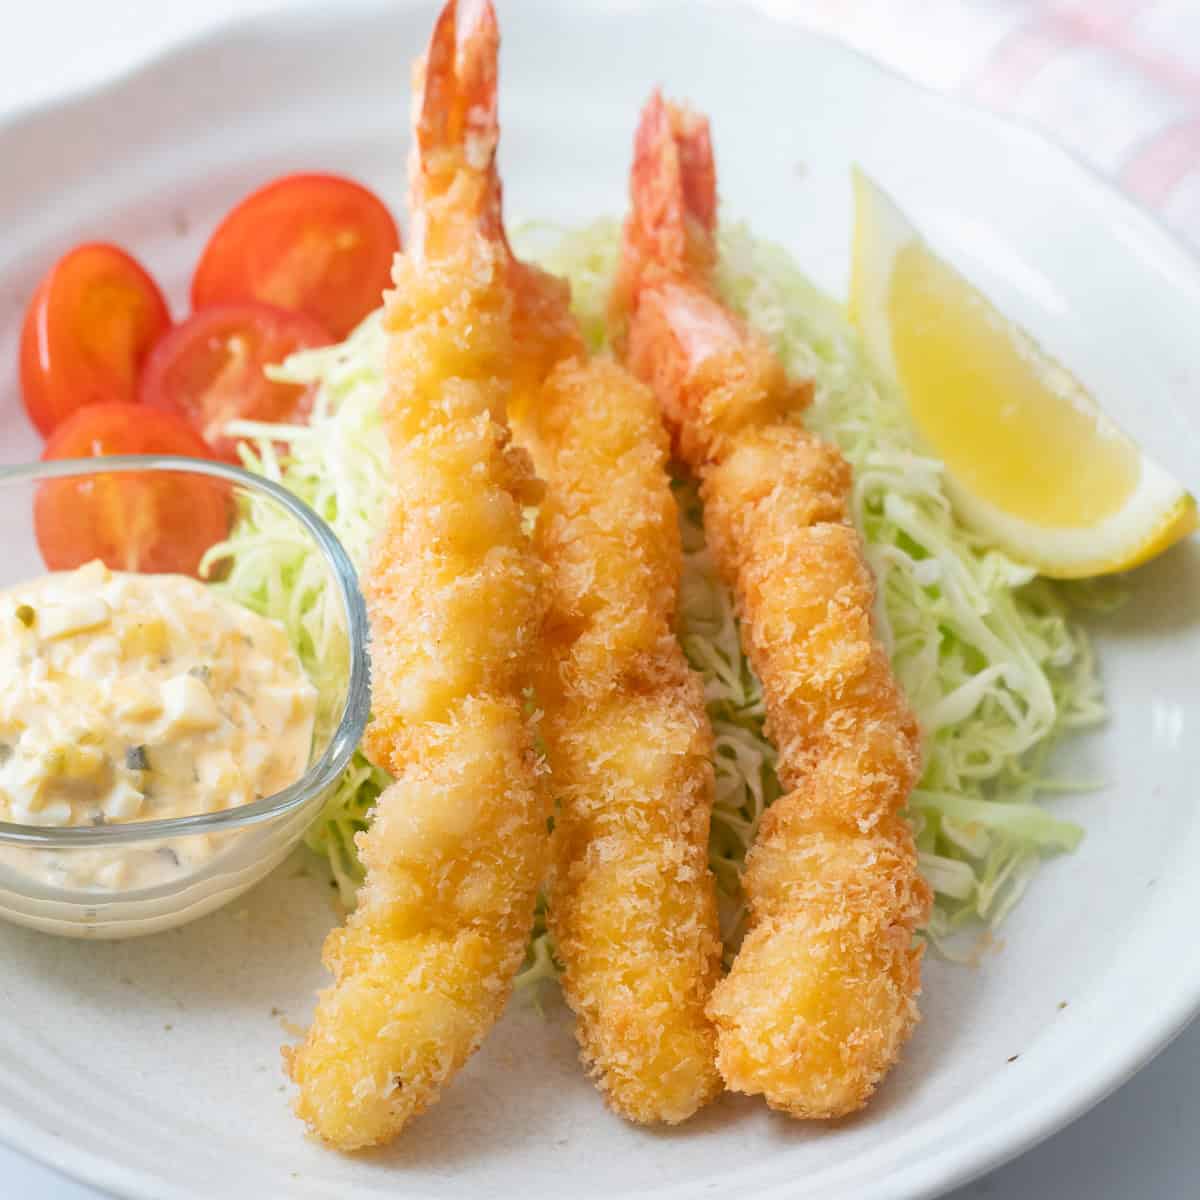
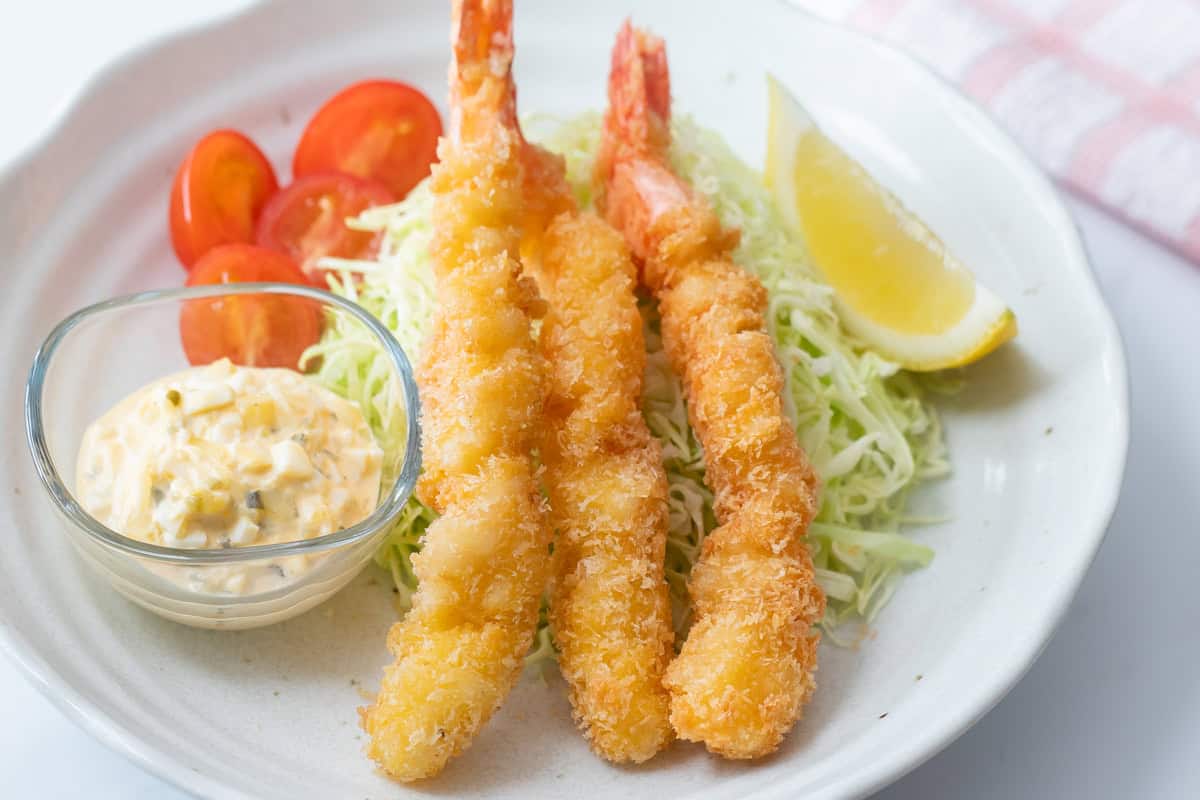
With its crispy, golden coating and umami-rich shrimp flavor inside, Ebi Fry is one of the most beloved fried dishes in Japan. Every bite offers a satisfying crunch from the coating, complemented by the shrimp's pleasantly springy texture, which bursts with natural sweetness in your mouth.
Jump to:
What is Ebi Fry?
Ebi Fry (also known as Ebi Furai) is a Japanese fried dish made by breading shrimp and deep-frying it. “Ebi” means shrimp, and “Fry (or Furai)” comes from the English word “fry,” but in Japan, it refers specifically to breaded, deep-fried foods. By coating the shrimp with a crust, you can enjoy its natural flavor and texture along with a crispy, savory crunch.
While fried shrimp dishes can be found all over the world, what sets ebi fry apart is its focus on letting the flavor of the shrimp shine through. The breading is not heavily seasoned; its purpose is simply to enhance the shrimp's natural flavor rather than overpower it. Seasoning is typically added according to personal preference, using condiments like Japanese tartar sauce or lemon wedges.
Simple yet full of flavor, this dish is considered a small but special treat in Japan. It is a popular favorite not only in households but also at restaurants and grocery store delis. The contrast between the crispy coating and the springy bite of the shrimp is sure to satisfy your palate.

How to properly prepare shrimp
Making ebi fry starts with properly preparing the shrimp. Neglecting this step can leave a fishy odor and result in a dish that doesn't look very appealing. To achieve a delicious, visually appealing finish, it is important to follow the preparation steps below in order:
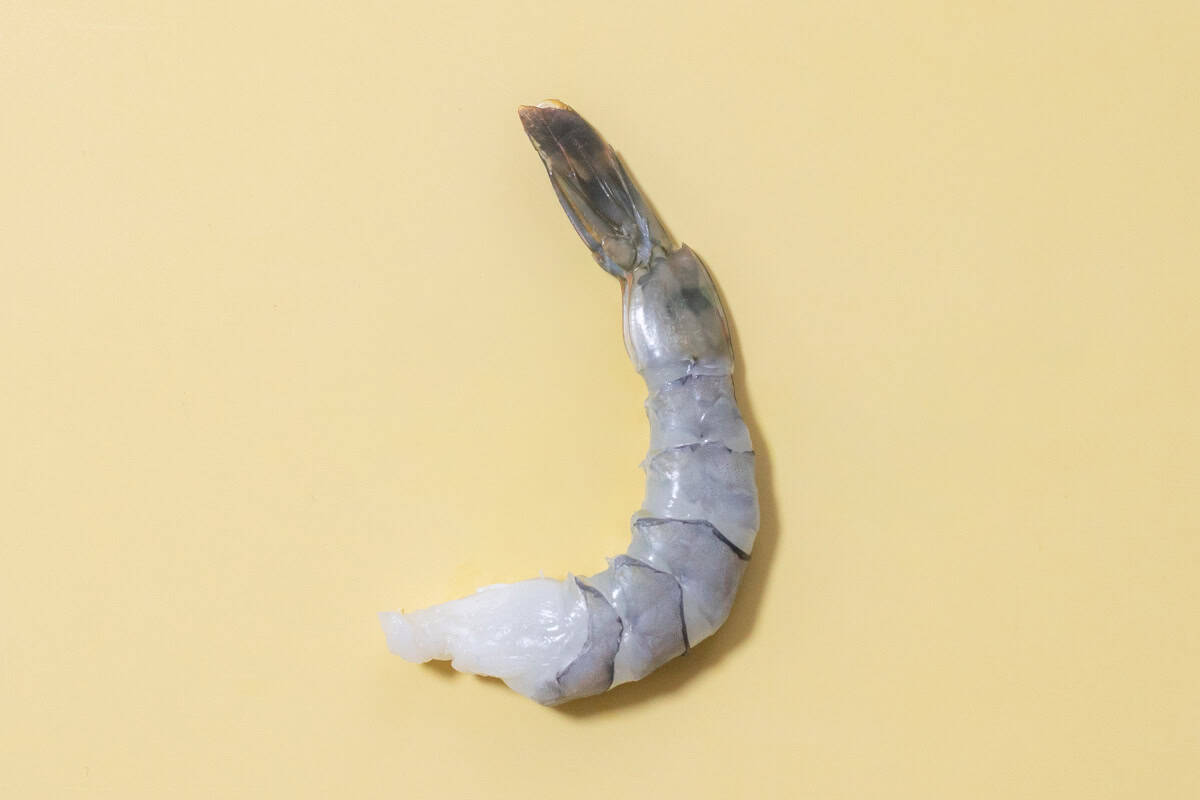
1. Peel the shell, leaving the tail intact.
The shell is removed to access the flesh, but the shell around the tail should be left on to preserve the shrimp’s appearance. Specifically, leave the tail and the shell segment attached to it intact. Keeping the shell at the base helps prevent the tail from falling off during frying.
2. Remove the vein.
The shrimp’s vein can contain sand or undigested matter. Leaving it in can compromise both flavor and texture. Make a shallow slit along the back of the shrimp and remove the dark, stringy vein. (If the vein appears translucent, it generally indicates that it is clean; however, it is still recommended to remove it.)

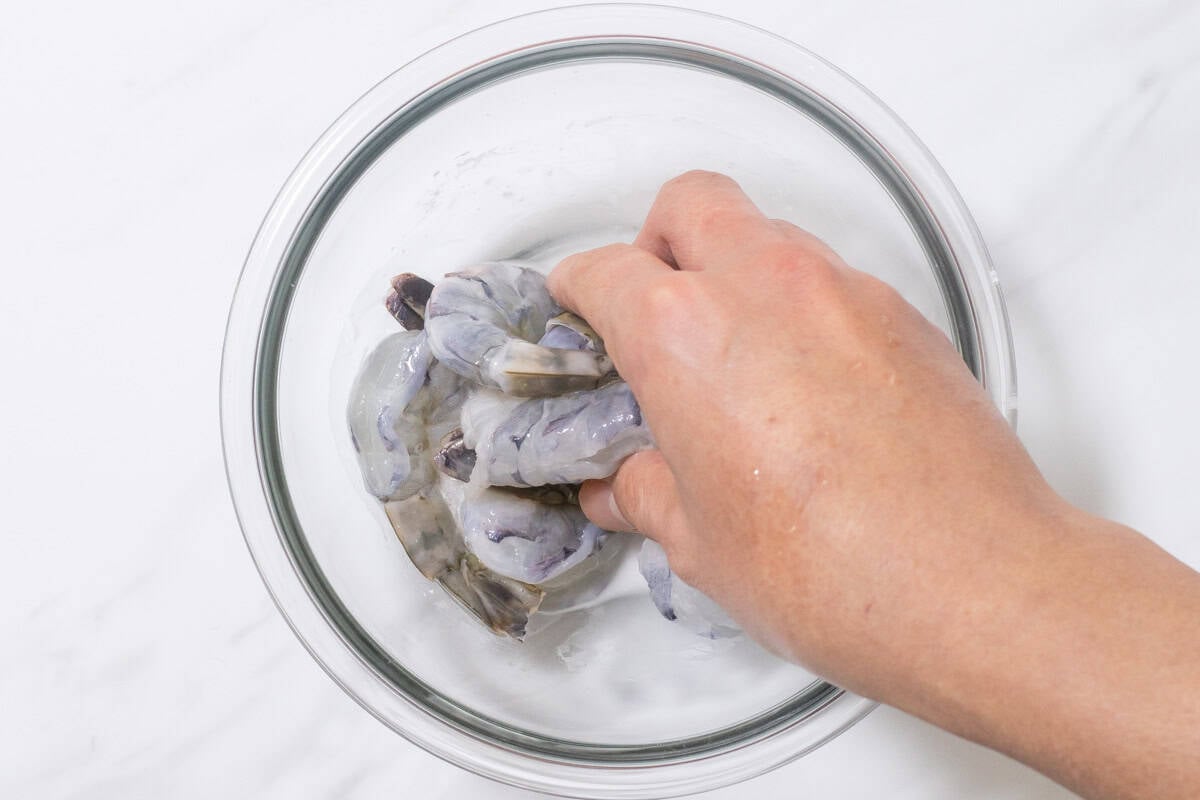
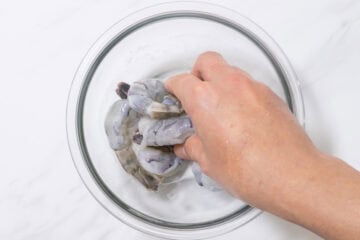
3. Remove odor and impurities.
Removing odor and impurities significantly improves the shrimp's flavor. In Japan, a common method is to sprinkle the shrimp with salt and potato starch (or cornstarch), add a little water, then gently rub the shrimp with the mixture. The use of salt helps draw out odor and impurities, while starch absorbs them once they surface. If you don’t have starch on hand, you can also sprinkle sake over the shrimp to reduce any fishy smell instead.

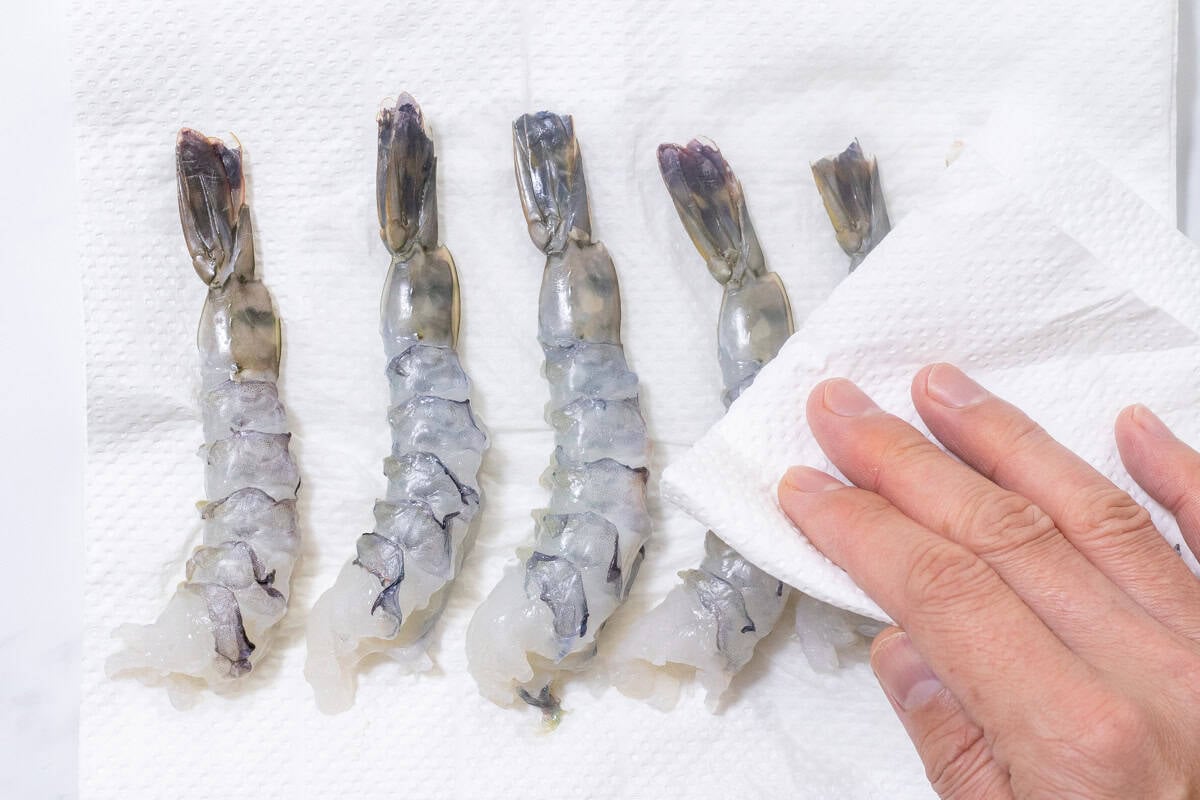
4. Rinse and pat dry.
Once the odor and impurities have been removed, rinse the shrimp under running water. Then, use paper towels to thoroughly pat them dry. Be careful, as any remaining moisture can cause oil to splatter during frying.
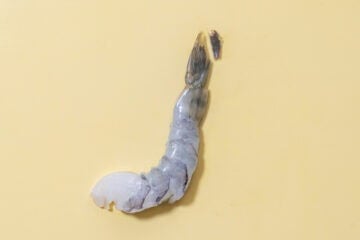
5. Trim the tip of the tail.
Cut off the tip of the tail shown at an angle in the photo below, then run a knife along the surface of the tail to release any trapped water. The tail contains a hollow cavity, and if water remains inside, it can cause oil to splatter during frying.

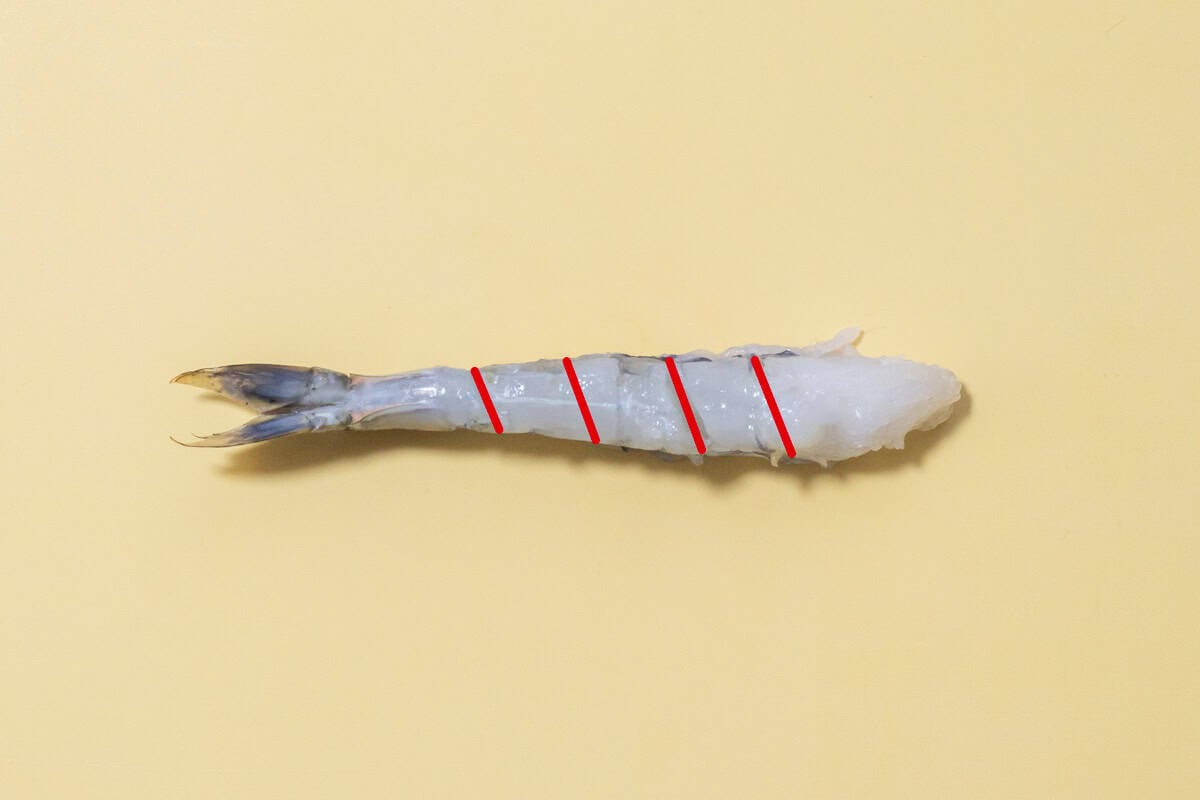
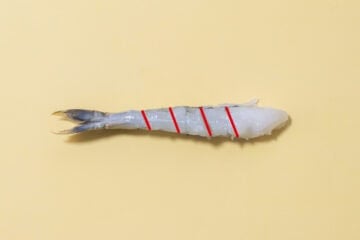
6. Make shallow cuts along the belly.
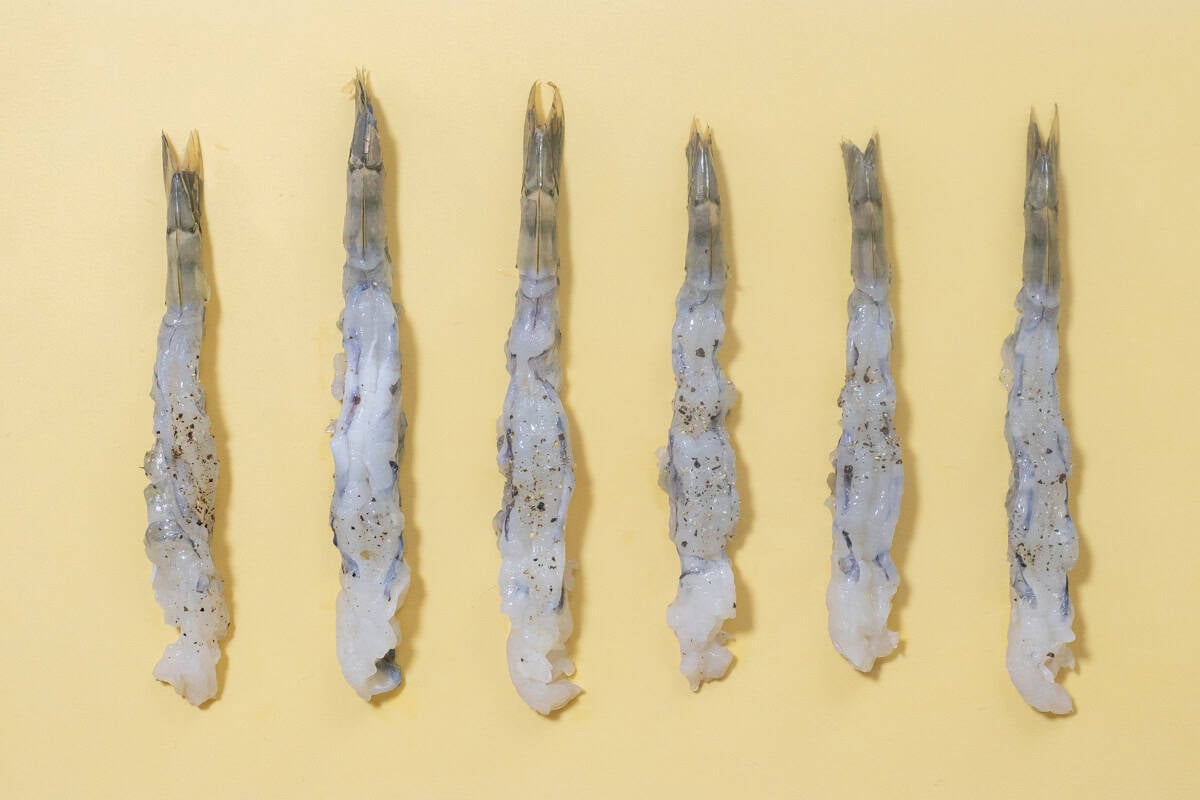
Place the shrimp on a cutting board with the belly side up, and make shallow diagonal cuts, about one-third of the way through, across the segments (about four to five cuts in total). This step is essential for keeping the shrimp straight when fried. Straight shrimp not only look better but also ensure even cooking.
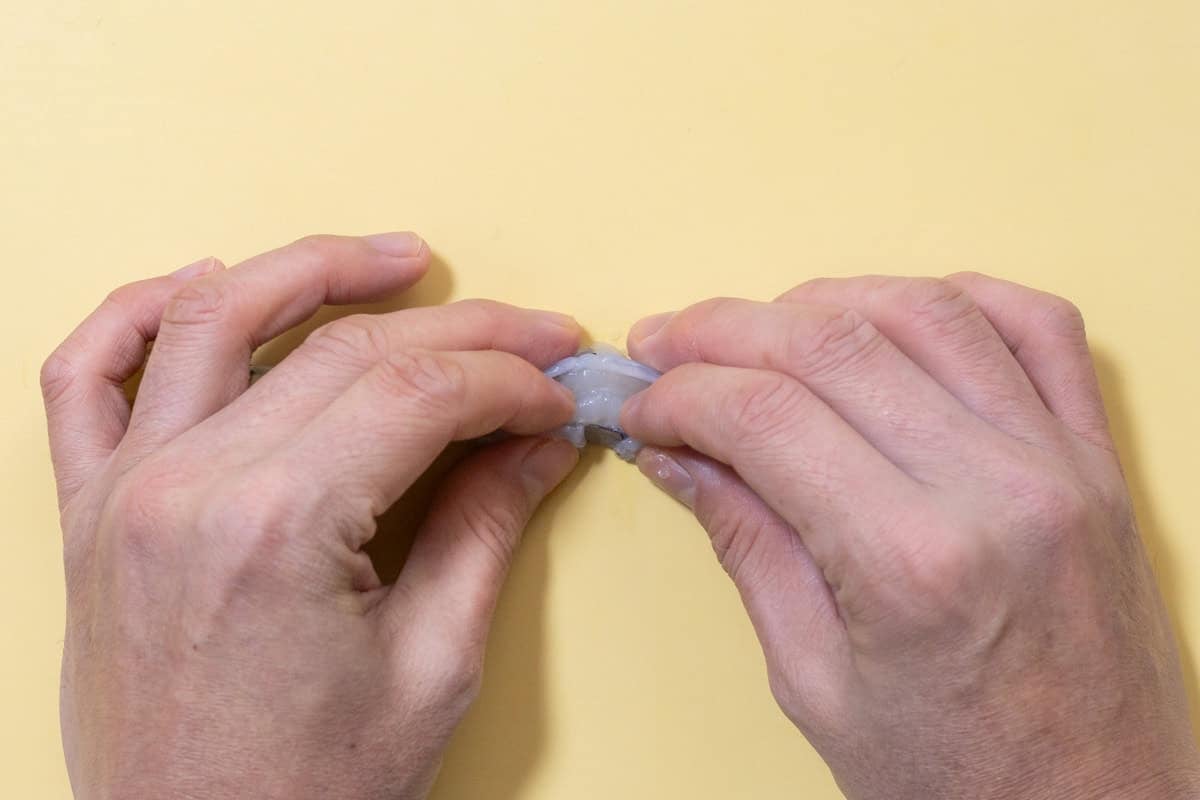
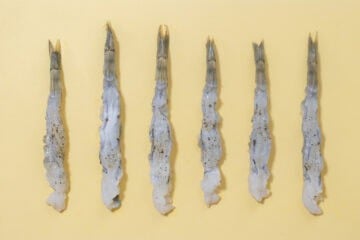
7. Break the muscle fibers.
Turn the shrimp so the back is facing up, and gently press it against the board with your fingers. You should feel the muscle fibers breaking. This step is also crucial for ensuring the shrimp fry up straight. Be careful not to press too hard, as the shrimp may tear. After pressing, shape it into a straight, even line.

These are all the steps needed to properly prepare shrimp for ebi fry. It may seem like a lot, but it doesn’t actually take much time. Finally, lightly season the shrimp with salt and pepper, then proceed to the next breading step.
How to bread shrimp
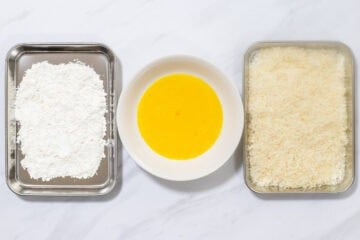
In Japan, dishes known as "fry (furai)" or "katsu"—including ebi fry—are typically prepared by breading the following ingredients in this order:
- Wheat flour
- Beaten eggs
- Panko breadcrumbs
The first step of applying flour absorbs excess moisture from the ingredients being fried while drying their surface. It acts as the base for the breading, allowing the egg to adhere evenly.
The beaten eggs serve as a binder between the flour and the breadcrumbs, as their proteins set when fried. They also add richness and flavor to the crust.
Panko breadcrumbs provide texture to the coating. They create a thicker, crispier crust compared to Western-style breadcrumbs.

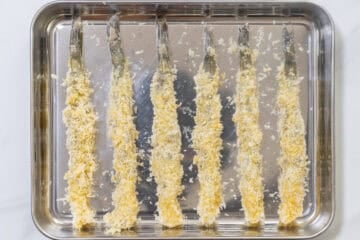
For anyone who has made Japanese "fry (furai)" or "katsu" before, these ingredients should all be familiar. When making ebi fry, the shrimp is breaded with each ingredient in sequence.
Once breaded, deep-fry the shrimp in oil heated to around 340℉ (170℃) until golden brown. Before you know it, the dish will be ready to serve.
Popular condiments
Ebi fry is a dish that highlights the flavor of shrimp, and since the breading itself isn't heavily seasoned, it might taste a bit bland when eaten on its own. For this reason, it is common to enjoy it with one or more of the following condiments, depending on your taste:
- Japanese tartar sauce
- Worcestershire sauce
- Salt
- Lemon wedges
Among these, Japanese tartar sauce is the most commonly used with ebi fry. It is rich in umami, creamy, and less acidic, making it a perfect complement to the dish. It's easy to make at home, so if you are interested in giving it a try, please refer to the Japanese tartar sauce recipe page. Alternatively, you might have fun experimenting with condiments from your own region.
📋Step-by-step recipe
Ingredients
- 6 black tiger shrimp or other large shrimp (16/20 or 13/15 count, about 25-35 g each, is recommended)
- 1 tsp salt (for cleaning the shrimp)
- 1 Tbsp potato starch or cornstarch (for cleaning the shrimp)
- 1 Tbsp water (for cleaning the shrimp)
- a pinch of salt (for seasoning)
- a pinch of ground black pepper (for seasoning)
- about 1 inch (3 cm) of neutral oil in a pot (for deep-frying)
For breading:
- 3 Tbsp all-purpose flour (plain flour)
- 1 small egg (about 1.5 oz/42 g, including shell)
- ⅔ cup panko breadcrumbs
Instructions
🕒 Total: 25 mins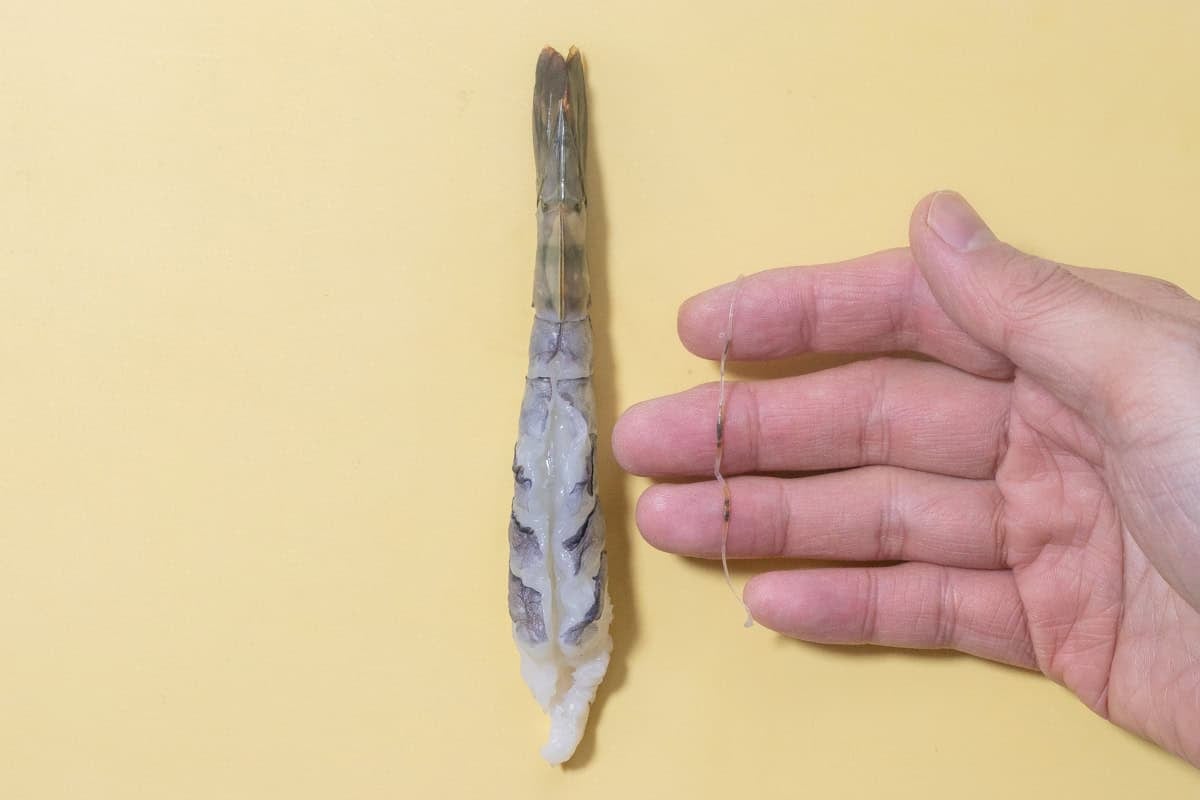
Step 1
Peel the shrimp, leaving the tail and the segment at the base of the tail intact. (If using shrimp with heads, remove the heads.) Make a shallow slit along the back of the shrimp and remove the vein (the dark string).
Step 2
Place the shrimp in a bowl, sprinkle them with salt, and gently rub it in. Then, add starch and water, and gently rub them in again. Rinse the shrimp under running water, and thoroughly pat them dry with paper towels.

Step 3
Cut off the tip of the tail at an angle as shown in the photo, then run a knife along the surface of the tail to release any trapped water.

Step 4
Place the shrimp on a cutting board with the belly side up, and make shallow diagonal cuts, about one-third of the way through, across the segments (about four to five cuts in total).
Step 5
Turn the shrimp so the back is facing up, and gently press it against the board with your fingers to break the muscle fibers. After pressing, shape it into a straight, even line.
Step 6
Lightly sprinkle the shrimp with salt and pepper.

Step 7
Crack the egg into a bowl and beat it. Prepare two containers, one with flour and the other with panko breadcrumbs.
Step 8
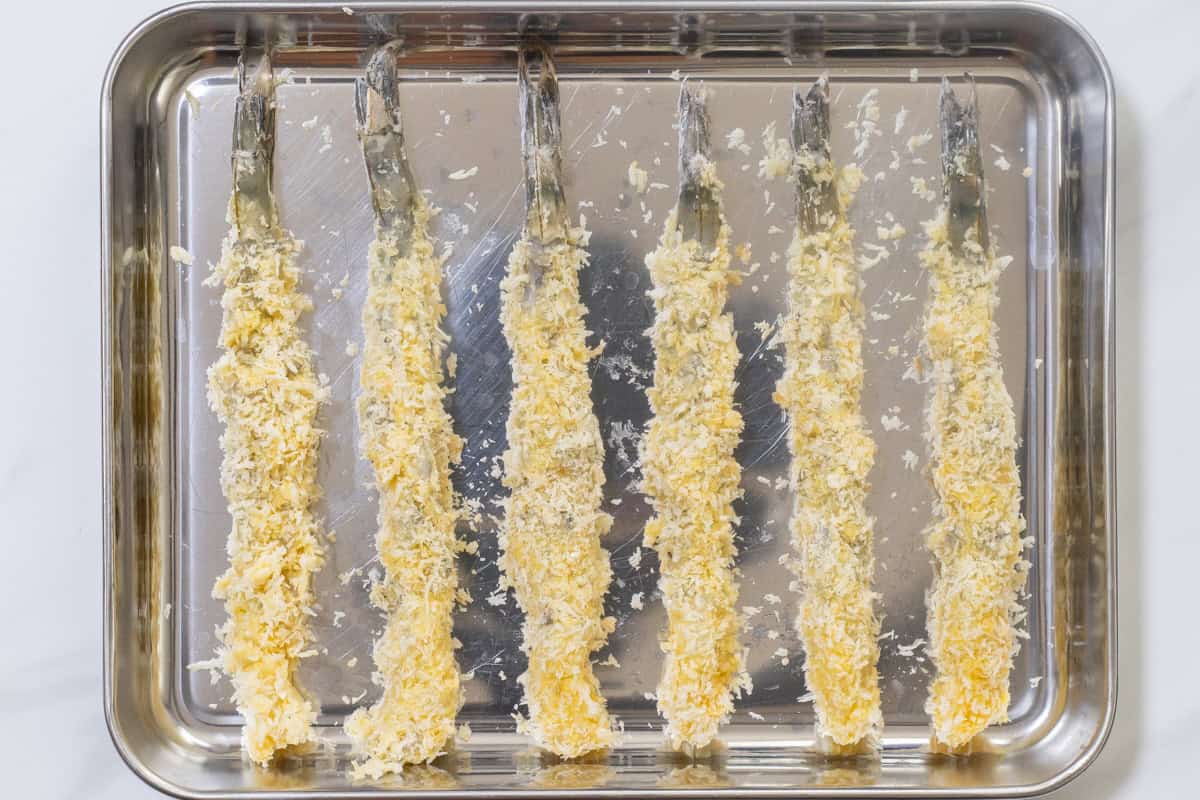
Coat the shrimp in this order: flour, beaten egg, and panko breadcrumbs. Once the flour is applied, gently shake off any excess with your hands. Make sure the shrimp are thoroughly coated with panko so that the flesh is completely covered.
Step 9
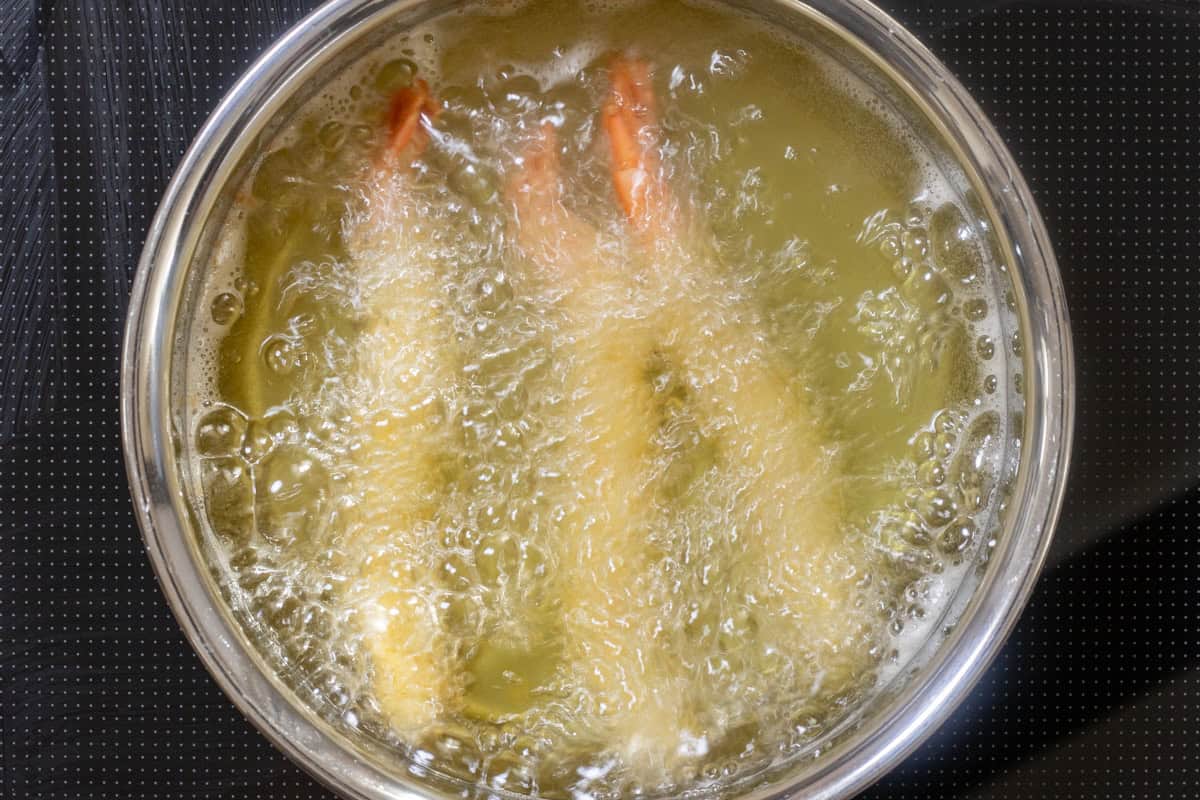
Heat oil in a pot to 340℉ (170℃). Once the oil is hot, carefully add the shrimp one at a time. Deep-fry them for about 3 minutes until they turn golden brown.
Be careful not to add too many pieces at once, as this can cause the oil temperature to drop significantly. The shrimp should occupy no more than about two-thirds of the oil’s surface area.
If you don't have a thermometer, drop a few panko breadcrumbs into the oil to test the temperature. When the breadcrumbs float to the surface at a moderate speed without touching the bottom, it indicates that the oil is ready.
Step 10
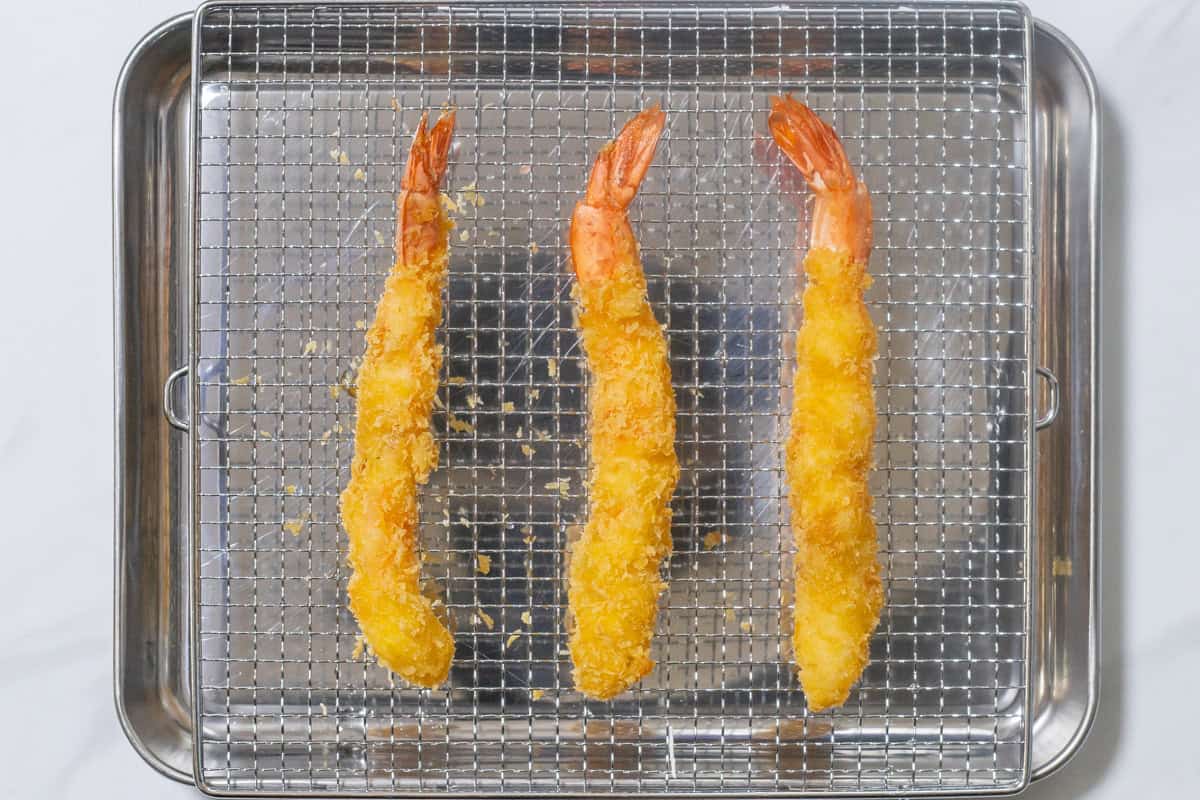
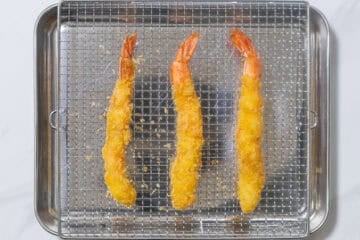
Remove the shrimp from the oil and let them drain on a wire rack. If there are any fried bits left in the oil, skim them out with a mesh skimmer or strainer, then repeat the frying process (step 9) until all the shrimp are fried.

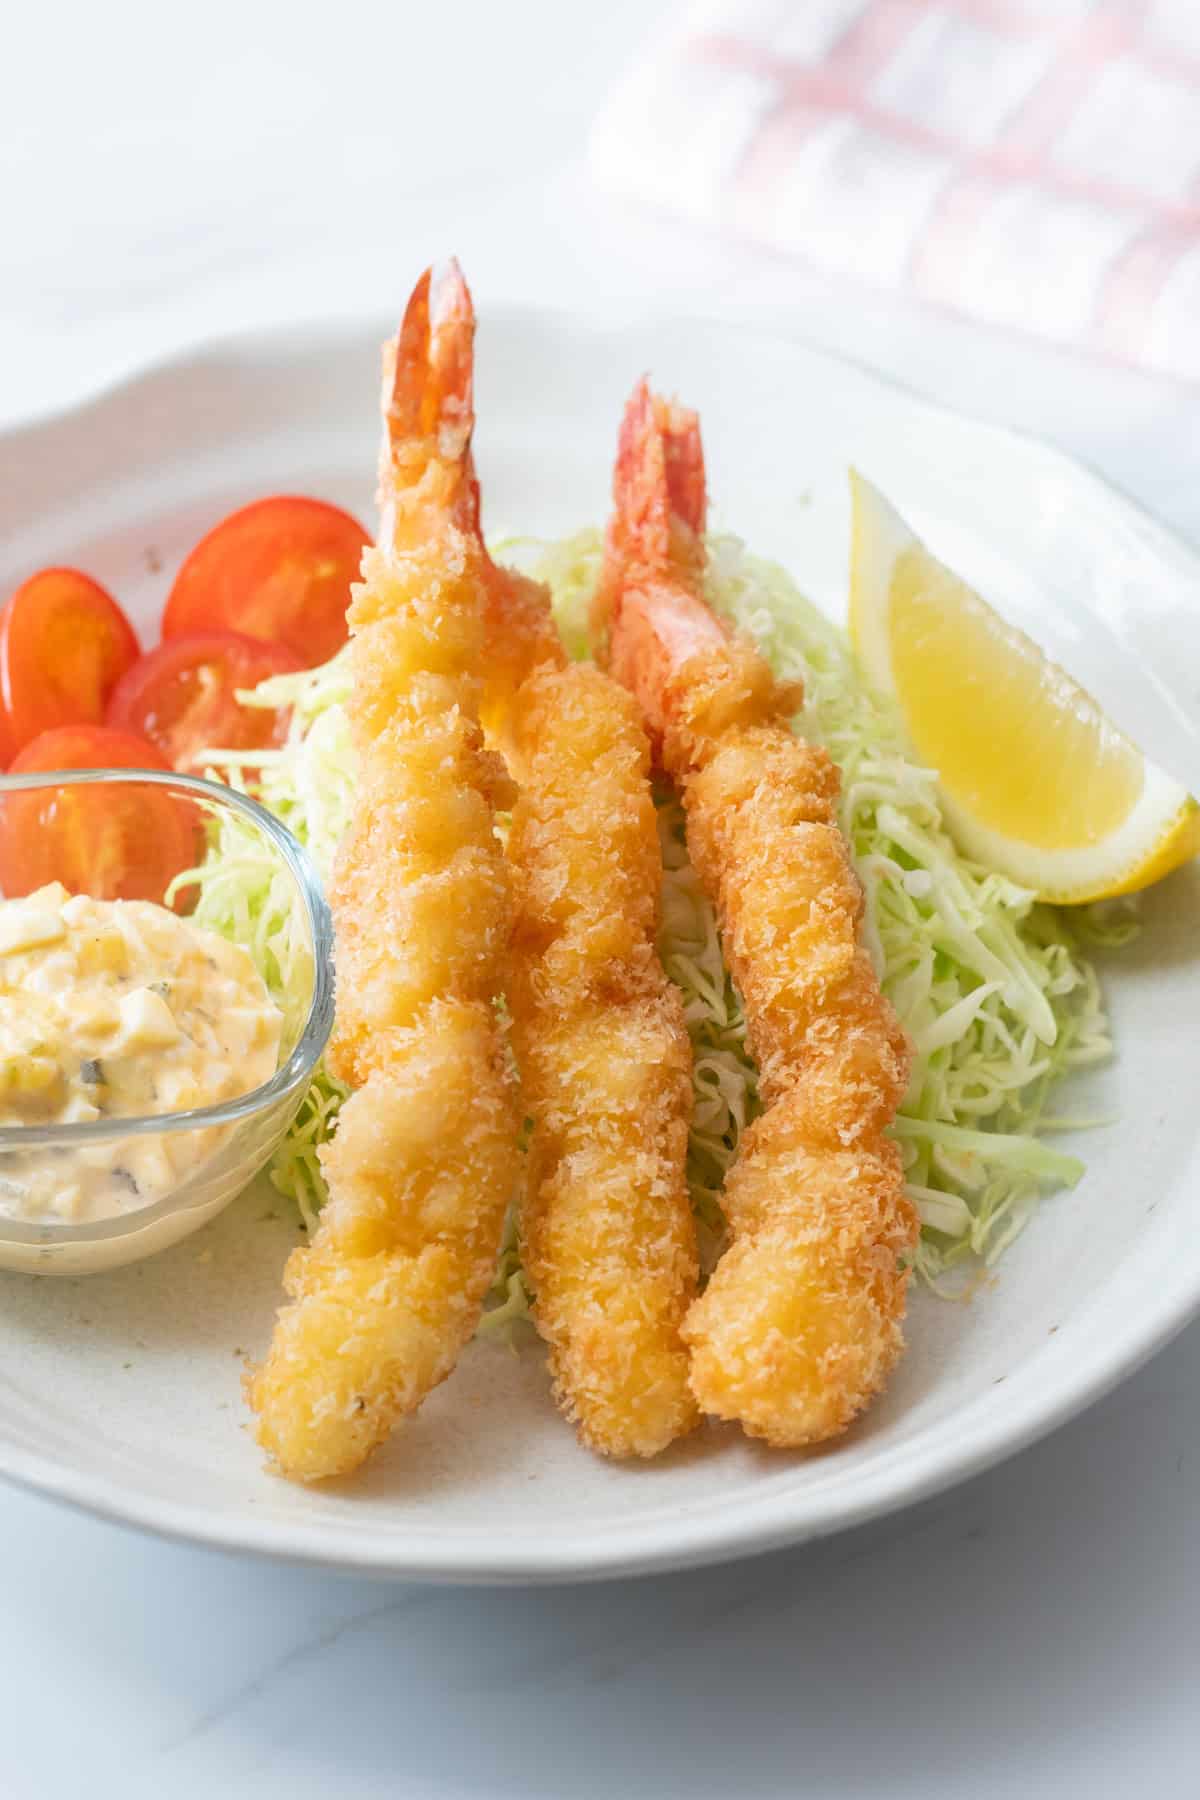
Step 11
Serve your ebi fry on a plate with fresh vegetables if desired, and feel free to enjoy it with Japanese tartar sauce, Worcestershire sauce, salt, lemon wedges, or your favorite condiments.
To store
You can store it in the refrigerator for up to 2 days. Once the ebi fry has completely cooled, wrap each piece individually in plastic wrap and place them all in a freezer bag; they can be kept in the freezer for up to a month.
How to dispose of used cooking oil
After enjoying kaki fry, it is essential to properly dispose of the oil used for deep-frying. Pouring large amounts of oil directly down the drain can clog pipes.
In Japan, the most commonly recommended method is to use an oil-solidifying powder. This powder solidifies the oil, making it easy to dispose of.
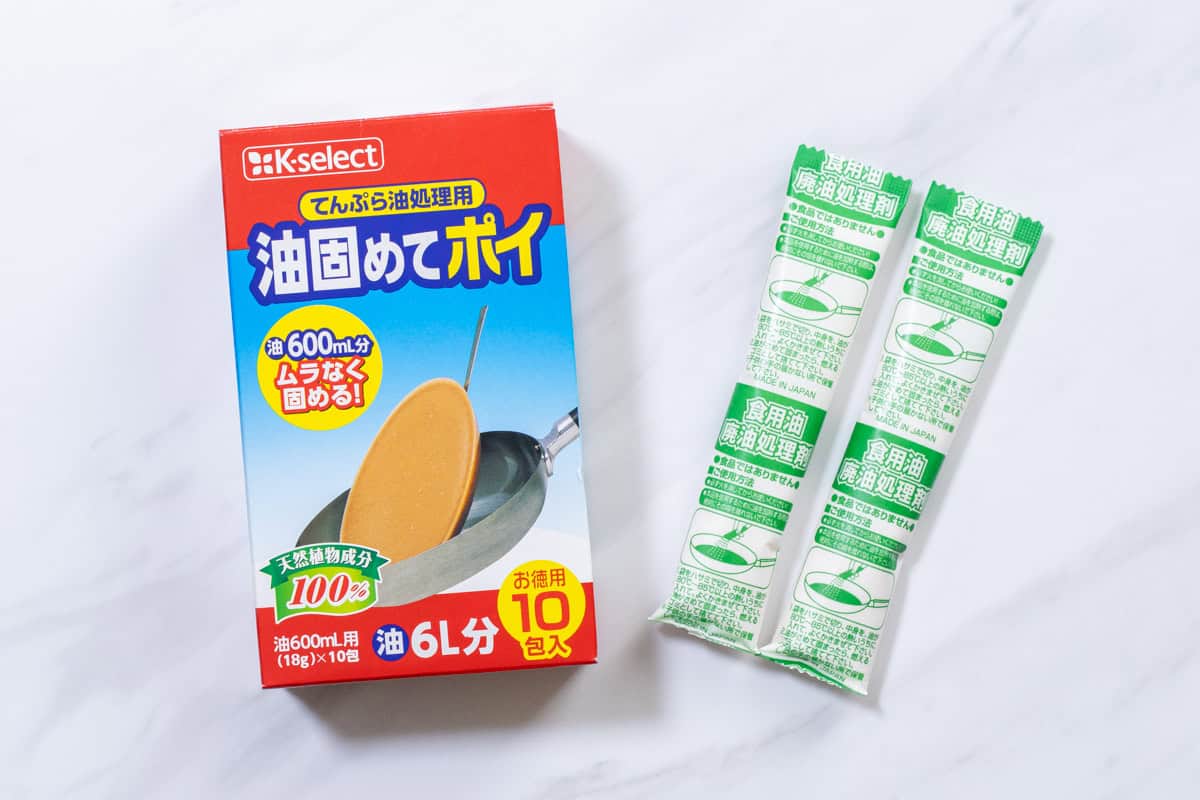
If this is not available locally, you can also use materials like newspaper to absorb the oil or pour it into an empty container after it has completely cooled.
When disposing of used oil, be sure to follow your local waste disposal regulations.
If you try this recipe, I’d love to hear what you think. Please consider leaving a review and star rating in the comments below. If you enjoyed it, I’d really appreciate it if you shared it with your friends.
More recipes you'll love
FAQ
Yes, that’s totally fine. Just make sure to thaw them before using.
Yeah, it's totally fine. It’s not the easiest thing to digest, but it’s actually rich in nutrients like calcium and astaxanthin (an antioxidant). By the way, in my experience, about 60% of Japanese people eat the tail, while the other 40% don't. Personally, I'm in the "eat it" camp.
It's true that letting the breading rest is common when making "fry (furai)" dishes, as it helps the coating adhere to the ingredients and prevents it from falling off during deep-frying. However, since shrimp contain relatively little moisture, the effect is minimal, so resting isn't really necessary.
Recipe card
Ebi Fry (Japanese Fried Shrimp)
Ingredients
- 6 black tiger shrimp or other large shrimp (16/20 or 13/15 count, about 25-35 g each, is recommended)
- 1 tsp salt (for cleaning the shrimp)
- 1 Tbsp potato starch or cornstarch (for cleaning the shrimp)
- 1 Tbsp water (for cleaning the shrimp)
- a pinch of salt (for seasoning)
- a pinch of ground black pepper (for seasoning)
- about 1 inch (3 cm) of neutral oil in a pot (for deep-frying)
For breading:
- 3 Tbsp all-purpose flour (plain flour)
- 1 small egg (about 1.5 oz/42 g, including shell)
- ⅔ cup panko breadcrumbs
Instructions
- Peel the shrimp, leaving the tail and the segment at the base of the tail intact. (If using shrimp with heads, remove the heads.) Make a shallow slit along the back of the shrimp and remove the vein (the dark string).

- Place the shrimp in a bowl, sprinkle them with salt, and gently rub it in. Then, add starch and water, and gently rub them in again. Rinse the shrimp under running water, and thoroughly pat them dry with paper towels.
- Cut off the tip of the tail at an angle, then run a knife along the surface of the tail to release any trapped water.
- Place the shrimp on a cutting board with the belly side up, and make shallow diagonal cuts, about one-third of the way through, across the segments (about four to five cuts in total).
- Turn the shrimp so the back is facing up, and gently press it against the board with your fingers to break the muscle fibers. After pressing, shape it into a straight, even line.
- Lightly sprinkle the shrimp with salt and pepper.
- Crack the egg into a bowl and beat it. Prepare two containers, one with flour and the other with panko breadcrumbs.
- Coat the shrimp in this order: flour, beaten egg, and panko breadcrumbs. Once the flour is applied, gently shake off any excess with your hands. Make sure the shrimp are thoroughly coated with panko so that the flesh is completely covered.
- Heat oil in a pot to 340℉ (170℃). Once the oil is hot, carefully add the shrimp one at a time. Deep-fry them for about 3 minutes until they turn golden brown.Be careful not to add too many pieces at once, as this can cause the oil temperature to drop significantly. The shrimp should occupy no more than about two-thirds of the oil’s surface area.If you don't have a thermometer, drop a few panko breadcrumbs into the oil to test the temperature. When the breadcrumbs float to the surface at a moderate speed without touching the bottom, it indicates that the oil is ready.
- Remove the shrimp from the oil and let them drain on a wire rack. If there are any fried bits left in the oil, skim them out with a mesh skimmer or strainer, then repeat the frying process (step 9) until all the shrimp are fried.
- Serve your ebi fry on a plate with fresh vegetables if desired, and feel free to enjoy it with Japanese tartar sauce, Worcestershire sauce, salt, lemon wedges, or your favorite condiments.


Notes
- You can store it in the refrigerator for up to 2 days. Once the ebi fry has completely cooled, wrap each piece individually in plastic wrap and place them all in a freezer bag; they can be kept in the freezer for up to a month.
- The Nutrition Facts label assumes that the amount of oil absorbed by the shrimp is approximately 15% of its weight.

Leave a Rating and a Comment