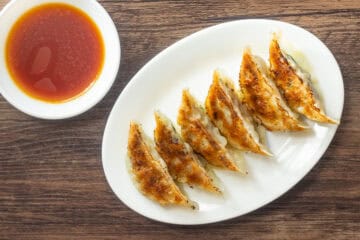
Let’s bring authentic Japanese Gyoza to your table! With their crispy wrappers and a filling that bursts with the rich juiciness of savory pork and the natural sweetness of cabbage, Gyoza are a beloved dish enjoyed across generations in Japan. My recipe stays true to the traditional Japanese style—light enough to eat by the dozen, yet packed with deep, umami-rich flavor in every bite.

Jump to:
What are Gyoza?
Gyoza are a Japanese dish made by wrapping a filling of ground pork, green cabbage (or napa cabbage), garlic chives, and other ingredients in thin wrappers, then pan-frying them. They are typically served with a dipping sauce. Since the cooking process involves pan-frying, they are sometimes called yaki gyoza (“yaki” meaning fried) to distinguish them from gyoza that are steamed, boiled, or deep-fried.
Their origins can be traced back to the Chinese dish "jiǎozi," and it is believed that gyoza were created by Japanese people who returned from China after World War II and tried to recreate the jiǎozi they had eaten there. The name “gyoza” comes from the Japanese pronunciation of jiǎozi. However, Japanese-style gyoza are not commonly found in China. In China, jiǎozi are usually boiled or steamed, while gyoza, which are pan-fried, represent a unique style that developed in Japan.
What makes gyoza so appealing is the combination of a crispy, golden-brown bottom with juicy meat and vegetables inside, offering a light yet deeply satisfying flavor. They are also a nutritionally balanced dish that is relatively easy to make at home, making them immensely popular.
They are perfect as a main dish or a side, so be sure to try making them at home!

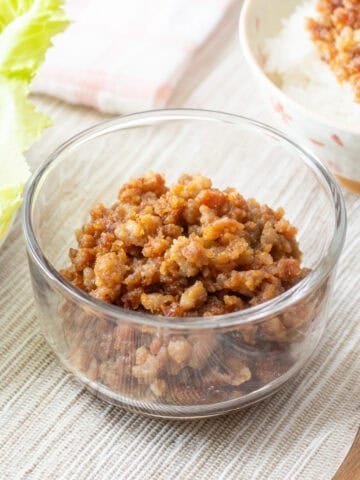
Preparing the gyoza filling
Gyoza are typically made in the following steps:
- Prepare the filling
- Wrap the filling in thin gyoza wrappers
- Pan-fry the gyoza
Each step has key points that help make the dish delicious. Let’s first take a look at the filling.
The filling is typically made by mixing some or all of the following ingredients together:
- Ground pork
- Green cabbage (or napa cabbage), finely chopped
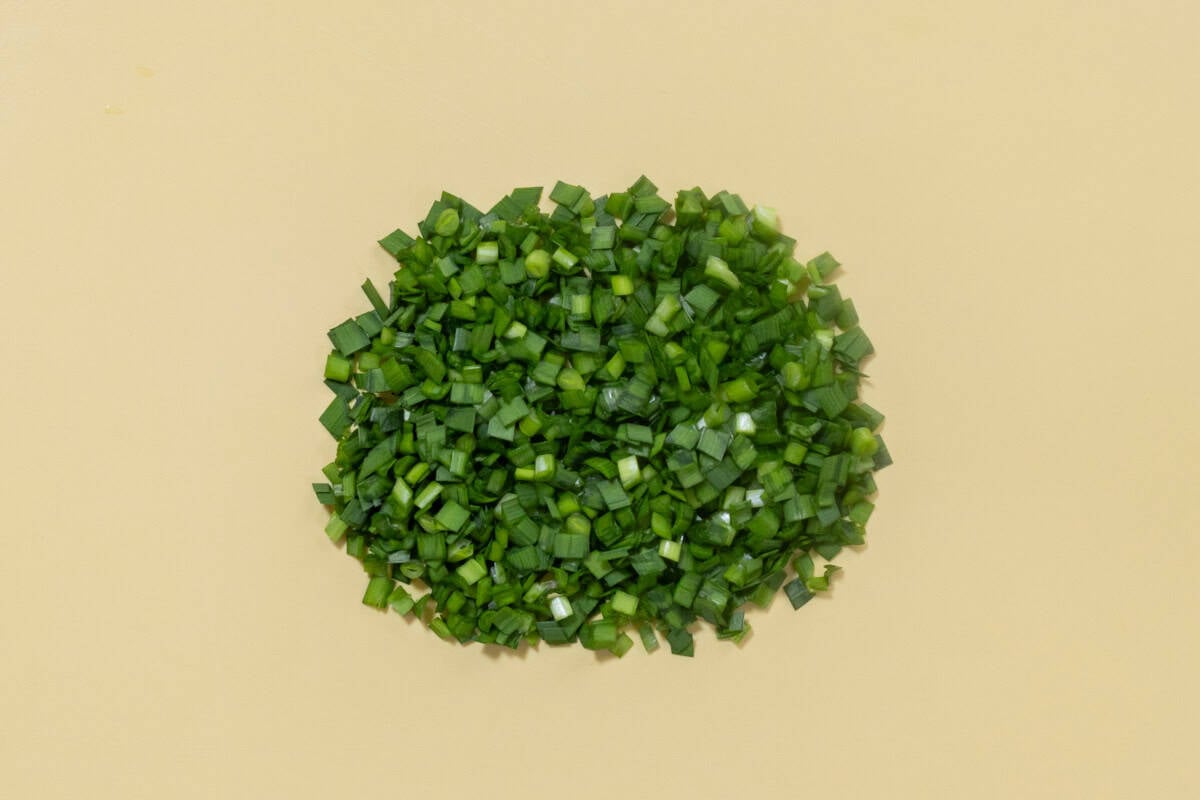
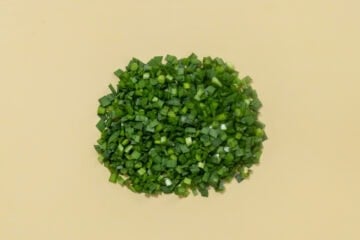
- Garlic chives, finely chopped
- Garlic, grated or finely chopped
- Ginger, grated or finely chopped
- Sake
- Sugar
- Salt
- Soy sauce
- Oyster sauce
- Toasted sesame oil
- Potato starch or cornstarch
The flavor of gyoza varies depending on which ingredients you use and their proportions. For example, reducing the amount of vegetables will make the filling meatier, while adding more garlic or ginger will give it a punchier flavor. The combinations and ratios vary widely across different regions and households in Japan, so there is no single “right” way.
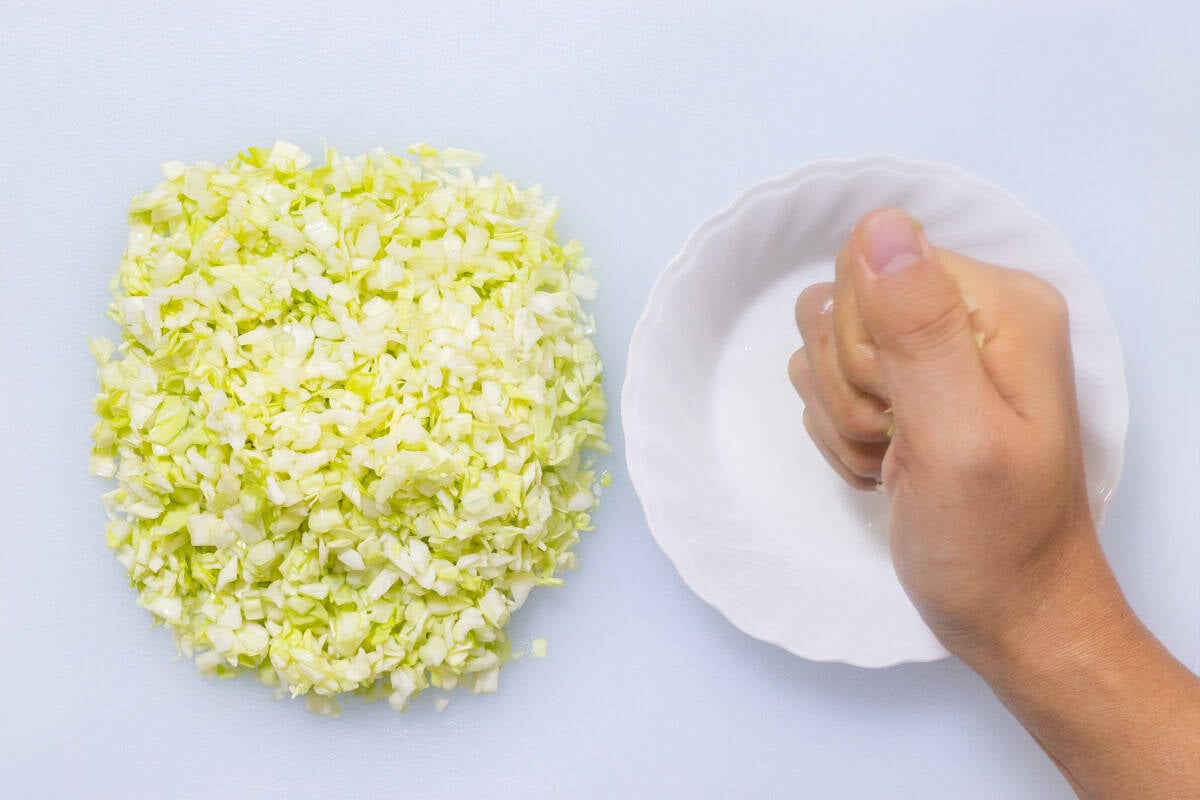
However, no matter which ingredients you use, there is one important thing to keep in mind: how to handle the moisture in the cabbage.
Preparing the cabbage
Preparing the cabbage might be the most important step in making delicious gyoza.
First, finely chop the cabbage and sprinkle it with salt, then let it sit for a while to draw out the moisture. After that, squeeze out the excess moisture. Since cabbage contains a lot of moisture, this step helps prevent the gyoza from turning out bland or soggy.

If you are using napa cabbage instead of regular cabbage, make sure to squeeze it more firmly, as napa cabbage holds even more moisture. You will know you have squeezed enough when no more water comes out as you press it.
When to add the cabbage to the filling
The timing of adding the cabbage is also important for achieving a crispy texture in the gyoza.
Add the cabbage (and any other vegetables) after mixing the ground pork with the seasonings. This is because the seasonings contain salt, and adding cabbage beforehand can draw out moisture through osmosis, which can make the filling soggy.
Therefore, the recommended steps are:
- Mix the ground pork thoroughly with the seasonings.
- Then, add the cabbage and other vegetables and gently stir to combine.
This simple tip can make a big difference in the final dish, so be sure to follow these steps for the best results.
How to wrap gyoza
Once the gyoza filling is ready, the next step is to wrap it in gyoza wrappers. Here is what you will need for this part:
- Gyoza filling and a small spatula (or spoon)
- Gyoza wrappers
- A small bowl of water
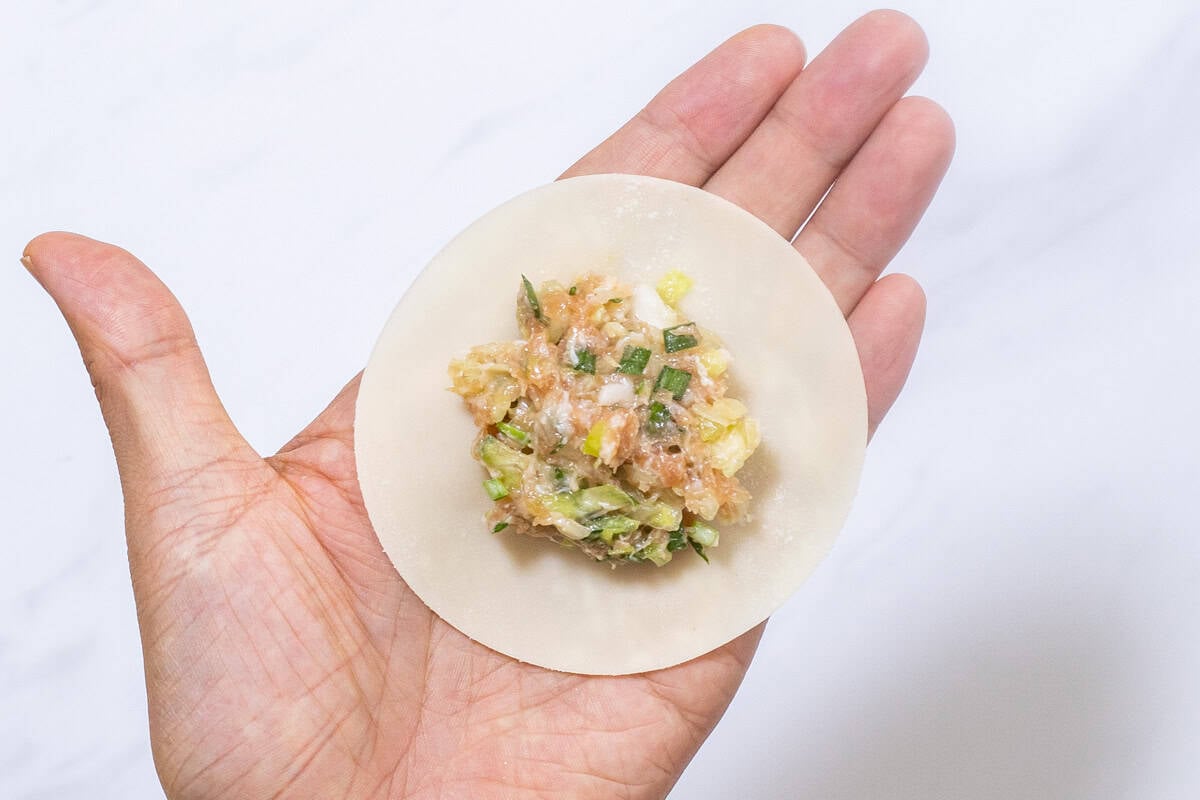
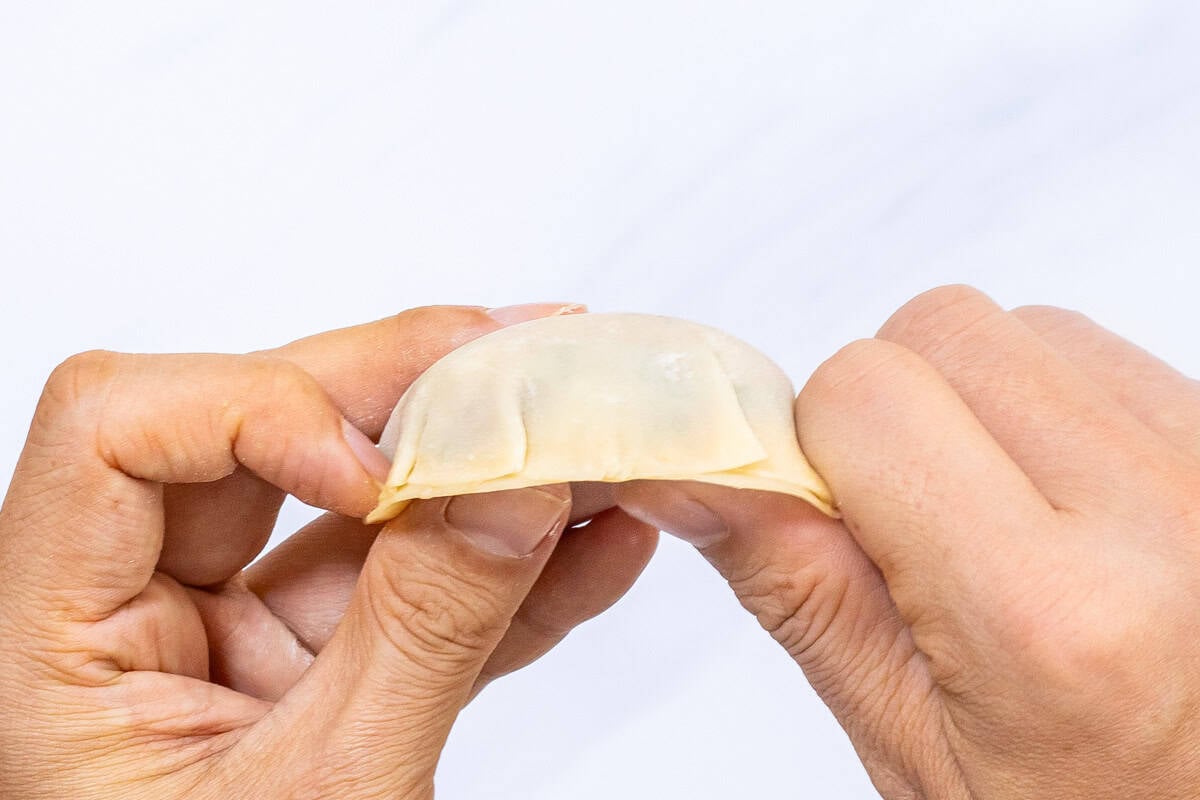
Start by placing a gyoza wrapper in the palm of your non-dominant hand. Use the spatula to scoop some filling and place it in the center of the wrapper. The ideal amount of filling is as much as the wrapper can hold without spilling out when folded.
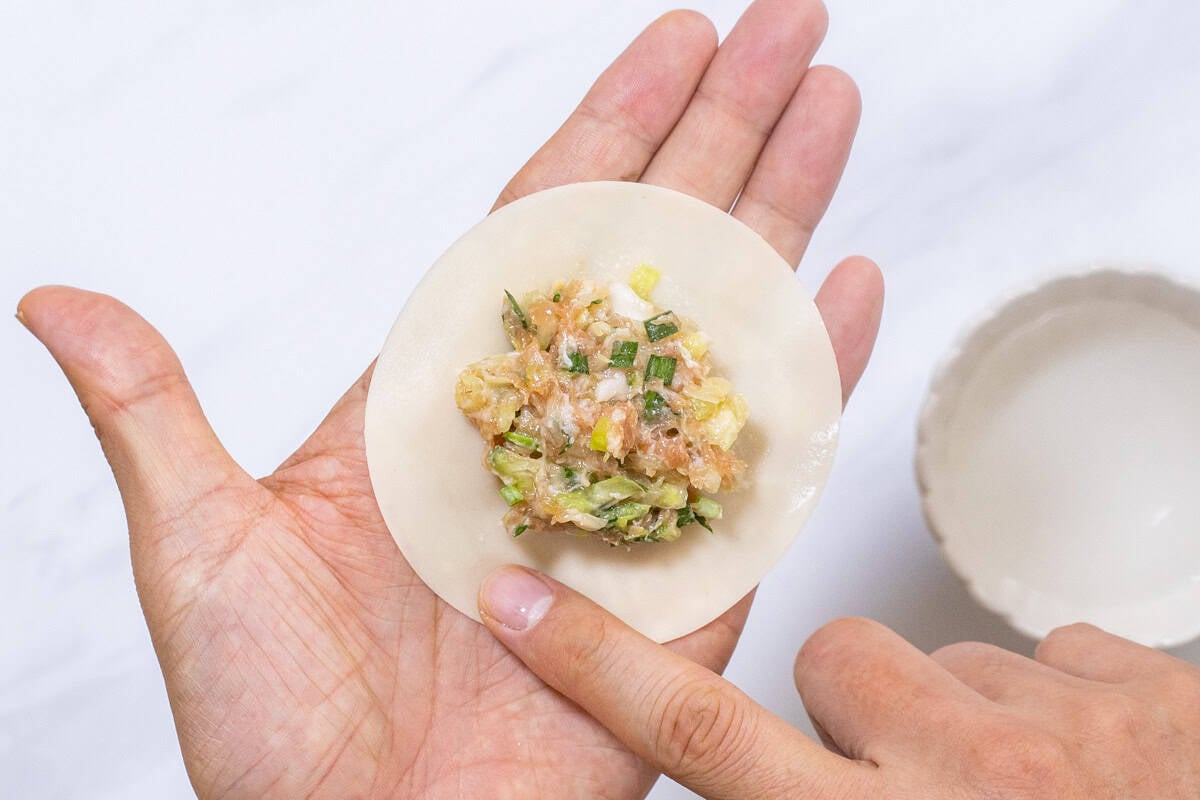
Next, dip the tip of your dominant index finger into the small bowl of water and lightly moisten the edge of the wrapper. The water acts like glue to help seal the gyoza.
There are many ways to seal the wrapper, but here is one of the most common Japanese methods (if you are left-handed, just reverse the sides):
Fold the wrapper in half, bringing the top and bottom edges together. Use your left thumb and index finger to pinch and seal the left edge.
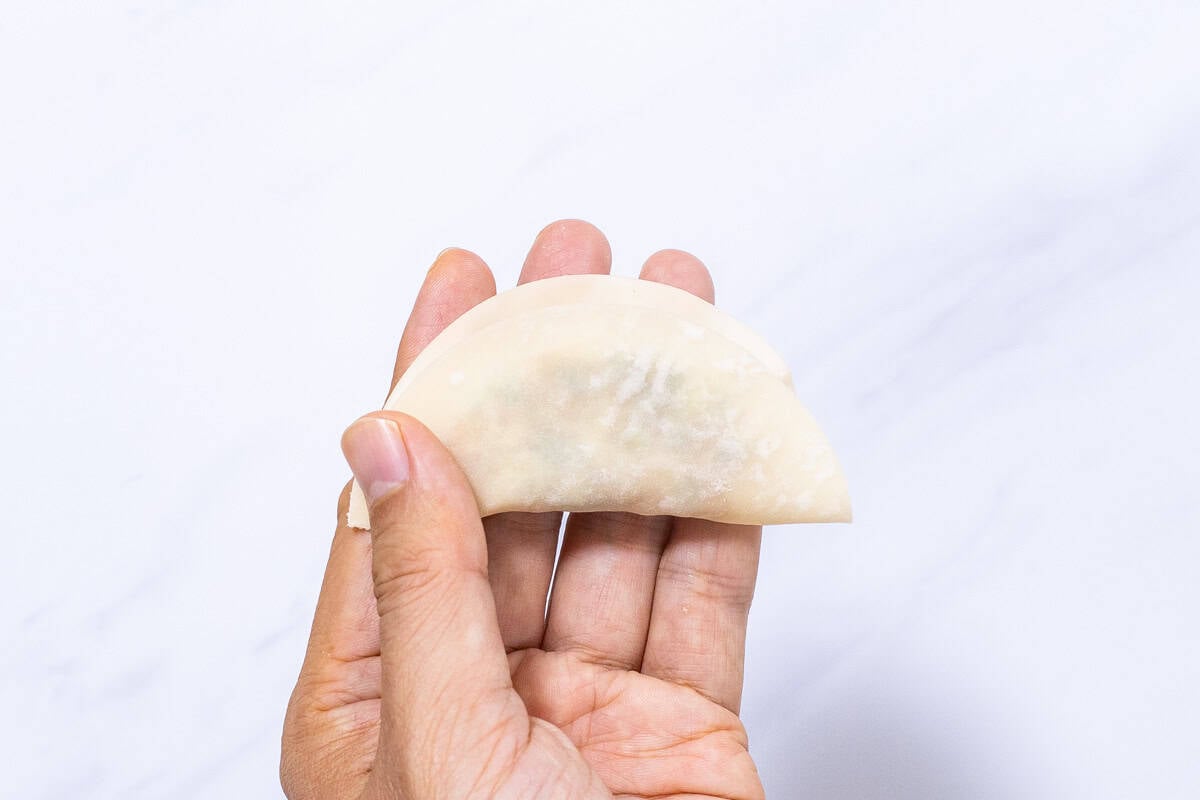
Using your right thumb and index finger (or middle finger), make a small pleat on the front side of the wrapper, just to the right of your left thumb.

Press the pleat with your left thumb and index finger to seal it, then make the next pleat in the same way.
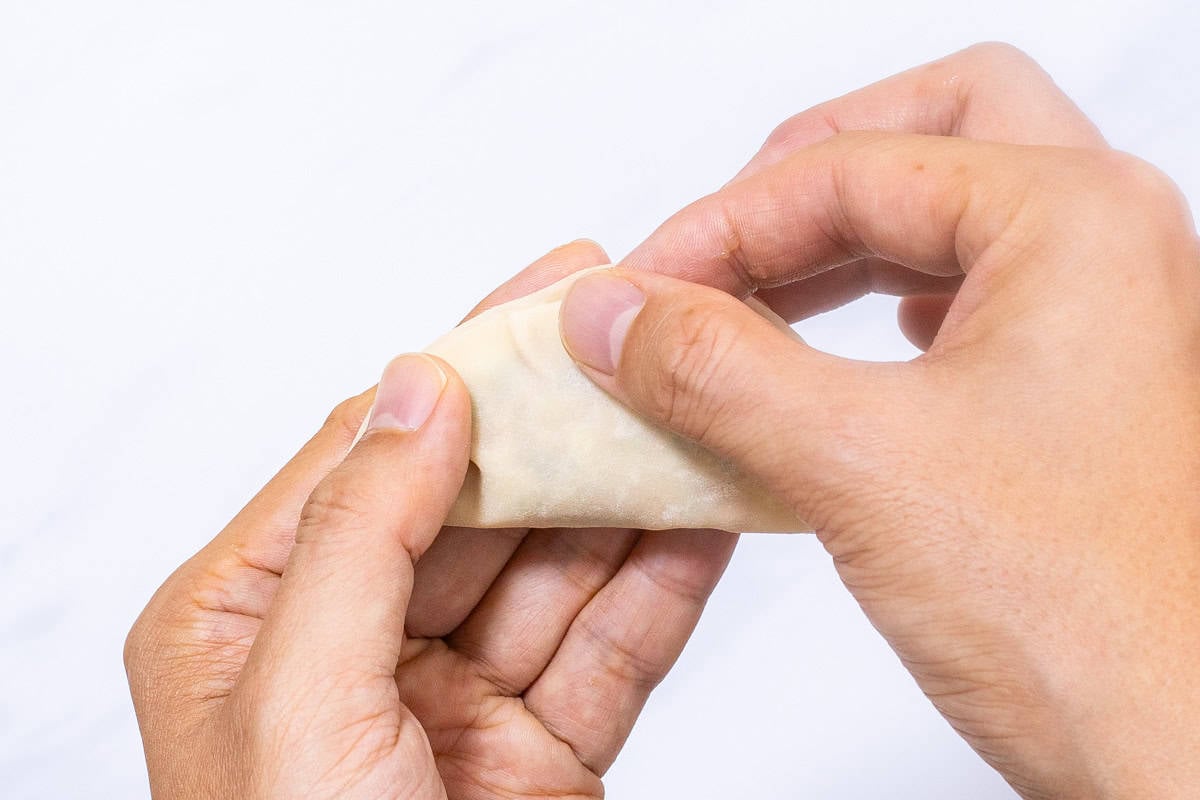
Repeat this process 3-5 times (or more if you like) until the right edge is completely sealed.
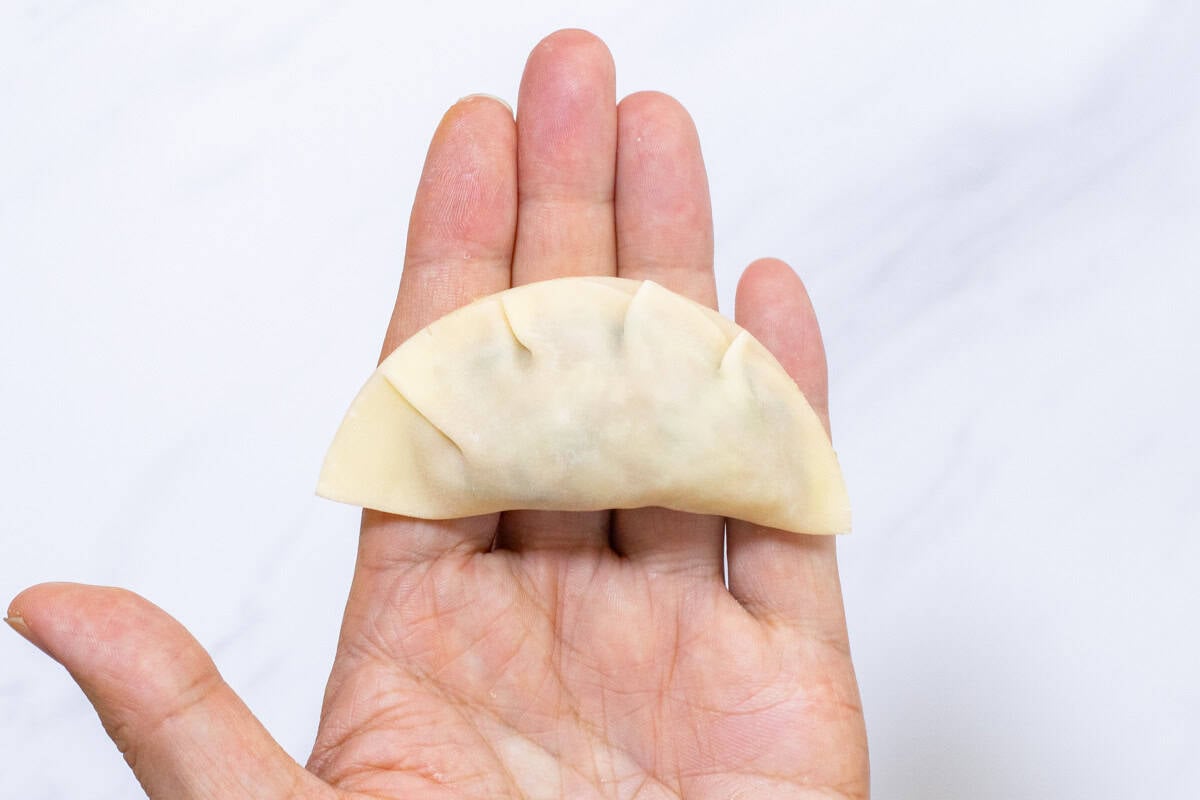
While it is not essential, pressing the lower side of the pleated edge with both thumbs to give it a slight curve can make the gyoza look better after cooking.
The purpose of sealing the wrapper is to keep the filling from spilling out during cooking. The pleats are mainly for appearance, so if making them feels tricky, you can simply press the edges together without pleating. Take it easy, and don’t worry about making them perfect.
If this is your first time wrapping gyoza, you might not get the amount of filling just right. That is perfectly fine—you will get the hang of it as you go. Even if some filling spills out or you don’t put in quite enough, it won’t be a problem at all for home cooking, so just keep going.
Wrapping gyoza takes time because you need to do it for each one. That is why making gyoza is often a family activity in many Japanese households—parents and children make them together. If you have family around to help, be sure to get them involved. It is part of what makes gyoza-making so much more enjoyable.
Cooking gyoza
Once you have finished wrapping the gyoza, it is time to cook them.
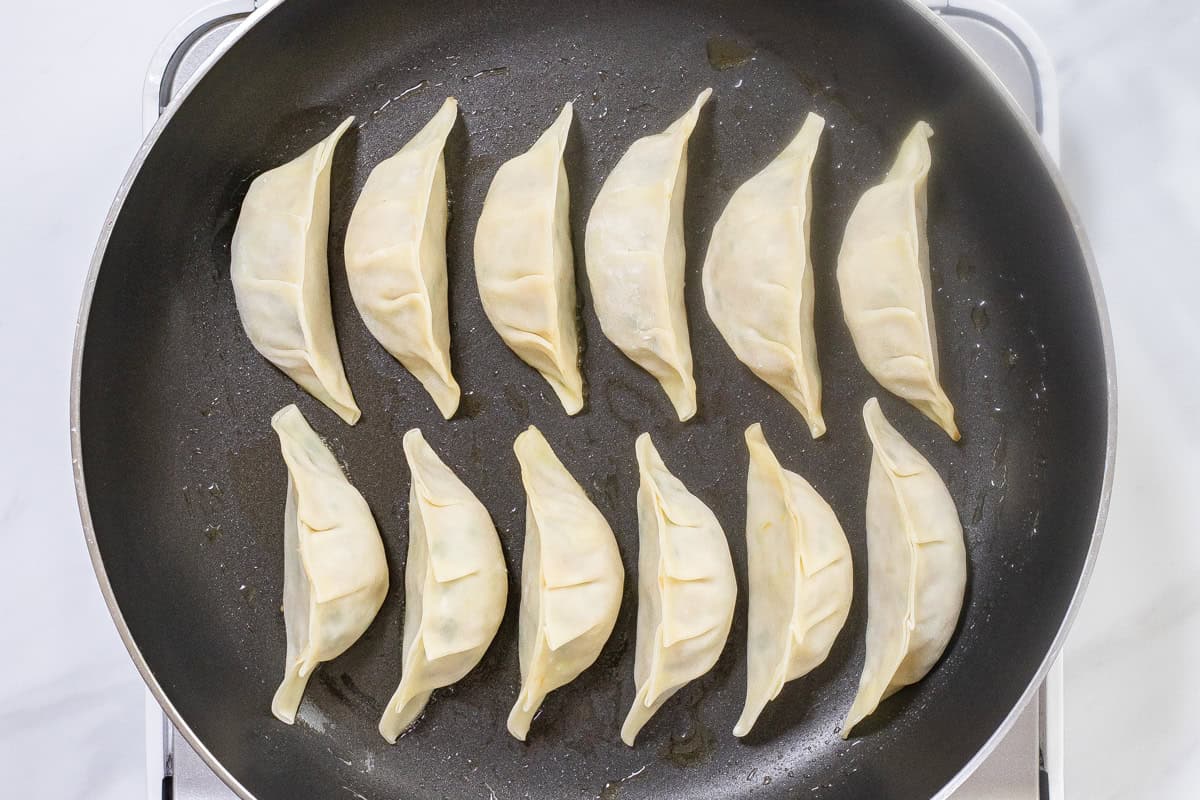
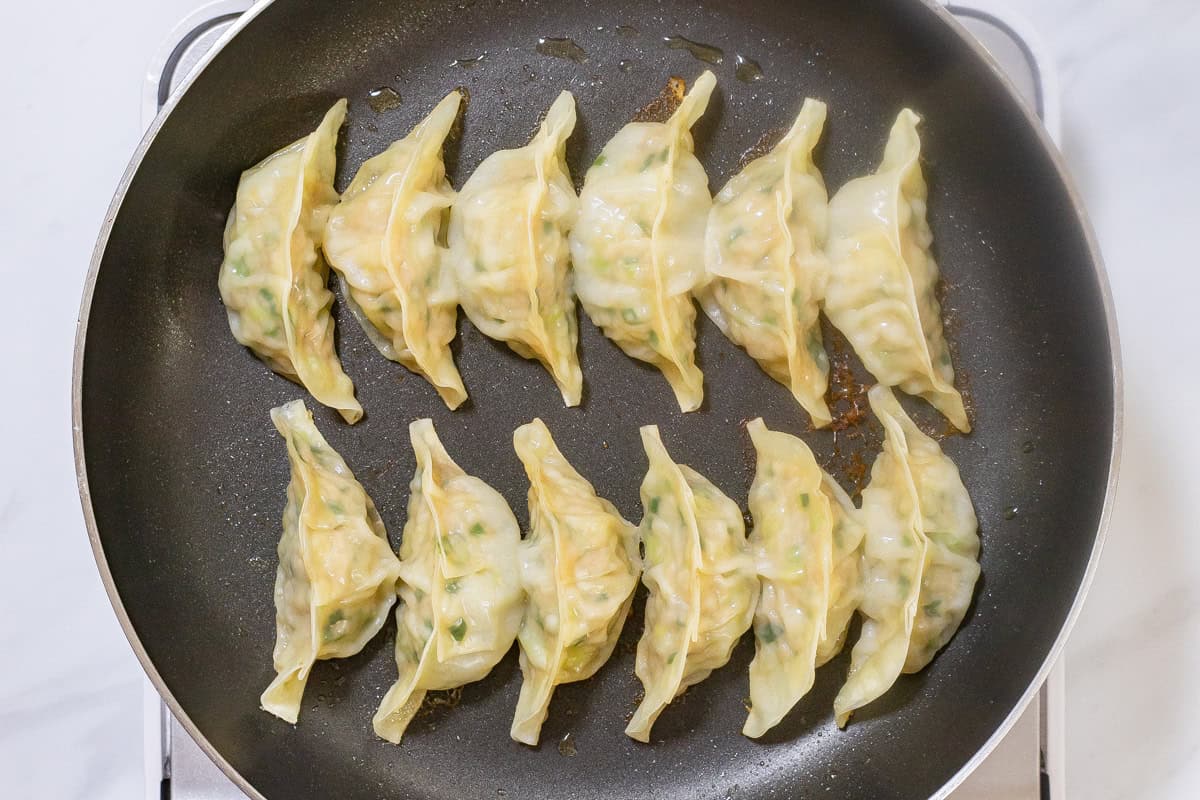
Coat a pan with oil and arrange the gyoza in it, making sure to leave a little space between each one—if they are too close together, they will stick to each other while cooking. To get a nice, even sear, press the bottoms of the gyoza gently against the pan. You can line them up in a row or place them in a circle, whichever you prefer.
After the gyoza are arranged, turn on the heat. Once the pan is hot, pour some hot water around the edges and cover it with a lid. The water should come up about one-fourth to one-fifth of the height of the gyoza. Using hot water instead of room-temperature water helps them cook more evenly.
Let them steam over medium heat for about 4 minutes. Once 4 minutes have passed, or when you hear a dry sizzling sound as the water evaporates, remove the lid. If there is still some water left in the pan, continue cooking until it evaporates.
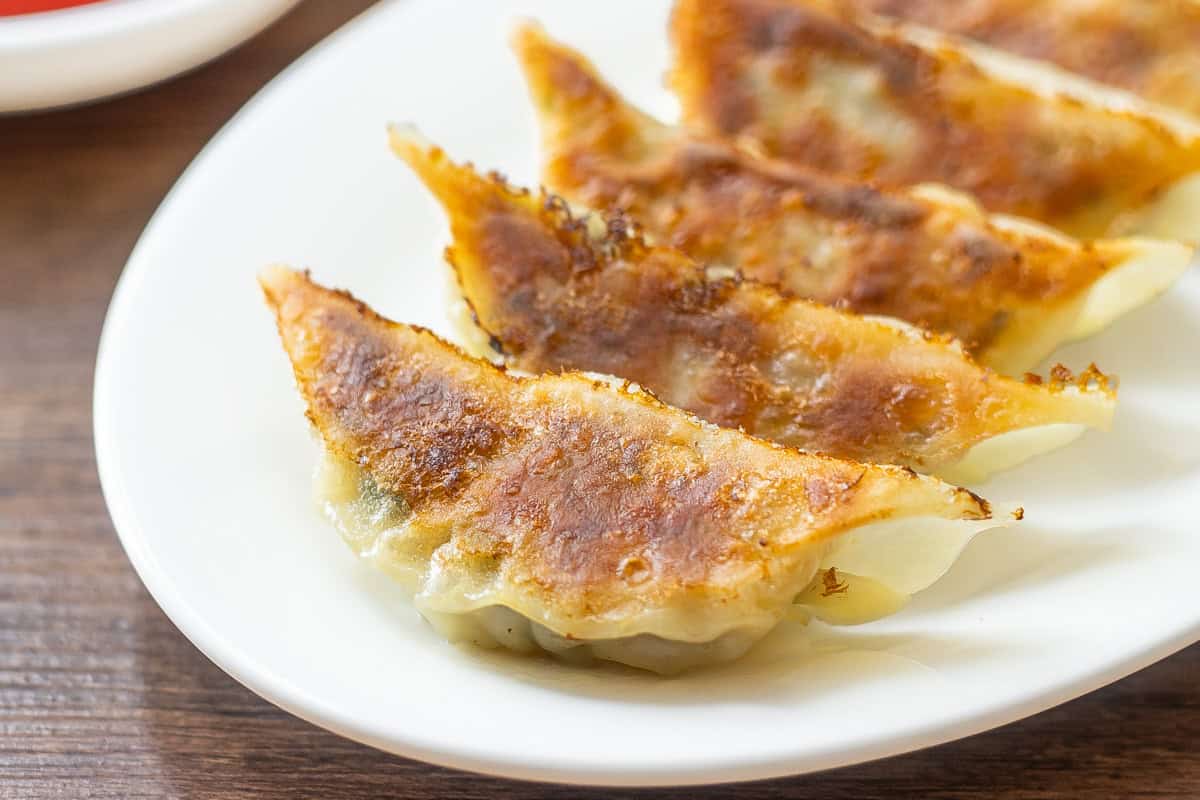
For the finishing touch, drizzle sesame oil over the gyoza and cook them for another 1-2 minutes, or until the bottoms are golden brown and crispy. Then, transfer them to a plate so the crispy side is facing up, and they are ready to serve.
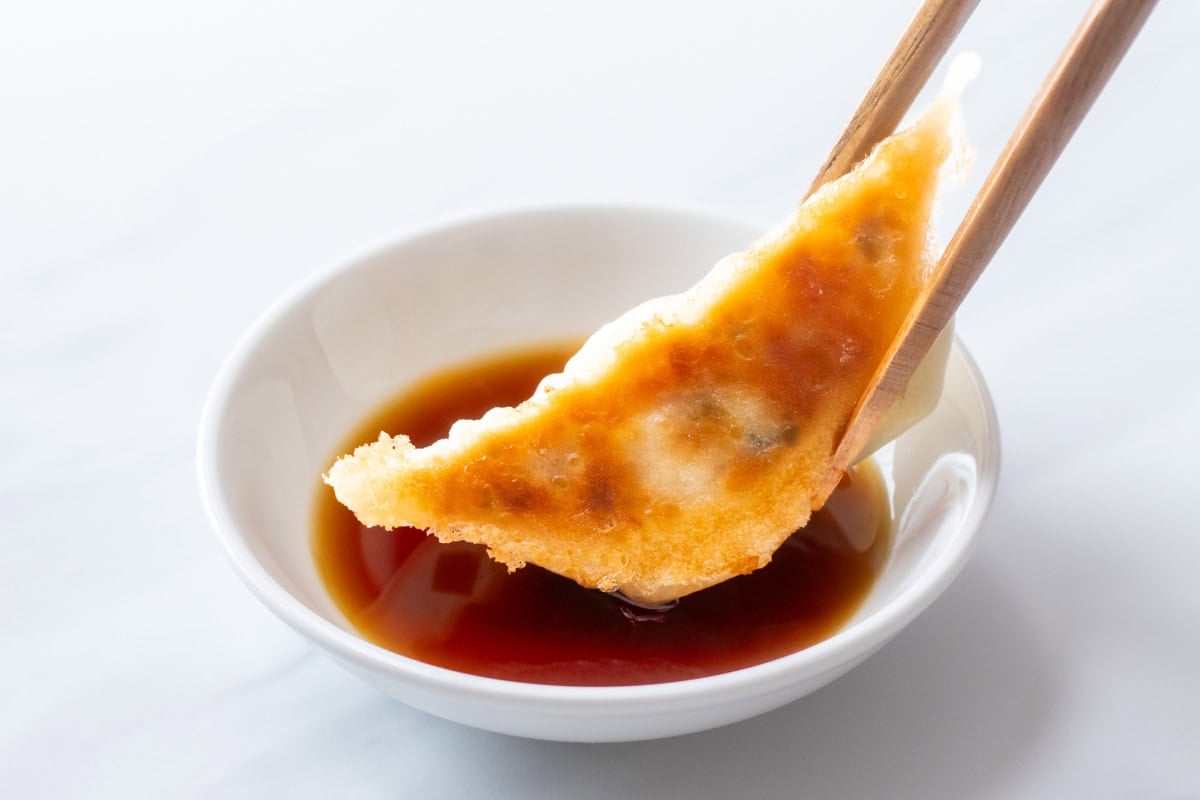
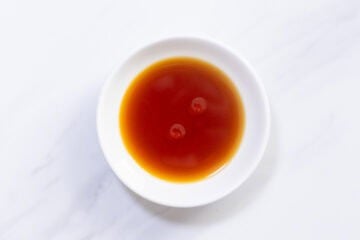
The dipping sauce for gyoza
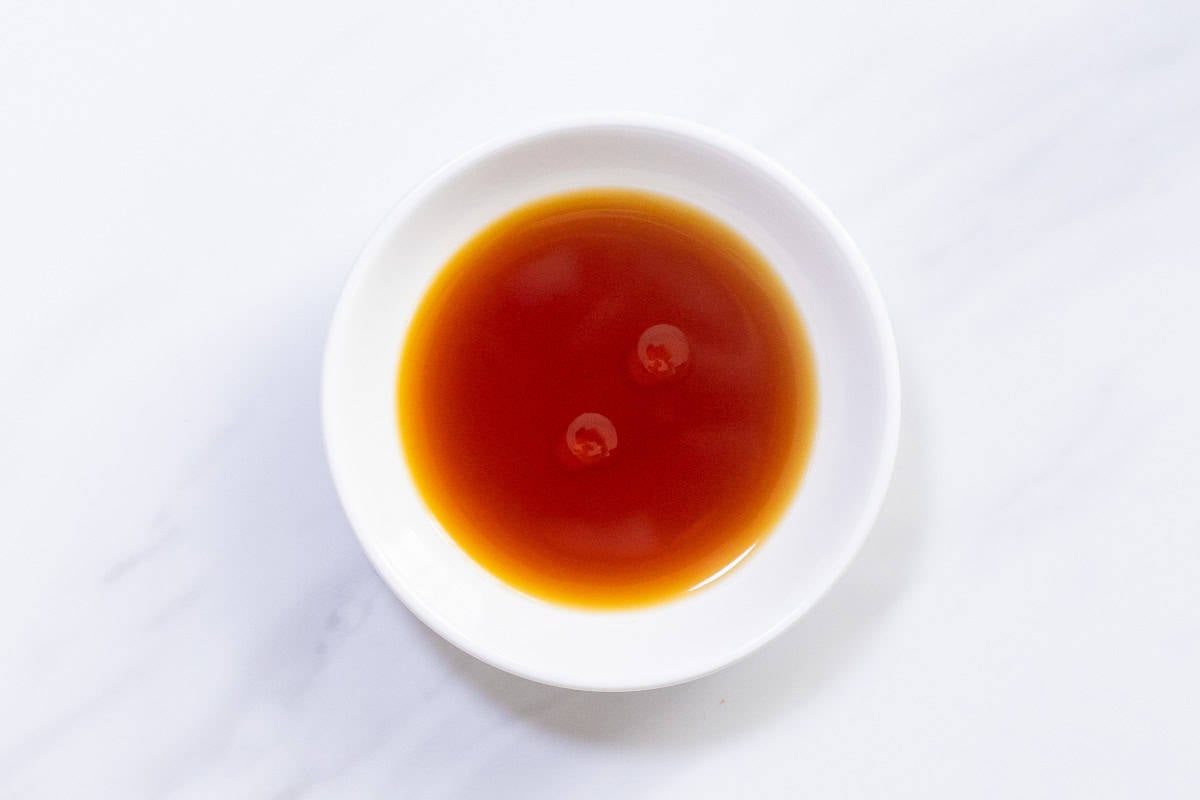
You can enjoy gyoza as they are, but dipping them in sauce makes them even more delicious. In Japan, the classic gyoza dipping sauce is made by mixing rice vinegar and soy sauce in a 1:1 ratio (or sometimes 6:4 or 7:3). If you like a bit of heat, add a few drops of la-yu (Japanese chili oil) to taste.
It is incredibly easy to make, so be sure to give it a try. If you prefer an even quicker option, you can also use ponzu sauce as a ready-made alternative. These are just some common choices, but there are many other types of gyoza dipping sauces in Japan as well. To learn more about gyoza dipping sauces, please refer to the linked page.
📋Step-by-step recipe
Ingredients
- 8 oz green cabbage or napa cabbage
- ¼ tsp salt (for the cabbage)
- 1 oz garlic chives
- 6 oz ground pork
- 20-25 gyoza wrappers (You can make about 25 gyoza with 3.5-inch [9 cm] wrappers, or about 20 gyoza with 4-inch [10 cm] wrappers. I recommend using Japanese gyoza wrappers, as Chinese wrappers tend to be thicker.)
- 1 Tbsp toasted sesame oil (for coating the pan)
- ⅘ cup hot water (The exact amount depends on the size of your pan. I used about ⅖ cup [100 ml] per batch; it will be used in step 7.)
- 1 Tbsp toasted sesame oil (for the final drizzle)
Seasonings for the gyoza filling:
- 1 tsp grated garlic
- 1 tsp grated ginger
- 1 Tbsp sake
- ½ tsp sugar
- ½ tsp salt
- 1 Tbsp soy sauce
- 1 Tbsp toasted sesame oil
- 1 tsp potato starch or cornstarch
Gyoza dipping sauce:
- 1 Tbsp rice vinegar
- 1 Tbsp soy sauce
- la-yu (Japanese chili oil) (optional)
Instructions
🕒 Total: 55 minsTake the gyoza wrappers out of the refrigerator about 30 minutes before you plan to use them. This will make them easier to handle when wrapping the gyoza.
Step 1
Chop the cabbage into pieces roughly ¼ inch (5 mm) in size. Sprinkle it with salt, mix well, and let it sit for about 10 minutes. Then, squeeze out any excess moisture by hand.
Step 2
Finely chop the garlic chives.
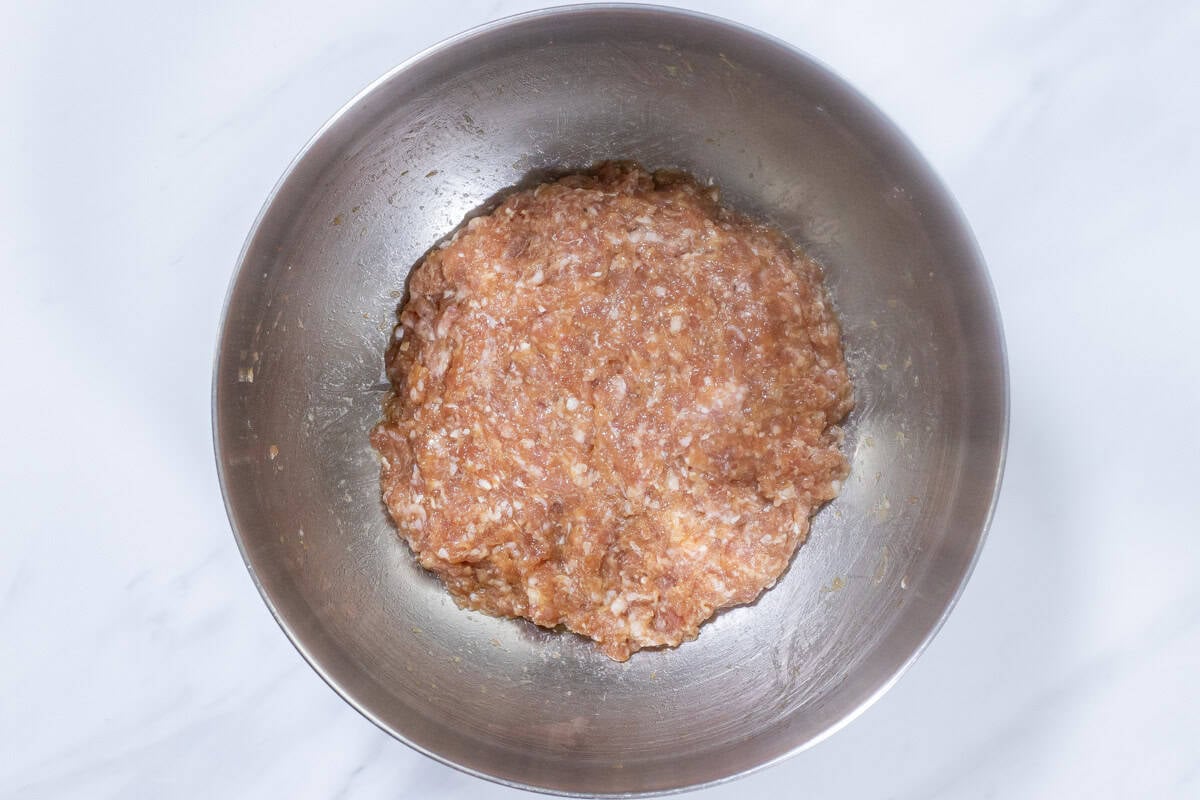
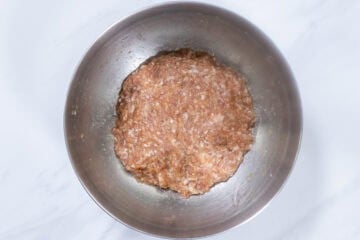
Step 3
In a large bowl, combine the ground pork with the seasonings for the gyoza filling (grated garlic, grated ginger, sake, sugar, salt, soy sauce, ground black pepper, toasted sesame oil, and potato starch or cornstarch). Mix thoroughly until the mixture becomes sticky.
Step 4
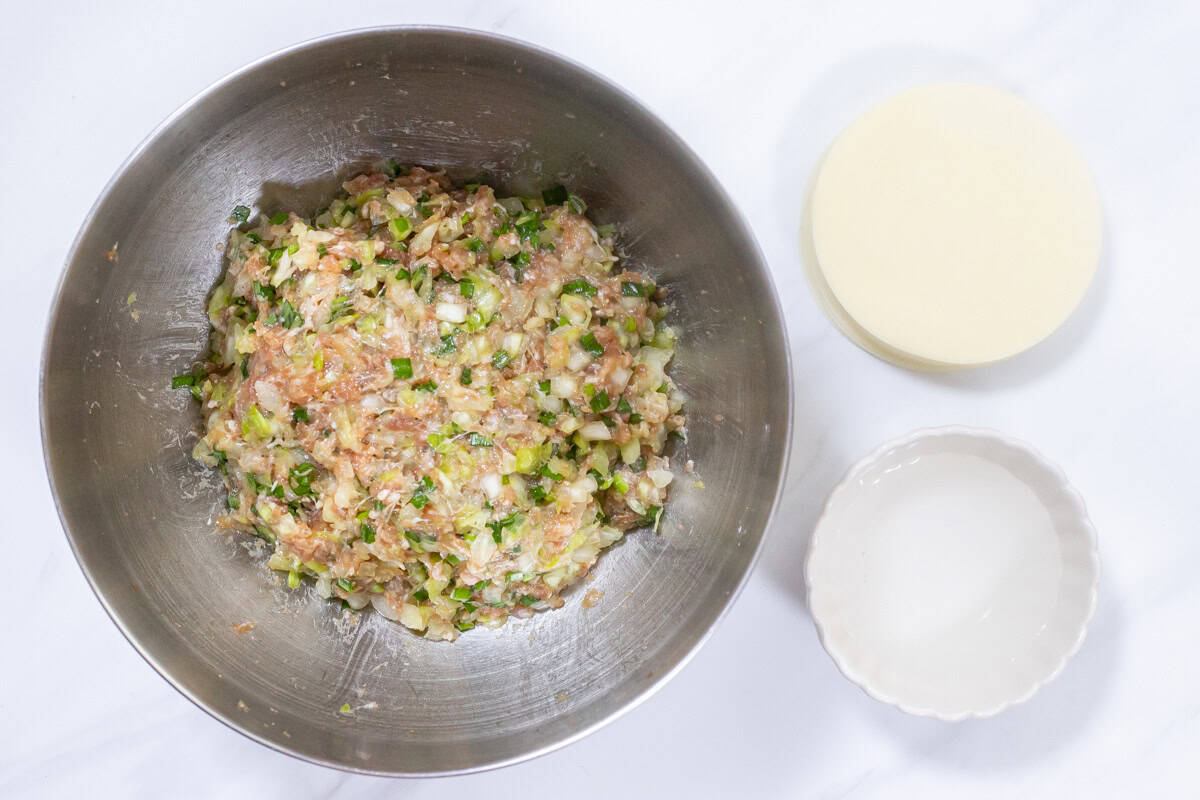
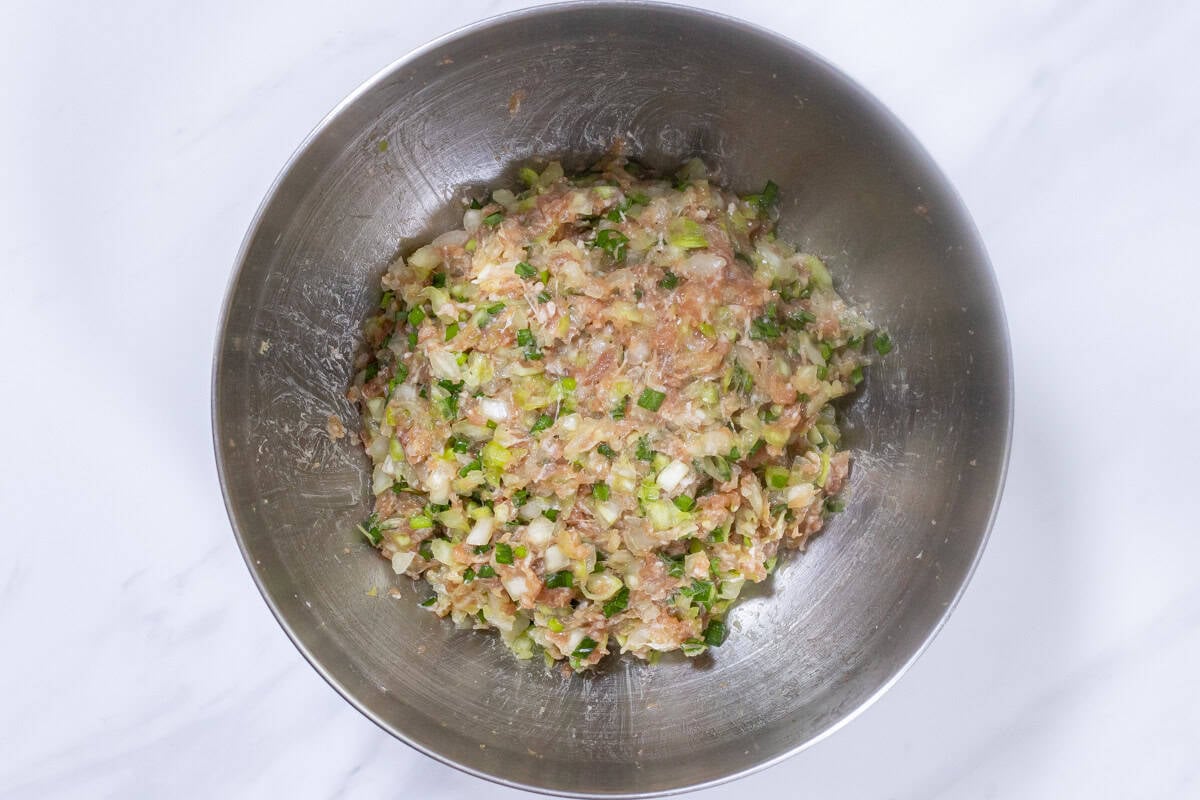
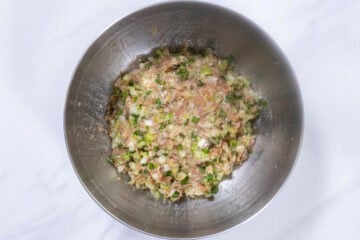
Add the cabbage and garlic chives to the pork mixture, and gently stir to combine. The gyoza filling is now ready.
Step 5
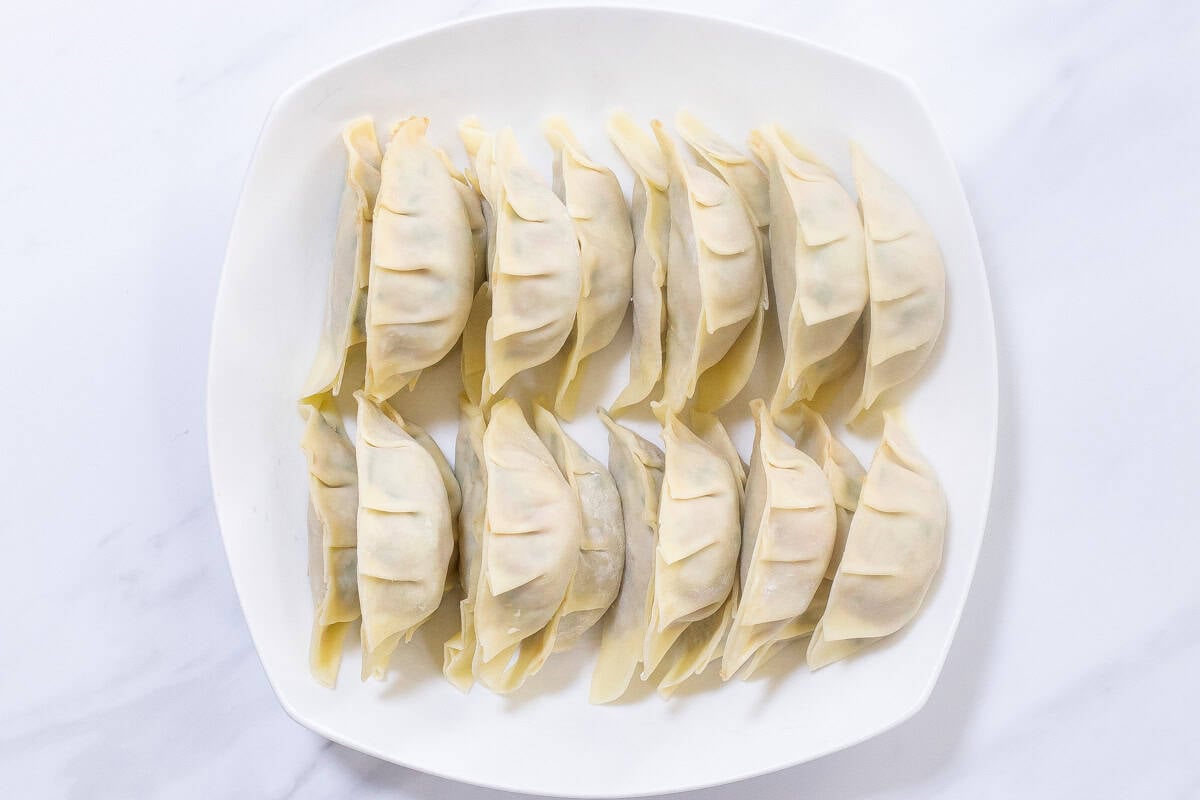
Prepare the gyoza wrappers and a small bowl of water. Place a wrapper in the palm of your non-dominant hand, and scoop some gyoza filling (about 1 Tbsp; ideally, as much as the wrapper can hold without spilling out when folded) with a small spatula or spoon, and place it in the center of the wrapper. Then, dip the tip of your dominant index finger into the small bowl of water and lightly moisten the edge of the wrapper. Using the thumb and index finger (or middle finger) of your dominant hand, fold the wrapper and pleat the edges to seal the gyoza. Repeat until all the wrappers or filling are used up.
For a detailed guide on pleating gyoza, see the “How to Wrap Gyoza” section above.

Step 6
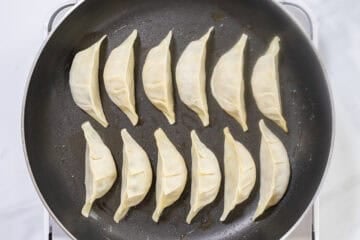
Coat a pan with about ½ Tbsp of sesame oil, spreading it evenly. Arrange the gyoza in a row or in a circle with a little space between each, pressing them gently against the pan.
Cook only as many gyoza as will comfortably fit in the pan at a time. I cooked mine in two batches, but the number of batches will vary depending on your pan size. Adjust the amount of sesame oil according to the size of your pan.
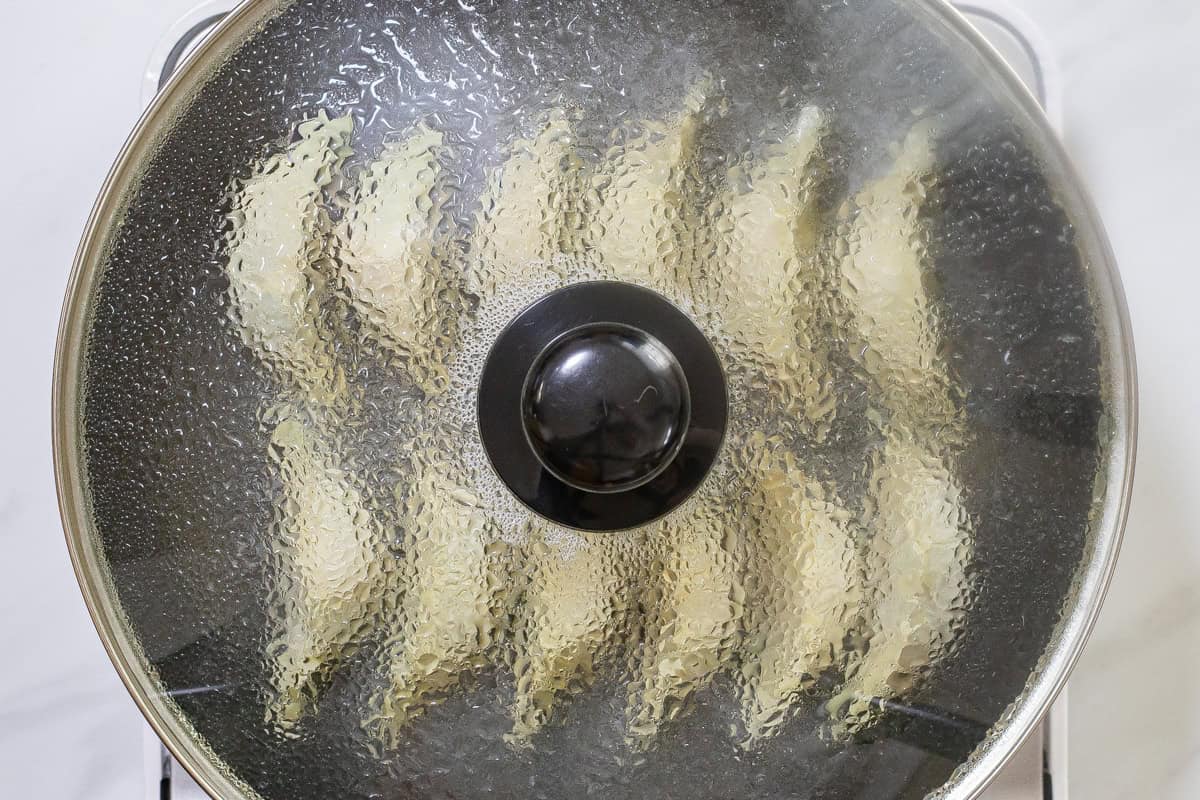
Step 7
Heat the pan over medium heat. Once the pan is hot, add enough hot water to come about one-fourth to one-fifth of the height of the gyoza. Cover with a lid and steam for about 4 minutes.
Step 8
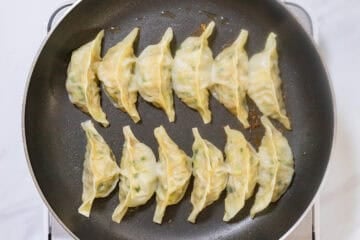
Remove the lid, and if any water remains in the pan, continue cooking until it has evaporated. Then, drizzle about ½ Tbsp of sesame oil over the gyoza and cook them for another 1-2 minutes, until the bottoms are golden brown and crispy. (Adjust the amount of sesame oil according to the size of your pan.)

Step 9
Transfer the gyoza to a plate, crispy side up. Serve with dipping sauce on the side. Wipe the pan quickly with a paper towel, then cook the next batch of gyoza.
To make gyoza dipping sauce:
Step 1
In each small dish, mix rice vinegar and soy sauce in a 1:1 ratio (or 6:4 or 7:3, if you prefer), then add a few drops of la-yu to taste.
To store
Cooked gyoza can be stored in the refrigerator for up to 2 days, although they will lose their crispiness.
Uncooked gyoza are more perishable, so keep them in the refrigerator for no more than a day. It is best to cook them as soon as possible or freeze them for longer storage.
How to freeze uncooked gyoza for later use
Ideally, you should cook the gyoza right after wrapping them, but if you make too many, you can freeze them for later.
When freezing, line a storage container with plastic wrap and arrange the gyoza in a single layer so that they don’t touch each other. Lightly dust them with potato starch or cornstarch to help prevent the wrappers from tearing during handling after freezing. Cover the container with plastic wrap and place it in the freezer overnight.
Once the gyoza are fully frozen, transfer them to an airtight container or a Ziploc bag for storage. Since they are already frozen, you don’t need to worry about them sticking together, even if they overlap. They can be stored in the freezer for up to 3 weeks.
When cooking, you can use the gyoza straight from the freezer—there is no need to thaw them beforehand. Simply increase the steaming time by about 6-8 minutes compared to the recipe. For everything else, follow the same steps as usual.
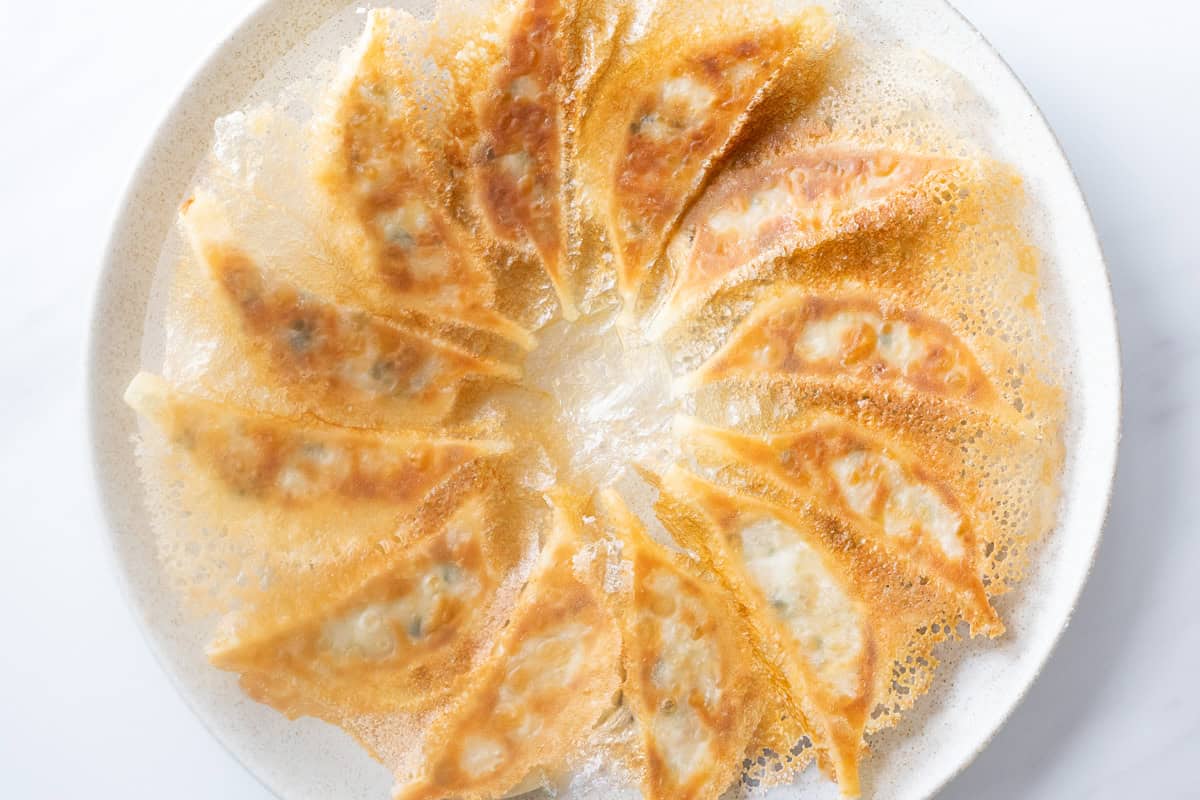
Hanetsuki Gyoza: gyoza with crispy wings
Some of you—especially gyoza enthusiasts—might be interested in making gyoza with crispy “wings,” known in Japan as hanetsuki gyoza.
Hanetsuki gyoza refers to gyoza that have a thin, golden, crispy layer (“wings”) around the bottom. The flavor is the same as regular gyoza, but the delicate crust adds an extra crunch, making the texture even more enjoyable.
They are surprisingly easy to make. In a bowl, mix ⅕ cup (50 ml) of room-temperature water with 1 tablespoon of wheat flour (all-purpose flour/plain flour) until smooth to prevent lumps. Then, add ⅗ cup (150 ml) of hot water, mix well, and use this flour mixture instead of the hot water called for in step 7 of the recipe. That’s all it takes to make gyoza with crispy wings.
Whether you prefer regular gyoza or hanetsuki gyoza is simply a matter of personal taste—both are popular in Japan. Feel free to try whichever you like.
If you try this recipe, I’d love to hear what you think. Please consider leaving a review and star rating in the comments below. If you enjoyed it, I’d really appreciate it if you shared it with your friends.
More recipes you'll love
Recipe card
Gyoza (Japanese Pork Dumplings)
Ingredients
- 8 oz green cabbage or napa cabbage
- ¼ tsp salt (for the cabbage)
- 1 oz garlic chives
- 6 oz ground pork
- 20-25 gyoza wrappers (You can make about 25 gyoza with 3.5-inch [9 cm] wrappers, or about 20 gyoza with 4-inch [10 cm] wrappers. I recommend using Japanese gyoza wrappers, as Chinese wrappers tend to be thicker.)
- 1 Tbsp toasted sesame oil (for coating the pan)
- ⅘ cup hot water (The exact amount depends on the size of your pan. I used about ⅖ cup [100 ml] per batch; it will be used in step 7.)
- 1 Tbsp toasted sesame oil (for the final drizzle)
Seasonings for the gyoza filling:
- 1 tsp grated garlic
- 1 tsp grated ginger
- 1 Tbsp sake
- ½ tsp sugar
- ½ tsp salt
- 1 Tbsp soy sauce
- 1 Tbsp toasted sesame oil
- 1 tsp potato starch or cornstarch
Gyoza dipping sauce:
- 1 Tbsp rice vinegar
- 1 Tbsp soy sauce
- la-yu (Japanese chili oil) (optional)
Instructions
- Chop the cabbage into pieces roughly ¼ inch (5 mm) in size. Sprinkle it with salt, mix well, and let it sit for about 10 minutes. Then, squeeze out any excess moisture by hand.

- Finely chop the garlic chives.
- In a large bowl, combine the ground pork with the seasonings for the gyoza filling (grated garlic, grated ginger, sake, sugar, salt, soy sauce, ground black pepper, toasted sesame oil, and potato starch or cornstarch). Mix thoroughly until the mixture becomes sticky.
- Add the cabbage and garlic chives to the pork mixture, and gently stir to combine. The gyoza filling is now ready.
- Prepare the gyoza wrappers and a small bowl of water. Place a wrapper in the palm of your non-dominant hand, and scoop some gyoza filling (about 1 Tbsp; ideally, as much as the wrapper can hold without spilling out when folded) with a small spatula or spoon, and place it in the center of the wrapper. Then, dip the tip of your dominant index finger into the small bowl of water and lightly moisten the edge of the wrapper. Using the thumb and index finger (or middle finger) of your dominant hand, fold the wrapper and pleat the edges to seal the gyoza. Repeat until all the wrappers or filling are used up.For a detailed guide on pleating gyoza, see the “How to Wrap Gyoza” section above.
- Coat a pan with about ½ Tbsp of sesame oil, spreading it evenly. Arrange the gyoza in a row or in a circle with a little space between each, pressing them gently against the pan.Cook only as many gyoza as will comfortably fit in the pan at a time. I cooked mine in two batches, but the number of batches will vary depending on your pan size. Adjust the amount of sesame oil according to the size of your pan.
- Heat the pan over medium heat. Once the pan is hot, add enough hot water to come about one-fourth to one-fifth of the height of the gyoza. Cover with a lid and steam for about 4 minutes.
- Remove the lid, and if any water remains in the pan, continue cooking until it has evaporated. Then, drizzle about ½ Tbsp of sesame oil over the gyoza and cook them for another 1-2 minutes, until the bottoms are golden brown and crispy. (Adjust the amount of sesame oil according to the size of your pan.)
- Transfer the gyoza to a plate, crispy side up. Serve with dipping sauce on the side. Wipe the pan quickly with a paper towel, then cook the next batch of gyoza.


To make gyoza dipping sauce:
- In each small dish, mix rice vinegar and soy sauce in a 1:1 ratio (or 6:4 or 7:3, if you prefer), then add a few drops of la-yu to taste.
Notes
- Take the gyoza wrappers out of the refrigerator about 30 minutes before you plan to use them. This will make them easier to handle when wrapping the gyoza.
- Cooked gyoza can be stored in the refrigerator for up to 2 days, although they will lose their crispiness.
- Uncooked gyoza are more perishable, so keep them in the refrigerator for no more than a day. It is best to cook them as soon as possible or freeze them for longer storage.
Leave a Rating and a Comment