When it comes to Japanese fried chicken, many people think of karaage. However, in Hokkaido, Japan’s northernmost region, there is a local specialty called Zangi, which has developed in a unique way. Crispy on the outside, juicy on the inside, and packed with bold flavors, this dish is a beloved staple enjoyed year-round in Hokkaido.
Jump to:
What is Zangi?
Zangi is a Japanese fried dish made by marinating chicken pieces in a flavorful mixture, coating them with flour or starch, and deep-frying them until golden brown. Originating in Hokkaido, it is known for its bold flavor and crispy coating.
At first glance, it resembles chicken karaage, Japan’s more widely known style of fried chicken, but it has a different origin. It is said to have first been created at “Torimatsu,” a yakitori restaurant in Kushiro, Hokkaido. The name is believed to come from the Chinese term for fried chicken, zhájī (pronounced “za-gi” in Japanese), with a Japanese twist—adding an “n” for good luck—resulting in “zangi.”
That said, zangi still fits all the criteria for karaage, so there is no clear line between the two. Generally, zangi tends to be more boldly seasoned and darker in color than karaage, so many people simply judge them by taste and appearance: the richer or darker it is, the more likely it is to be zangi; the lighter it is, the more likely it is to be karaage. In other words, you can think of zangi as a richer, darker version of karaage.
While zangi is traditionally made with chicken, it is now also common to make it with salmon, squid, or octopus. Try this dish and bring the beloved flavors of Hokkaido to your table.
What makes zangi different from karaage
Zangi is commonly recognized as a type of fried chicken with a bolder flavor and darker color compared to karaage. These characteristics often come from a few key factors:
- Using more soy sauce than is typically used in karaage
- Incorporating eggs into the marinade
Neither of these is strictly required—just common tendencies—but they help give zangi its distinctive flavor and appearance. Let’s take a closer look at each point.
Using more soy sauce
Hokkaido has a cold climate, so people there have traditionally preferred stronger flavors that emphasize preservation and provide extra energy. As a result, zangi is often seasoned more boldly, and soy sauce is commonly used to achieve this. Unlike salt, soy sauce adds depth of umami and aroma to the dish, keeping it flavorful even after it has cooled.
Using more soy sauce also helps the coating develop a rich, golden-brown color when fried, giving zangi its signature appearance.
Incorporating eggs
Adding eggs to the marinade has several effects. First, the protein in the egg acts as a binder, helping the coating adhere to the meat properly and preventing it from falling off during frying. Second, as the protein sets during frying, it adds richness and thickness to the coating. Finally, certain components in eggs promote the Maillard reaction, which gives the coating a darker color.
By keeping these points in mind, you can make zangi that is authentic in both flavor and appearance. Since the flavor tends to be bolder, the pieces are often cut slightly larger than those of karaage.
Cooking tips for perfect zangi
As mentioned earlier, zangi generally refers to fried chicken that is more boldly seasoned and darker in color than karaage. Therefore, the tips for making delicious zangi are basically the same as those for karaage. Below, I have listed the cooking tips from my chicken karaage recipe page—feel free to use them as a reference.
Preparing the chicken:
- Use chicken thighs.
- Remove any blood spots, yellow fat, cartilage, or tough tendons.
- Cut the chicken into pieces as uniform in size as possible. For zangi, pieces of about 1.4-1.8 oz (40-50 g) are recommended.
- Marinate the chicken at room temperature for 20-30 minutes to allow the flavors to soak in. If marinating for longer than 30 minutes, keep it in the refrigerator and let it return to room temperature before frying.
Deep-frying the chicken:
- Use enough oil.
- Don’t touch the chicken at the beginning of frying.
- Skim off any fried bits from the oil.
- Double-fry the chicken: first, fry at 320℉ (160℃) for 3 minutes, then let it rest for at least 3 minutes. After that, fry again at 360℉ (180℃) for about 1 minute.
My zangi recipe below incorporates all of these tips. For more details on each, please refer to my chicken karaage recipe page.
📋Step-by-step recipe
Ingredients
- 1 lb boneless, skin-on chicken thighs
- 1 large egg (about 2.1 oz/60 g, including shell)
- about 1.4 inches (3.5 cm) of neutral oil in a pot (for deep-frying)
For marinating:
- ½ tsp salt
- 1 tsp sugar
- 1 Tbsp sake
- 1 tsp grated garlic
- 2 tsp grated ginger
- a pinch of ground black pepper
- 2 Tbsp soy sauce
For the coating:
- 2 Tbsp all-purpose flour (plain flour)
- 4 Tbsp potato starch or cornstarch or Japanese rice flour (komeko)
Garnishes (optional):
- lemon wedges
- fresh vegetables
Instructions
🕒 Total: 50 mins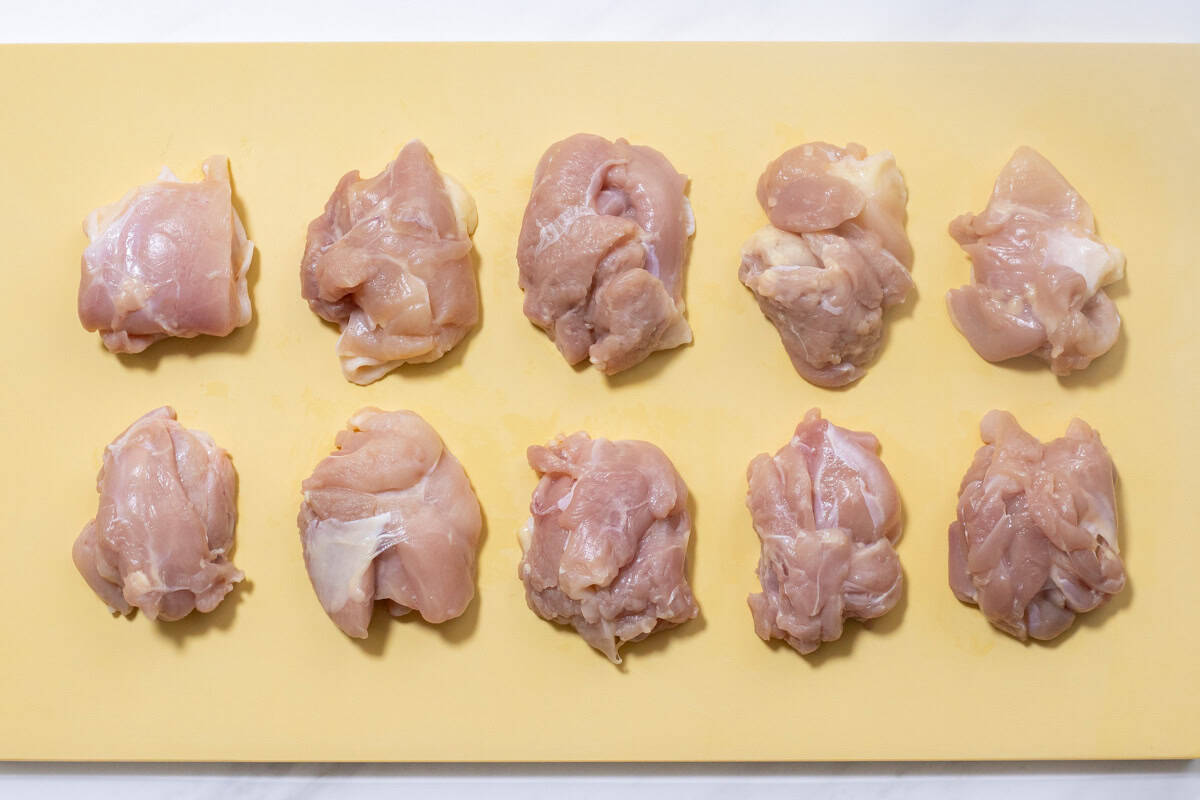
Step 1
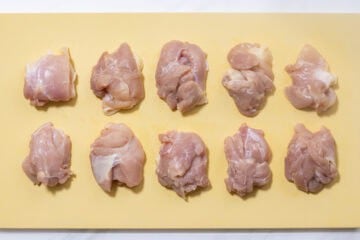
Remove any blood spots, yellow fat, cartilage, or tough tendons from the chicken thighs. Then, cut the meat into slightly larger bite-sized pieces, about 1.4-1.8 oz (40-50 g) each, and transfer them to a bowl.
Step 2
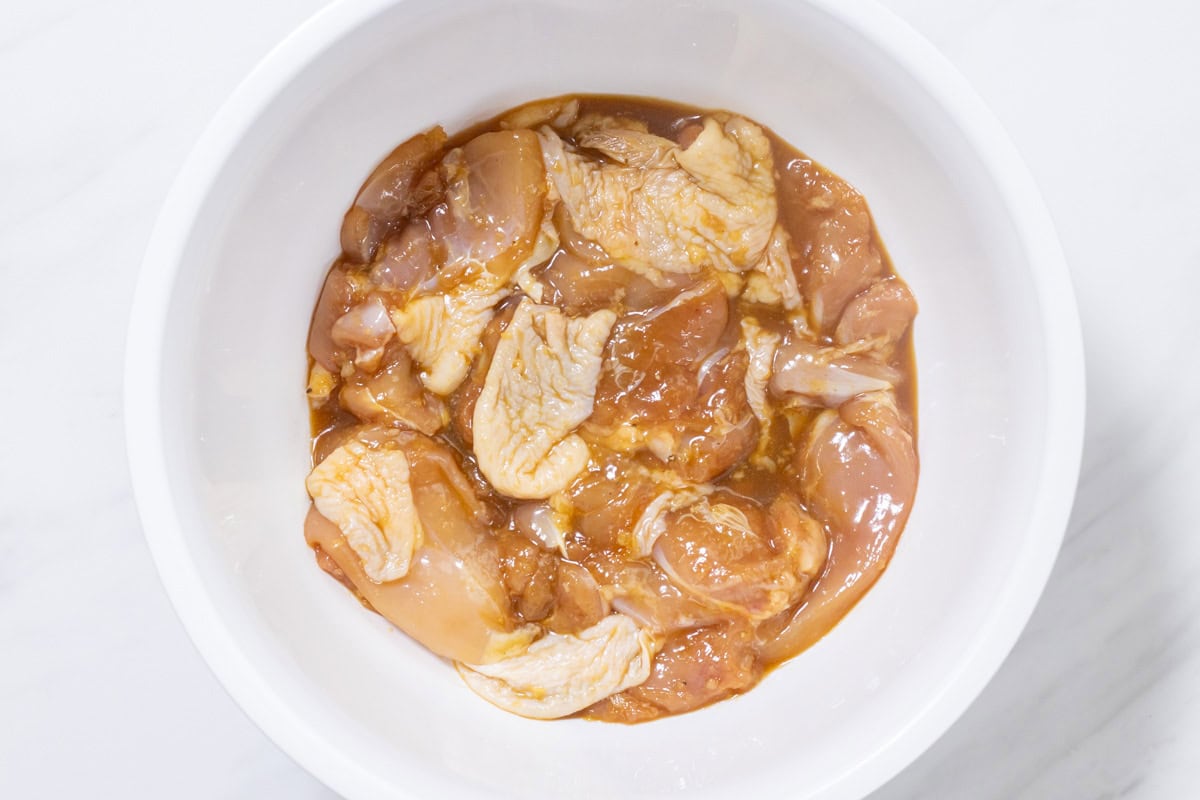
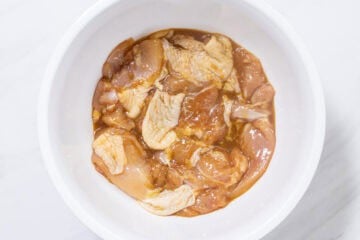
In the bowl with the chicken, first add salt and sugar, and gently rub them in. Then, add sake, grated garlic, grated ginger, pepper, and soy sauce, and mix everything together again. Let it sit at room temperature for 20-30 minutes to allow the flavors to meld.
If you let it rest for more than 30 minutes, keep it in the refrigerator. In that case, take it out and let it return to room temperature before frying.
Step 3
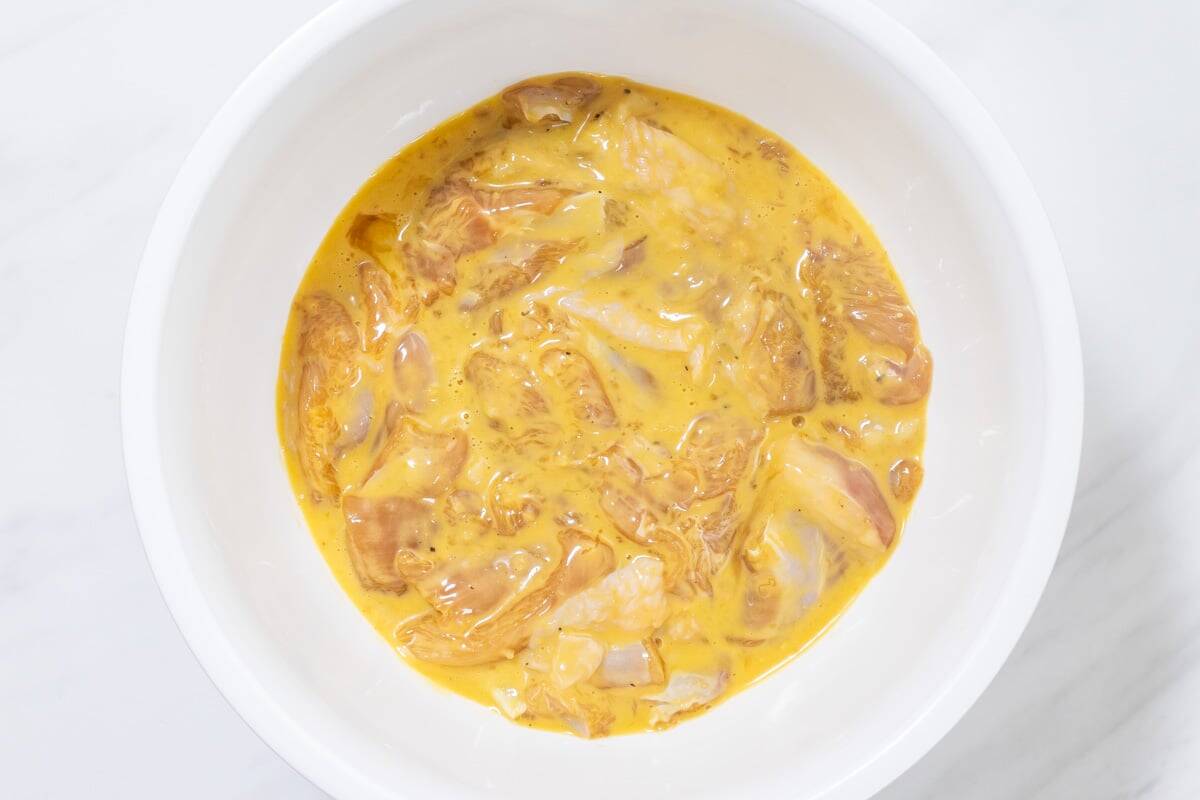
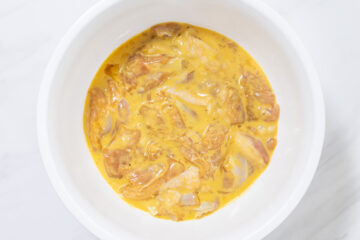
Crack the egg into a small bowl and beat it, then add it to the bowl with the chicken and mix well. After that, combine flour and potato starch (or cornstarch or Japanese rice flour) and mix everything together thoroughly.
Step 4
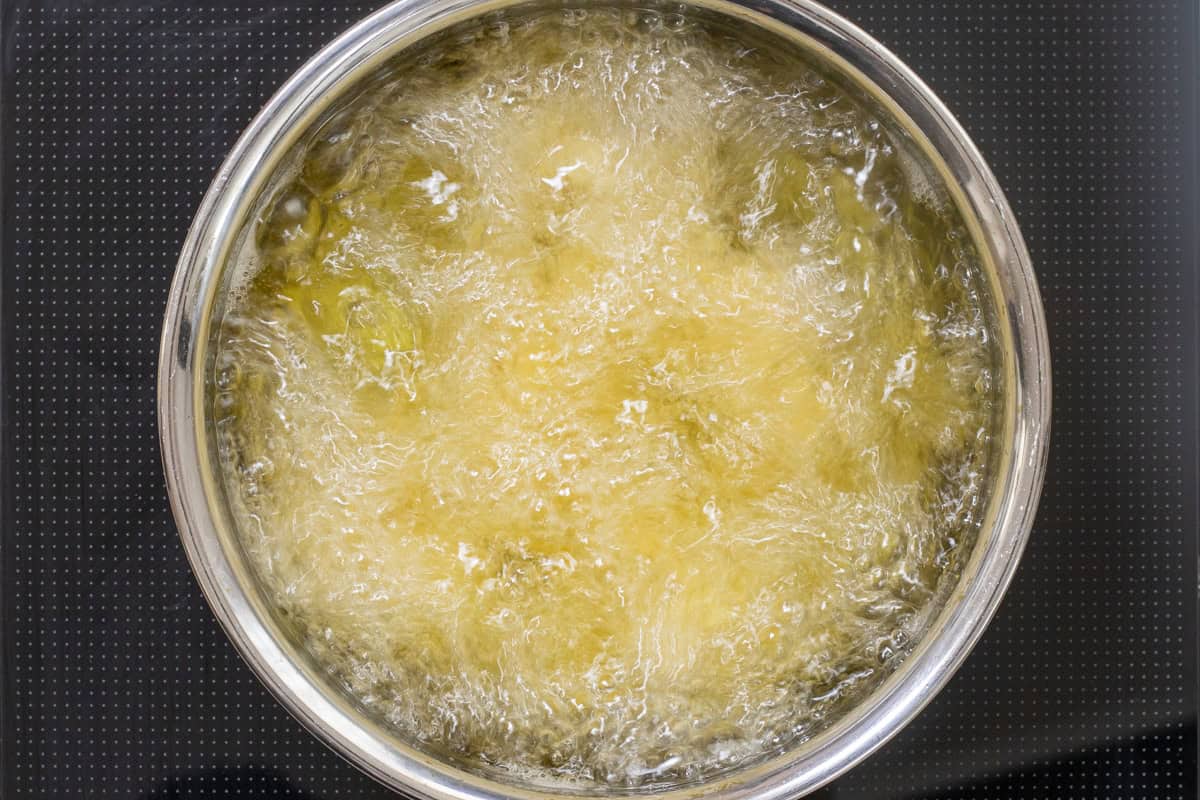
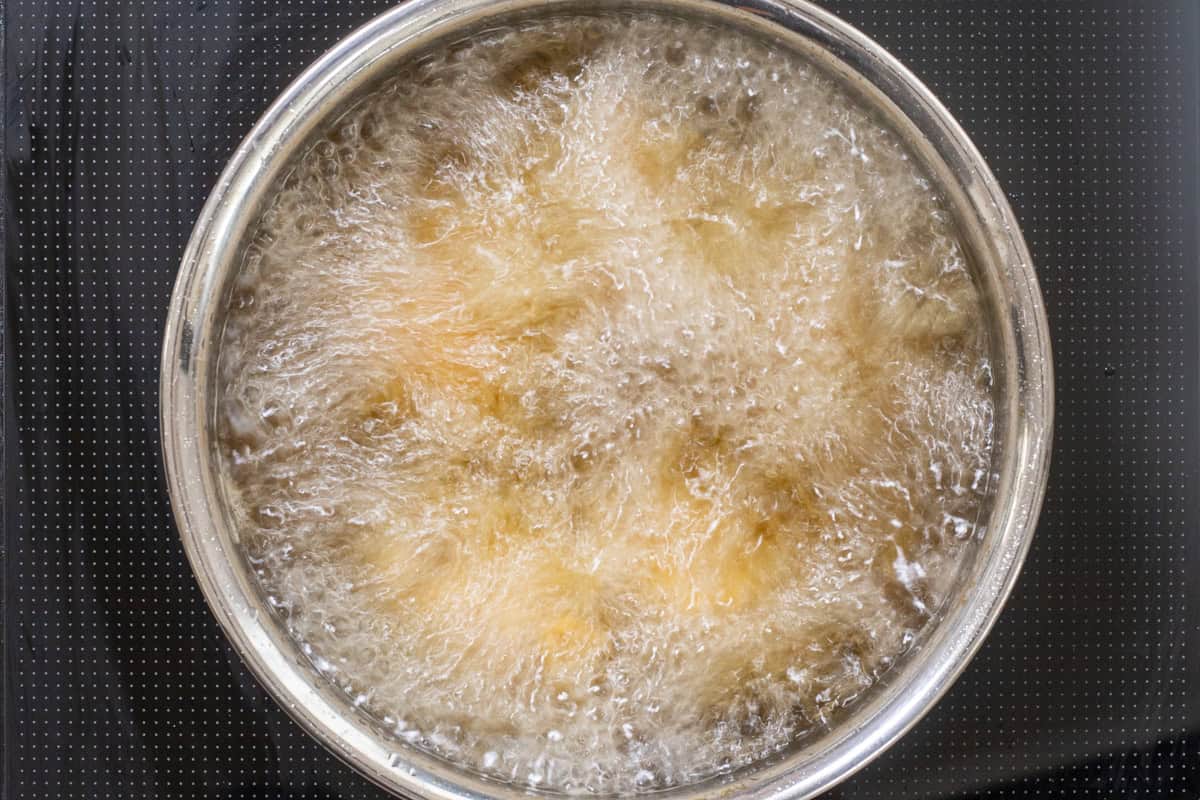
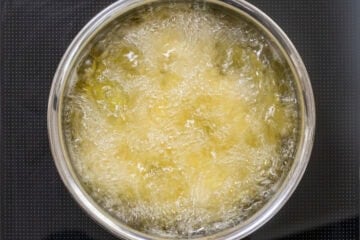
Heat oil in a pot to 320℉ (160℃). Once the oil is hot, carefully add the chicken pieces one at a time. Deep-fry them for 3 minutes.
Be careful not to add too many pieces at once, as this can cause the oil temperature to drop significantly. The chicken should occupy no more than about two-thirds of the oil’s surface area.

Step 5
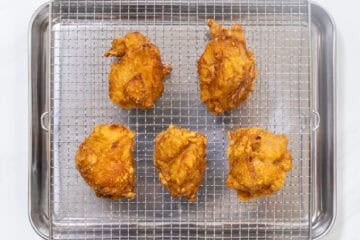
Remove the chicken pieces from the oil and let them rest on a wire rack for at least 3 minutes. If there are any fried bits left in the oil, skim them out with a mesh skimmer or strainer. Repeat steps 4 and 5 until all the pieces are fried.
Step 6
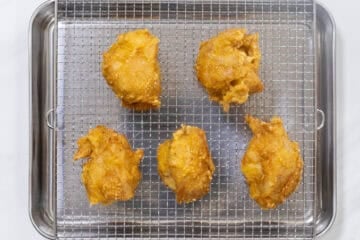
Increase the heat and raise the oil temperature to 360℉ (180℃). Then, carefully add the chicken pieces back into the oil one at a time and fry them for about 1 minute until golden brown. As before, avoid adding too many pieces at once.
The 1-minute frying time is just a guideline. If the pieces are smaller, they will cook faster, and if they are larger, it will take longer. Once the chicken turns golden brown or starts floating to the surface of the oil, that’s a sign it’s done. Be careful not to overcook it—frying for too long will make the chicken dry and tough instead of juicy.

Step 7
Remove the chicken pieces from the oil and let them drain on a wire rack. If there are any fried bits left in the oil, skim them out with a mesh skimmer or strainer, then repeat steps 6 and 7 until all the pieces are double-fried.
Step 8
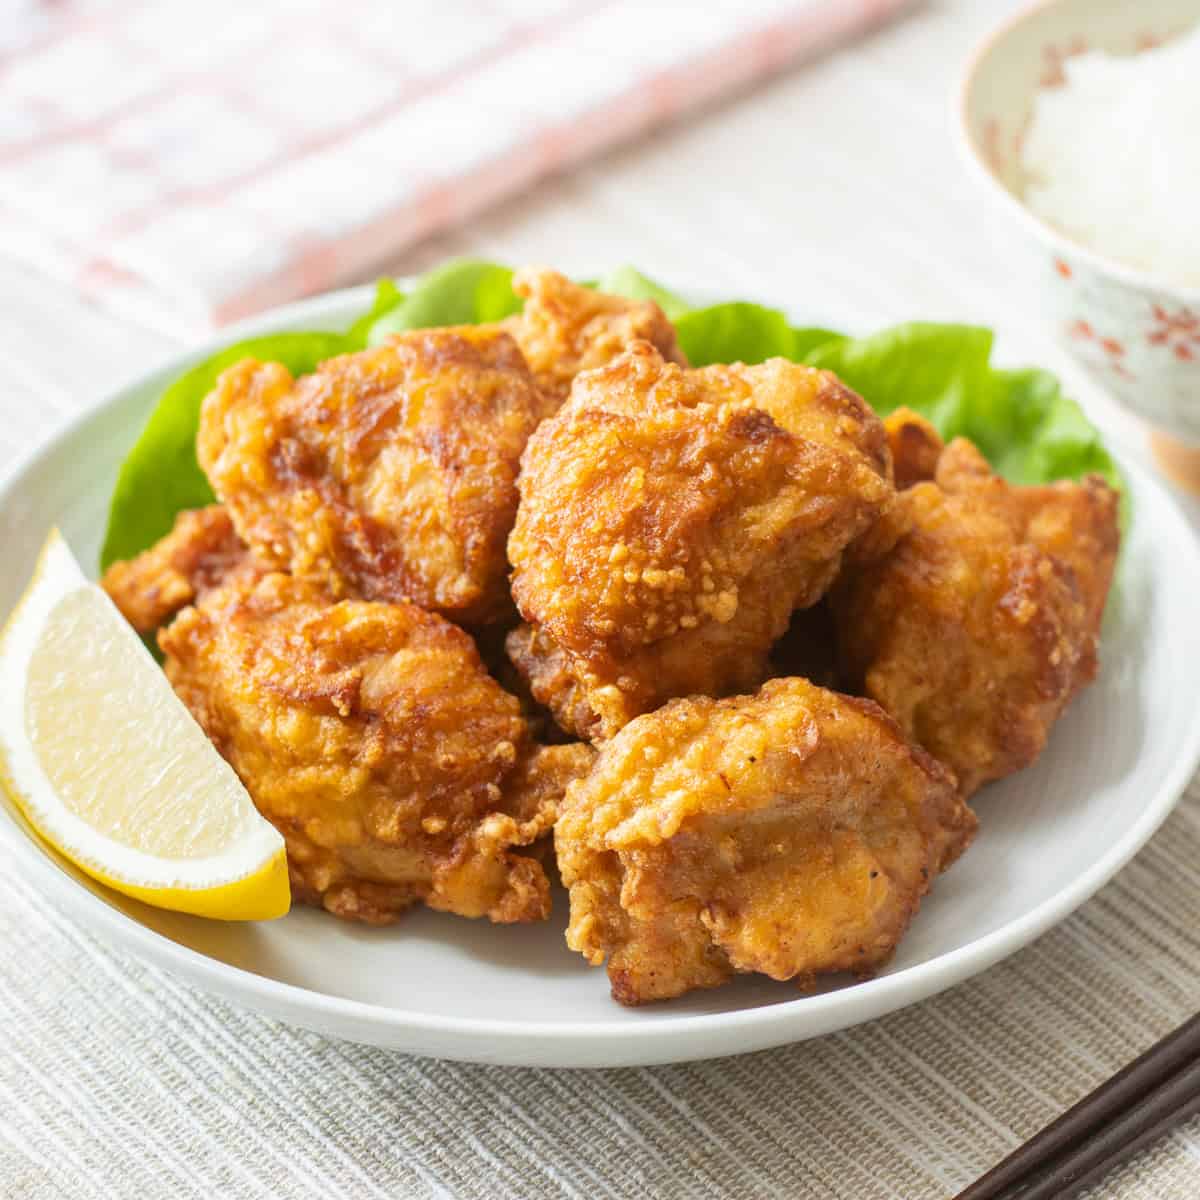
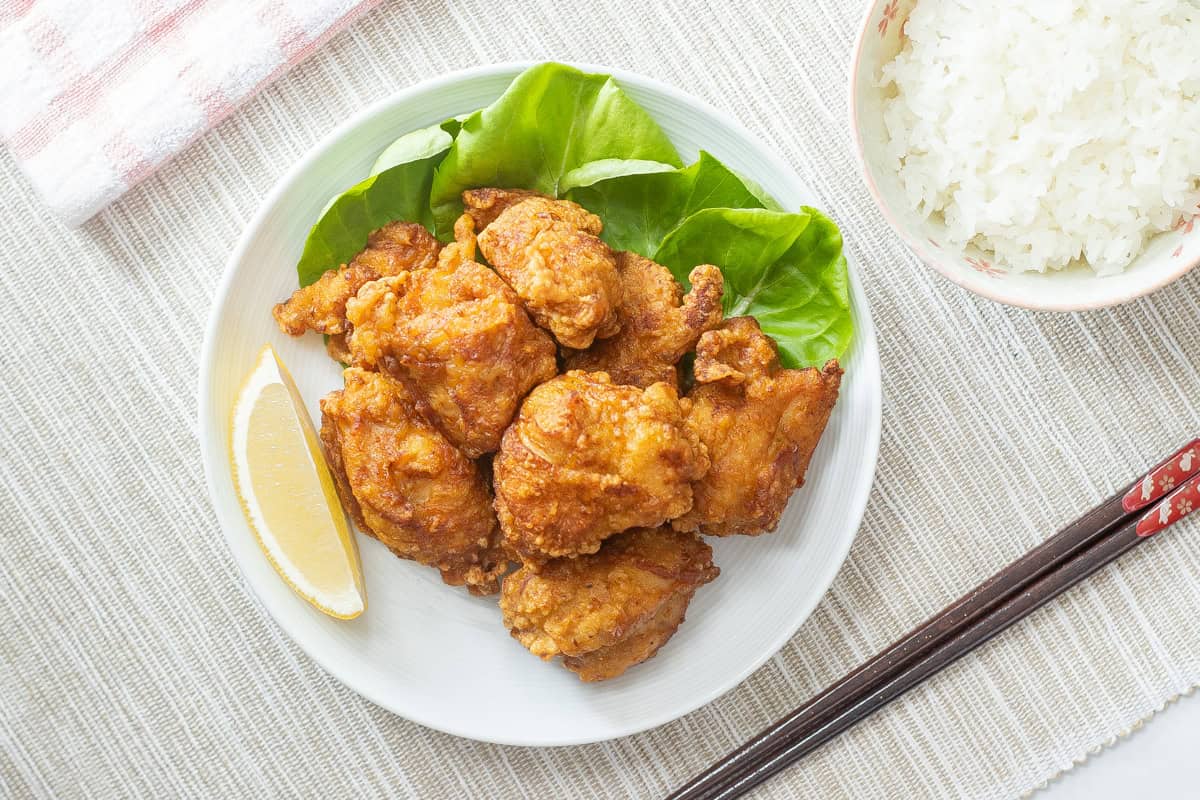
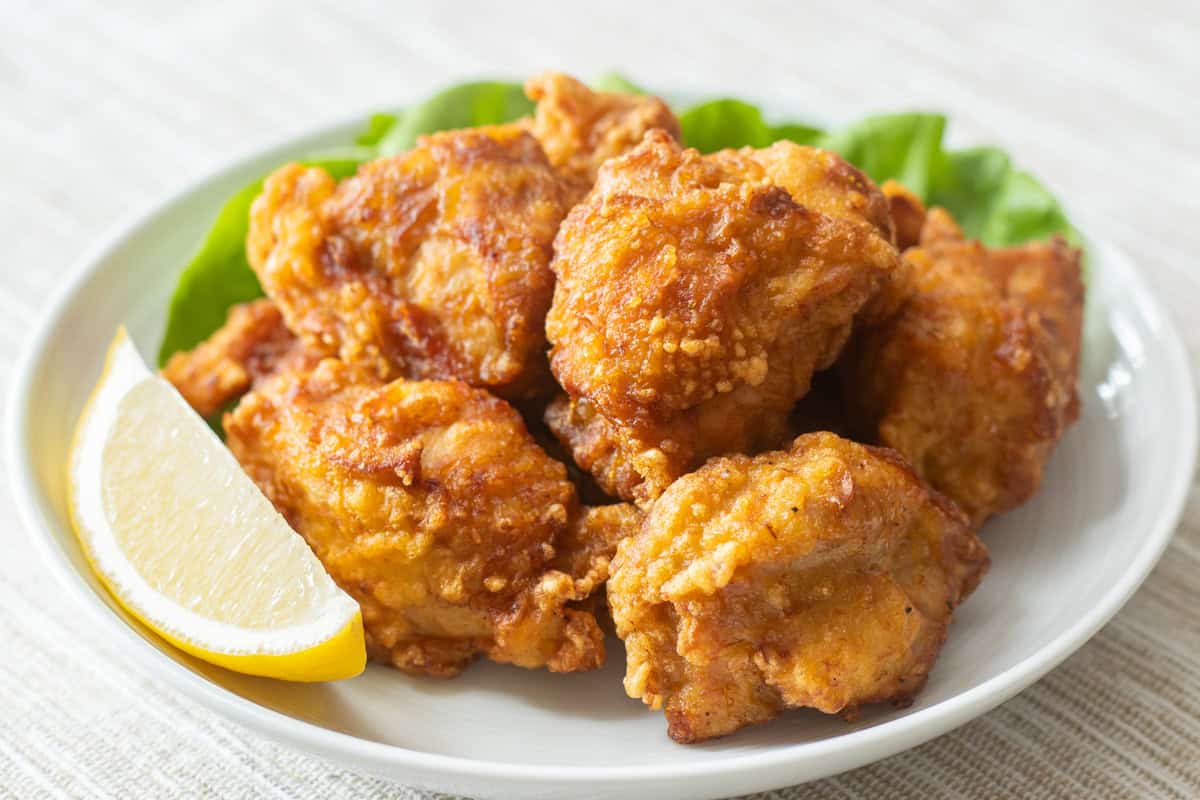
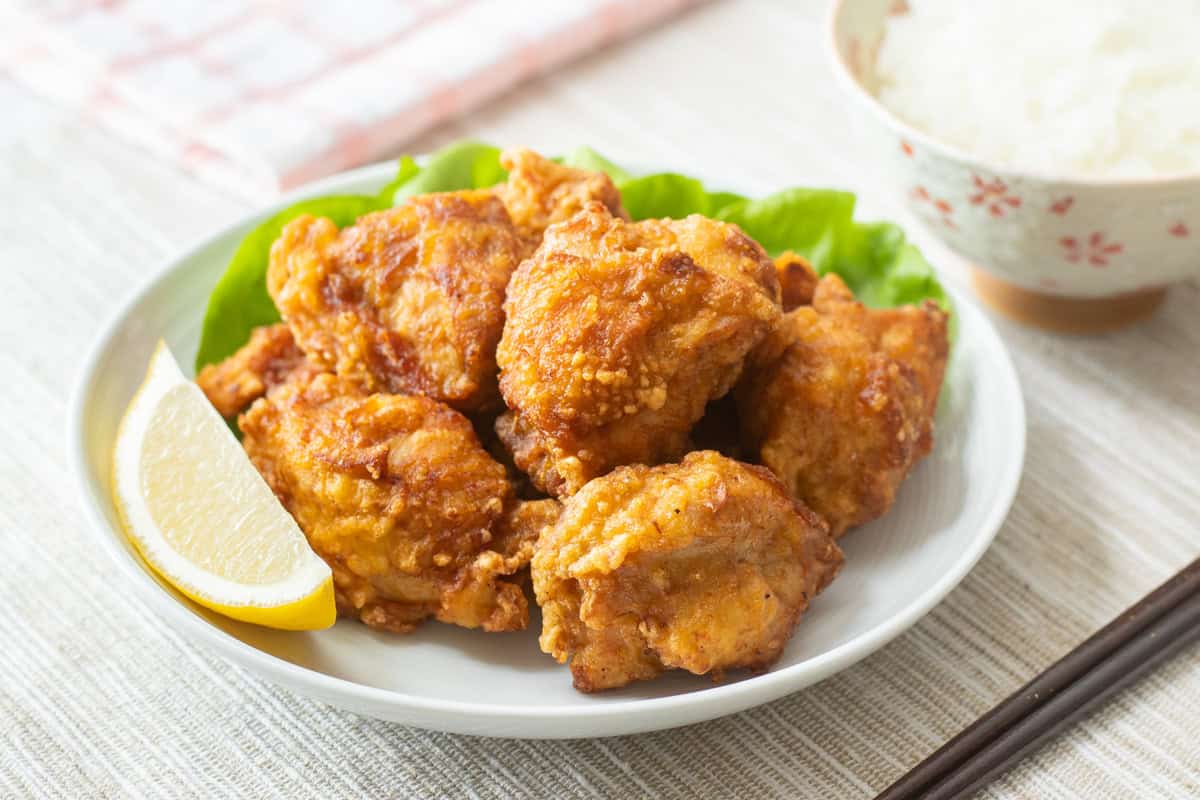
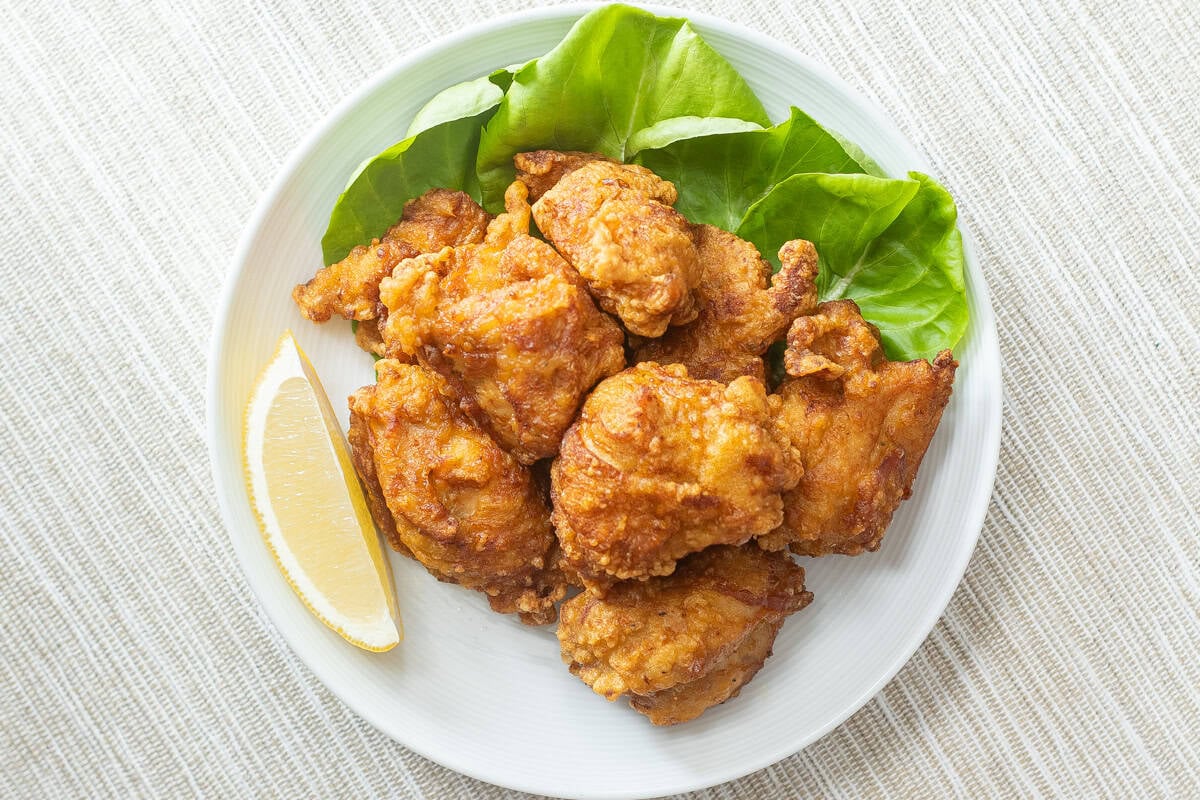
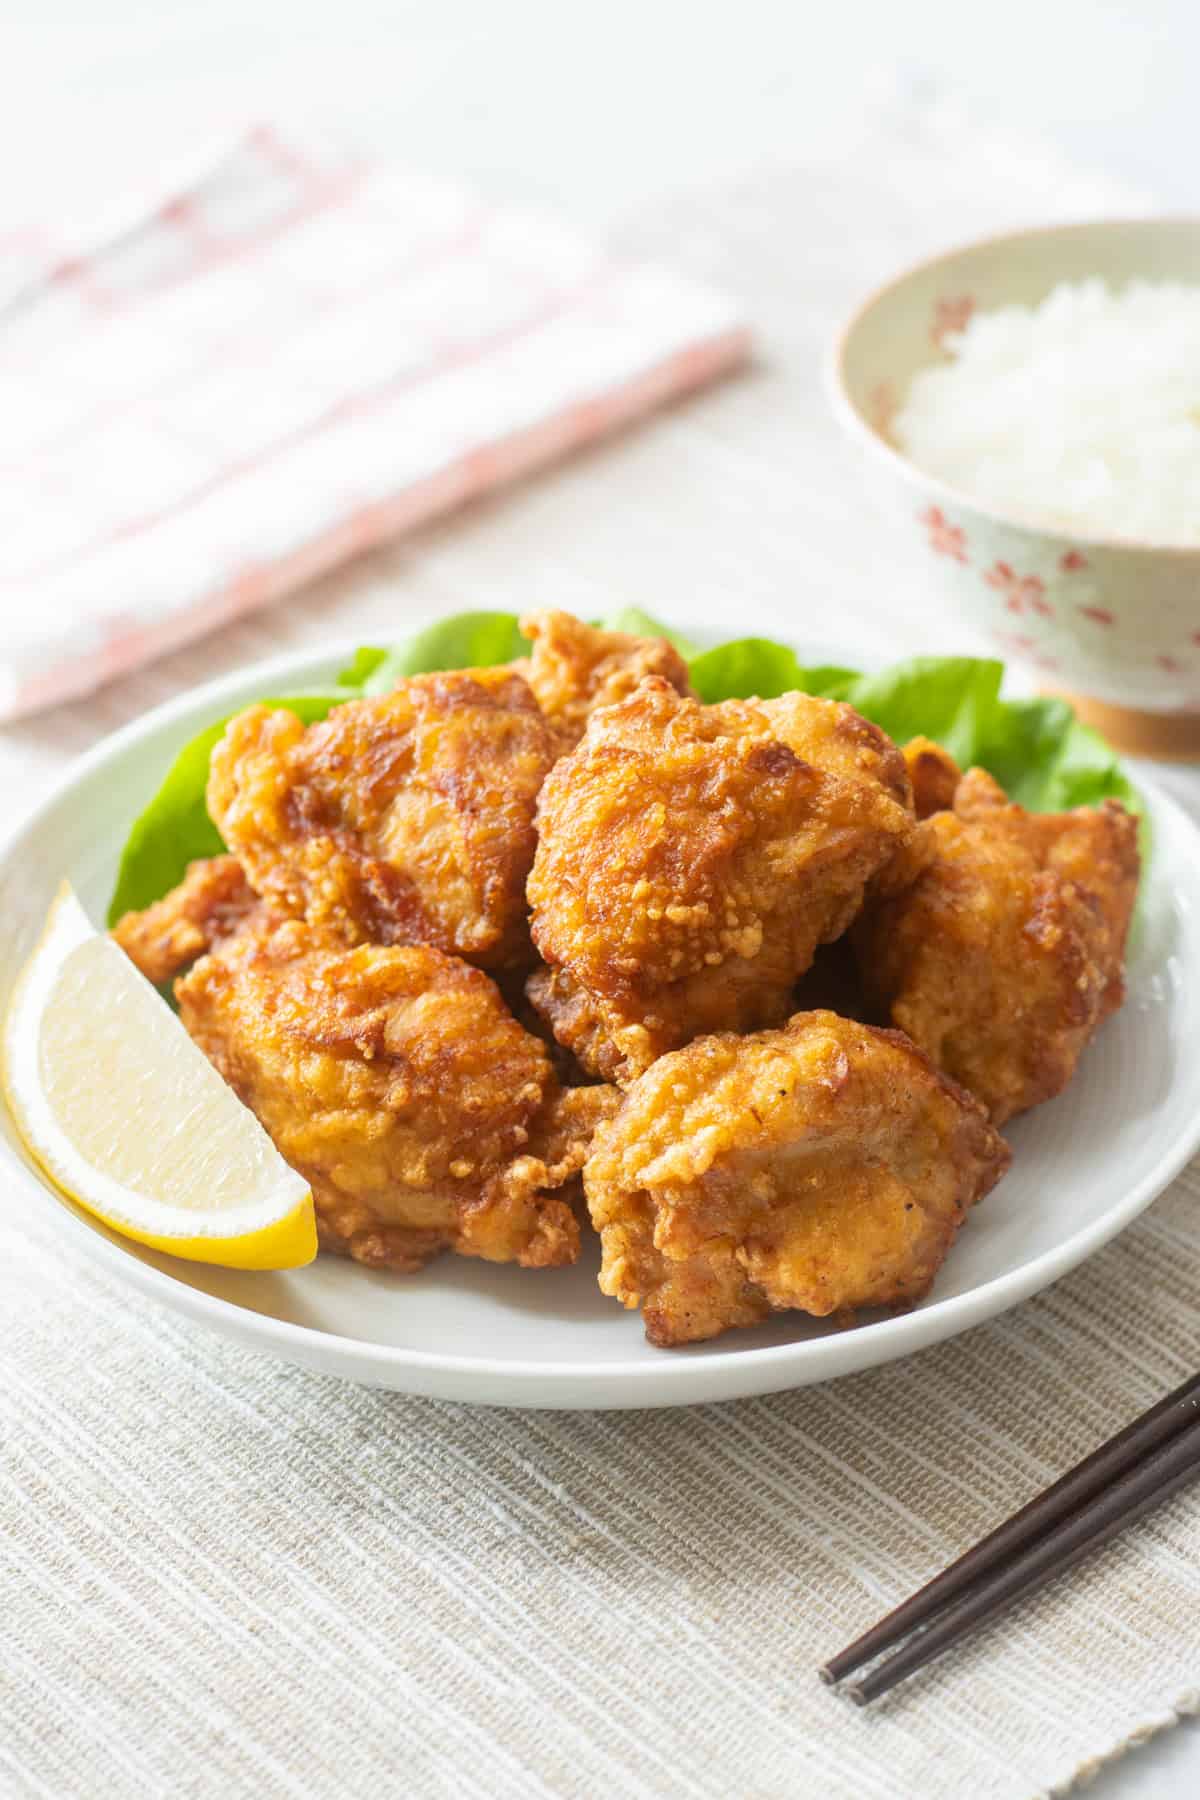
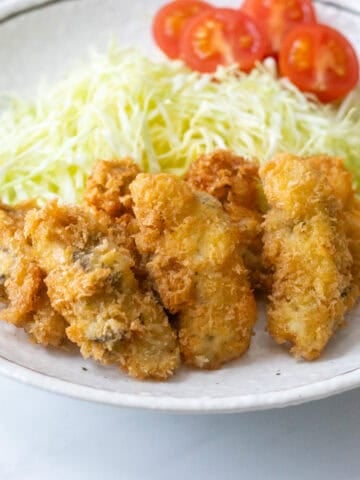
Serve the zangi on a plate. Feel free to garnish it with a lemon wedge and fresh vegetables of your choice.
To store
You can store it in the refrigerator for up to 3 days.
If you try this recipe, I’d love to hear what you think. Please consider leaving a review and star rating in the comments below. If you enjoyed it, I’d really appreciate it if you shared it with your friends.
More chicken recipes you'll love
Recipe card
Zangi (Hokkaido-Style Fried Chicken)
Ingredients
- 1 lb boneless, skin-on chicken thighs
- 1 large egg (about 2.1 oz/60 g, including shell)
- about 1.4 inches (3.5 cm) of neutral oil in a pot (for deep-frying)
For marinating:
- ½ tsp salt
- 1 tsp sugar
- 1 Tbsp sake
- 1 tsp grated garlic
- 2 tsp grated ginger
- a pinch of ground black pepper
- 2 Tbsp soy sauce
For the coating:
- 2 Tbsp all-purpose flour (plain flour)
- 4 Tbsp potato starch or cornstarch or Japanese rice flour (komeko)
Garnishes (optional):
- lemon wedges
- fresh vegetables
Instructions
- Remove any blood spots, yellow fat, cartilage, or tough tendons from the chicken thighs. Then, cut the meat into slightly larger bite-sized pieces, about 1.4-1.8 oz (40-50 g) each, and transfer them to a bowl.

- In the bowl with the chicken, first add salt and sugar, and gently rub them in. Then, add sake, grated garlic, grated ginger, pepper, and soy sauce, and mix everything together again. Let it sit at room temperature for 20-30 minutes to allow the flavors to meld.If you let it rest for more than 30 minutes, keep it in the refrigerator. In that case, take it out and let it return to room temperature before frying.
- Crack the egg into a small bowl and beat it, then add it to the bowl with the chicken and mix well. After that, combine flour and potato starch (or cornstarch or Japanese rice flour) and mix everything together thoroughly.
- Heat oil in a pot to 320℉ (160℃). Once the oil is hot, carefully add the chicken pieces one at a time. Deep-fry them for 3 minutes.Be careful not to add too many pieces at once, as this can cause the oil temperature to drop significantly. The chicken should occupy no more than about two-thirds of the oil’s surface area.
- Remove the chicken pieces from the oil and let them rest on a wire rack for at least 3 minutes. If there are any fried bits left in the oil, skim them out with a mesh skimmer or strainer. Repeat steps 4 and 5 until all the pieces are fried.
- Increase the heat and raise the oil temperature to 360℉ (180℃). Then, carefully add the chicken pieces back into the oil one at a time and fry them for about 1 minute until golden brown. As before, avoid adding too many pieces at once.The 1-minute frying time is just a guideline. If the pieces are smaller, they will cook faster, and if they are larger, it will take longer. Once the chicken turns golden brown or starts floating to the surface of the oil, that’s a sign it’s done. Be careful not to overcook it—frying for too long will make the chicken dry and tough instead of juicy.
- Remove the chicken pieces from the oil and let them drain on a wire rack. If there are any fried bits left in the oil, skim them out with a mesh skimmer or strainer, then repeat steps 6 and 7 until all the pieces are double-fried.
- Serve the zangi on a plate. Feel free to garnish it with a lemon wedge and fresh vegetables of your choice.


Notes
- You can store it in the refrigerator for up to 3 days.
- The Nutrition Facts label assumes that the amount of oil absorbed by the chicken is approximately 8% of its weight. Garnishes are not included in the calculation.

Leave a Rating and a Comment