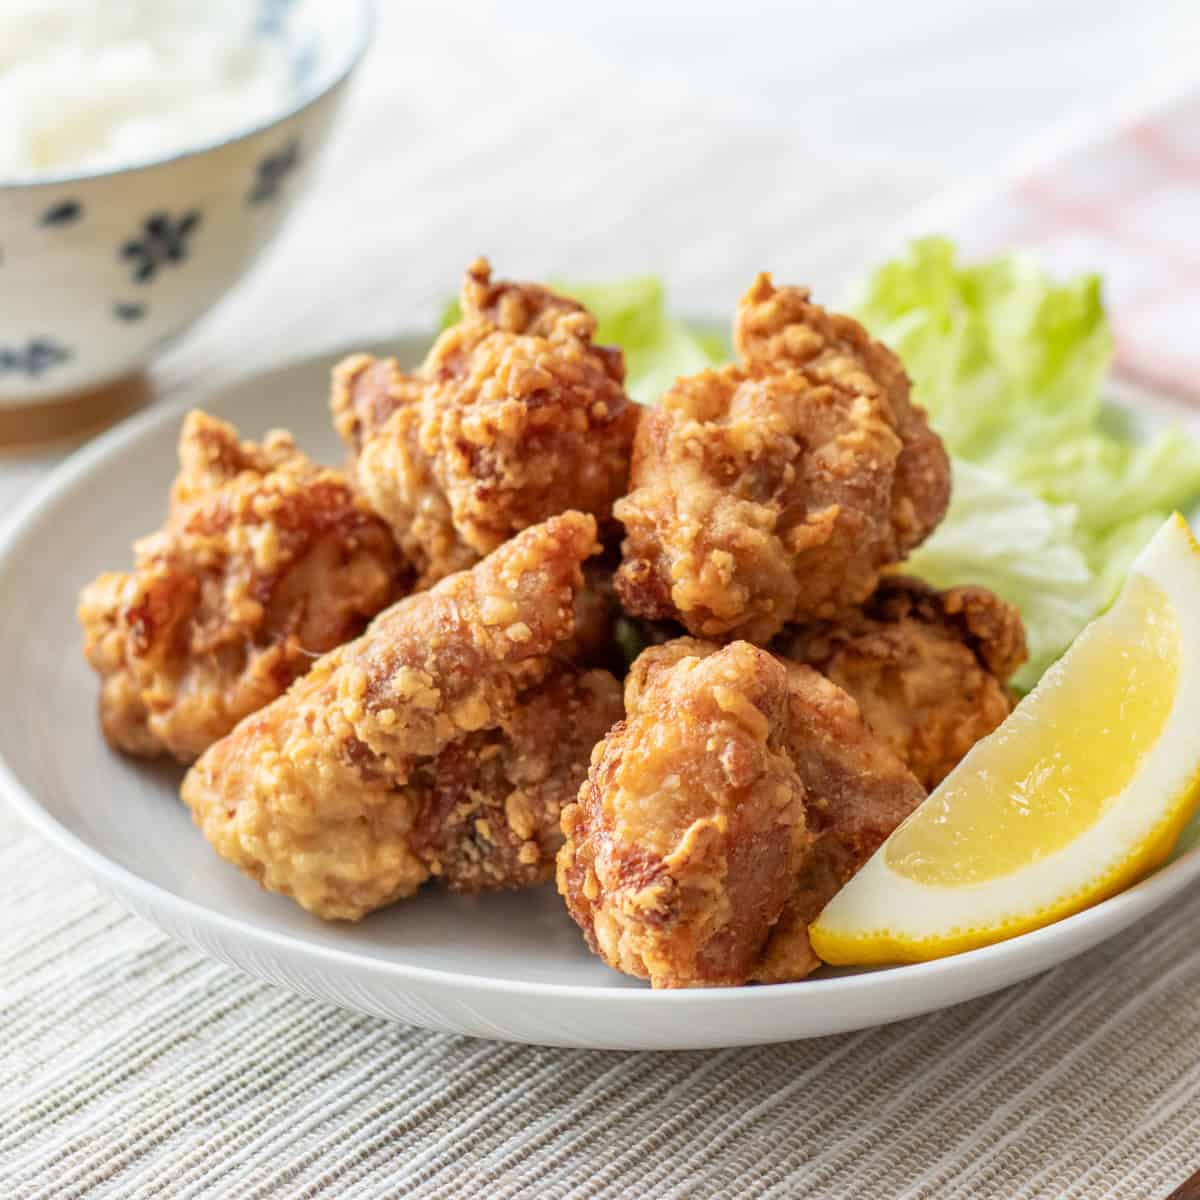
Chicken Karaage is one of the most popular and beloved dishes in Japanese cuisine. With its golden-brown, crispy crust and juicy, flavorful interior, who could possibly resist? My recipe stays true to traditional Japanese methods, ensuring you can make authentic and delicious chicken karaage at home!
Jump to:
What is Chicken Karaage?
Chicken Karaage is a Japanese dish made by marinating bite-sized pieces of chicken in a flavorful mixture, coating them with flour or starch, and deep-frying them until golden brown. The frying process gives them a crispy outer layer while keeping the inside juicy. In Japan, it is widely loved, not only at home but also in restaurants, izakayas (Japanese pubs), and in bento (lunch boxes).
It is similar to American-style fried chicken, but there are key differences. In American-style fried chicken, seasoning is added to the coating, whereas for karaage, the chicken itself is marinated before being coated. Additionally, American-style fried chicken is typically cooked at a higher temperature to create a crunchy crust, while karaage is fried at a slightly lower temperature, resulting in a more tender and juicy texture. Another great feature of karaage is that it still tastes good even after it has cooled, making it a great option for later consumption.
Although chicken is the most popular ingredient for karaage, other types of meat, fish, vegetables, and even mushrooms can also be used. For those following a plant-based diet, tofu karaage makes an excellent alternative.

The best cut of chicken for karaage
Chicken karaage is primarily made through the following steps:
- Prepare the chicken.
- Season and marinate the chicken.
- Coat the chicken.
- Deep-fry the chicken.
Simply following these steps will result in a tasty dish, but with small tweaks at each stage, you can take your karaage to the next level. Let’s start by choosing the right cut of chicken.
The best cut for chicken karaage is thigh meat.
Chicken thighs have a great balance of lean meat and fat, making them ideal for achieving a crispy exterior and a tender, juicy interior. Unlike other types of fried chicken, chicken karaage is typically boneless, so be sure to use boneless thighs. While you can use breast meat, it is leaner and can become dry and tough when cooked, so thigh meat is still recommended for the best results.
Preparing the chicken
Once your chicken is ready, let’s start the prep work. There are two key points to keep in mind during this step.
The first is to remove any unwanted parts from the chicken.
Chicken thighs might have some blood spots or yellowish fat attached. If these are left on when making karaage, they could cause an unpleasant odor in the final dish, so be sure to trim them off. At this stage, you should also remove any cartilage and tough tendons. This will improve the texture, making your karaage even more enjoyable.
The second point is to cut the chicken into bite-sized pieces that are as uniform in size as possible.
If the chicken pieces are uneven, the smaller ones may become too crispy while the larger ones may remain undercooked when deep-fried. By cutting them as uniformly as possible, you can achieve a more consistent result.
What is considered bite-sized can vary from person to person, but I personally recommend cutting them into pieces of about 1-1.5 oz (30-40 g) each. Larger pieces result in a meatier bite, while smaller ones will have a higher ratio of crispy coating.
When you cut the chicken, the pieces might seem a bit bigger than expected, but keep in mind that they will shrink slightly when fried. Since chicken thighs have both thick and thin sections, focusing on weight rather than size will help you cut them into more uniform pieces.

Seasoning and marinating the chicken
After preparing the chicken, the next step is to season it.
Seasoning is a crucial factor in determining the flavor of karaage. Marinating the chicken with the goal of removing any unpleasant odor and tenderizing the meat will result in a delicious dish that highlights its natural flavor.
For my recipe, I use the following ingredients:
- Salt: Draws out excess moisture from the chicken, which helps reduce any unpleasant odor. It also enhances the overall flavor.
- Sugar: Binds to the chicken’s proteins to help retain moisture, making the karaage juicier.
- Sake: Enhances the depth of flavor, while its alcohol content helps neutralize any unpleasant odor from the chicken. It also helps loosen the fibers in the meat, making it tender.
- Garlic: Adds a strong, distinctive flavor while helping to reduce any unwanted odor from the chicken.
- Ginger: Adds a unique flavor while helping to reduce any unpleasant odor from the chicken. It also helps break down proteins in the meat, making it tender.
- Soy Sauce: Adds a rich, savory flavor.

Among these ingredients, sugar is optional, but the others are staples for making chicken karaage in Japan. You might have seen recipes that use shiro dashi (light-colored soup base), mentsuyu (noodle soup base), chicken bouillon, mayonnaise, or sesame oil, but these are optional additions if you want to put your own spin on the traditional flavor. If you are curious, feel free to incorporate them or substitute them for some ingredients.
The recommended marinating time for the chicken is 20 to 30 minutes. The longer it sits, the more the flavors penetrate the meat, so you can even leave it overnight. However, depending on the marinating time, you may need to adjust the preparation method slightly.
For a marinating time of 20 to 30 minutes, it is best to marinate the chicken at room temperature, not in the refrigerator. If the chicken gets too cold, the temperature difference between the chicken and the frying oil will be too large, leading to uneven cooking or causing the coating to come off. It can also cause a sudden drop in oil temperature, which can result in soggy karaage.
On the other hand, if marinating for more than 30 minutes, it is best to refrigerate the chicken. This helps prevent bacterial growth in the meat. To ensure the chicken fries properly, it is recommended to take it out of the refrigerator and let it sit at room temperature for 10 to 20 minutes before frying.
Coating the chicken
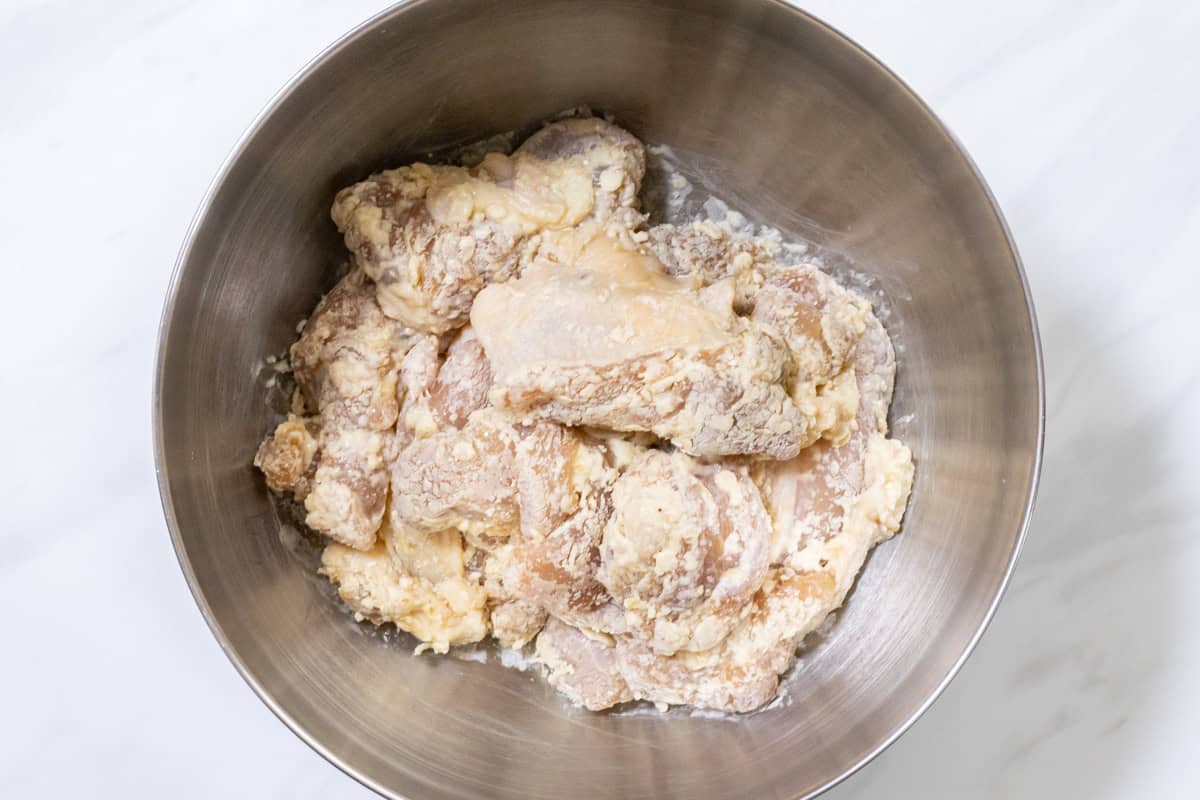
Once the chicken has been marinated, coat it evenly with the flour mixture.
For the coating, it is common to mix flour with potato starch, cornstarch, or Japanese rice flour (komeko). Each ingredient has its own characteristics:
- Flour: Sticks well to the marinated chicken. Since it absorbs oil easily, the final texture tends to be heavier and less crispy.
- Potato starch: Creates a crispy texture. Since it absorbs less moisture than flour, it doesn’t adhere well to the marinated chicken. This may cause the coating to separate from the meat when eaten.
- Cornstarch: Has characteristics similar to those of potato starch and creates a lighter, crispier texture. It tends to become soggy over time.
- Japanese rice flour (komeko): Adheres well to the marinated chicken. It gives a slightly white appearance and a light, crispy texture with a subtle rice cracker-like flavor. It doesn't necessarily have to be Japanese, as long as it is made from short-grain or glutinous rice. However, if the source differs, its characteristics may not match those described here, so keep that in mind.
Each ingredient has distinct properties, and by combining them wisely, you can take advantage of the best qualities of each. If you prefer a slightly softer texture, use a higher ratio of flour, and if you want extra crispness, increase the ratio of the other ingredients. My recipe prioritizes crispiness. You might wonder which combination to use, but ultimately, it all comes down to personal preference. Feel free to use whatever you have on hand.
Once the chicken is coated, let it rest for 5-10 minutes. This helps the coating adhere properly, preventing it from falling off during frying.

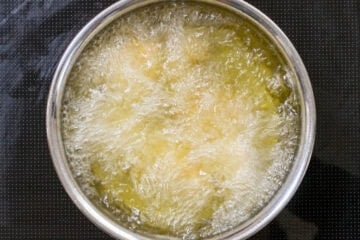
Deep-frying the chicken
It's time to deep-fry the chicken. When frying, keep these four key points in mind for the best results:
1. Use enough oil.
When you add the chicken to hot oil, the oil temperature drops. However, using plenty of oil helps minimize this temperature drop. If the temperature drops significantly, the outside of the chicken may cook while the inside remains undercooked, or the chicken may stick to the bottom of the pot. To avoid this, make sure there is enough oil to fully submerge the chicken—at least 1.4 inches (3.5 cm) deep.
2. Don’t touch the chicken at the beginning of the frying process.
As long as you are using enough oil, you typically don’t need to move the chicken around while frying. Touching the chicken at the beginning of the frying process may cause the coating to come off. Even if the chicken pieces seem to stick to the bottom of the pot or to each other, wait at least one minute before moving them.
3. Remove any fried bits from the oil.
While frying the chicken, some of the coating can break off and float in the oil. Be sure to skim them out regularly with a mesh skimmer or strainer. If left in the oil, the bits will eventually burn, giving the chicken a burnt flavor and affecting its appearance.
4. Double-fry the chicken.
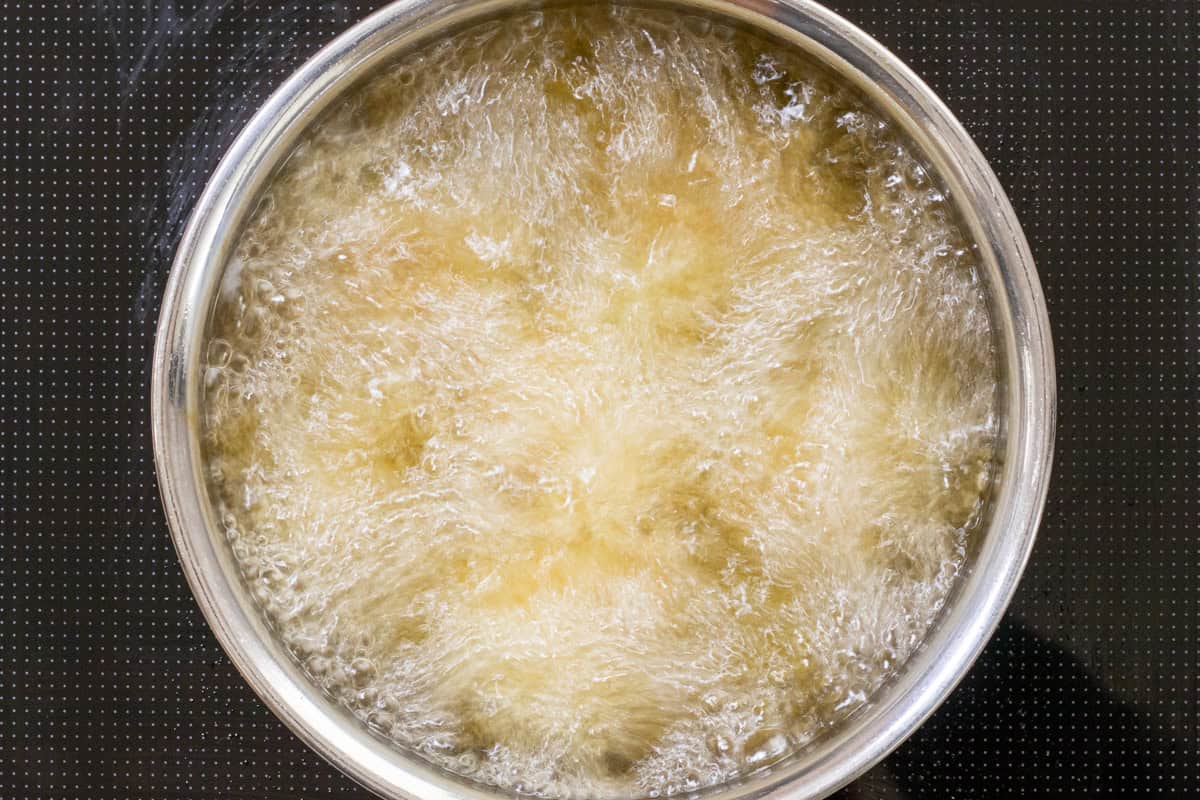
To make crispy and juicy karaage, it is crucial to deep-fry the chicken in two stages. First, cook it at 320℉ (160℃), then remove it and let it rest before frying it again at 360℉ (180℃). While you can make karaage by frying it just once, it won’t yield the best results. This is because achieving both a juicy interior and a crispy exterior with a single frying temperature is difficult.
For example, if you fry the chicken at 320℉ (160℃) for 5 minutes, it will be juicy, but the outside won’t be crispy enough. This happens because the oil temperature is too low to achieve that crispy texture.
On the other hand, if you fry it at 360℉ (180℃) for 3 minutes, the result won’t be proper karaage. While the exterior will be crispy, the inside will be dry. The high temperature causes the moisture inside the chicken to evaporate too quickly, making it tough and lacking juiciness.
The solution to this problem is double frying. First, fry the chicken at 320℉ (160℃) for 3 minutes to ensure the inside stays juicy. Then, increase the temperature to 360℉ (180℃) and fry it for about 1 minute. This method allows you to keep the chicken juicy while also making the exterior crispy.

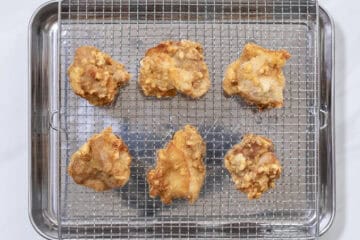
After the first fry, it is important to let the chicken rest for at least 3 minutes before frying it a second time. This resting period allows the residual heat to penetrate to the center of the meat, helping evaporate any remaining moisture in the coating.
To precisely control the temperature, using a cooking thermometer is the best option. However, if you don’t have one, you can also check the oil temperature by dropping a small piece of the flour mixture into the oil. If it slowly rises to the surface without touching the bottom, the oil temperature is around 320℉ (160℃). If it floats up more quickly, the oil temperature is at around 360℉ (180℃).
While managing the oil temperature and double frying might seem like extra work, once you taste the difference, you will see it’s well worth it. By using this authentic Japanese technique, you can achieve perfect karaage—crispy on the outside and tender and juicy on the inside.
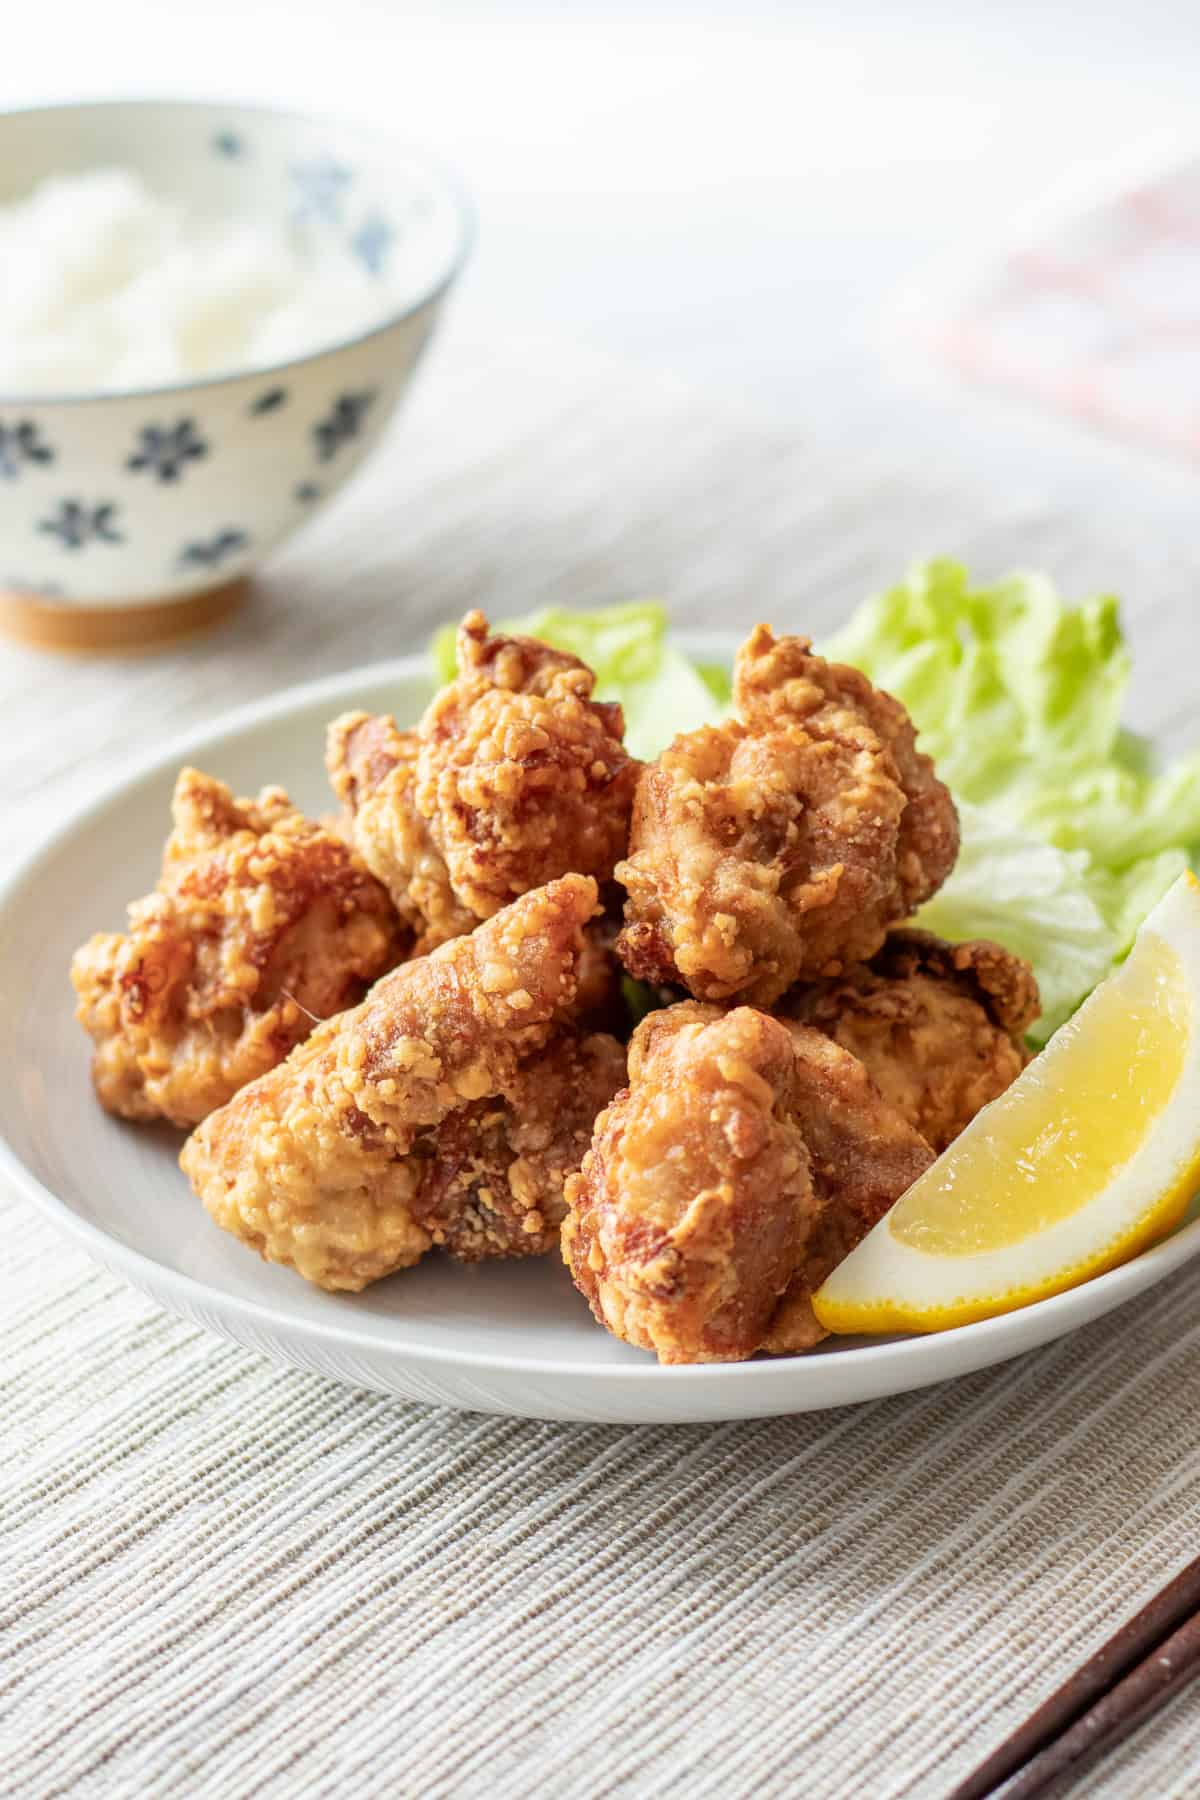
Serving suggestions
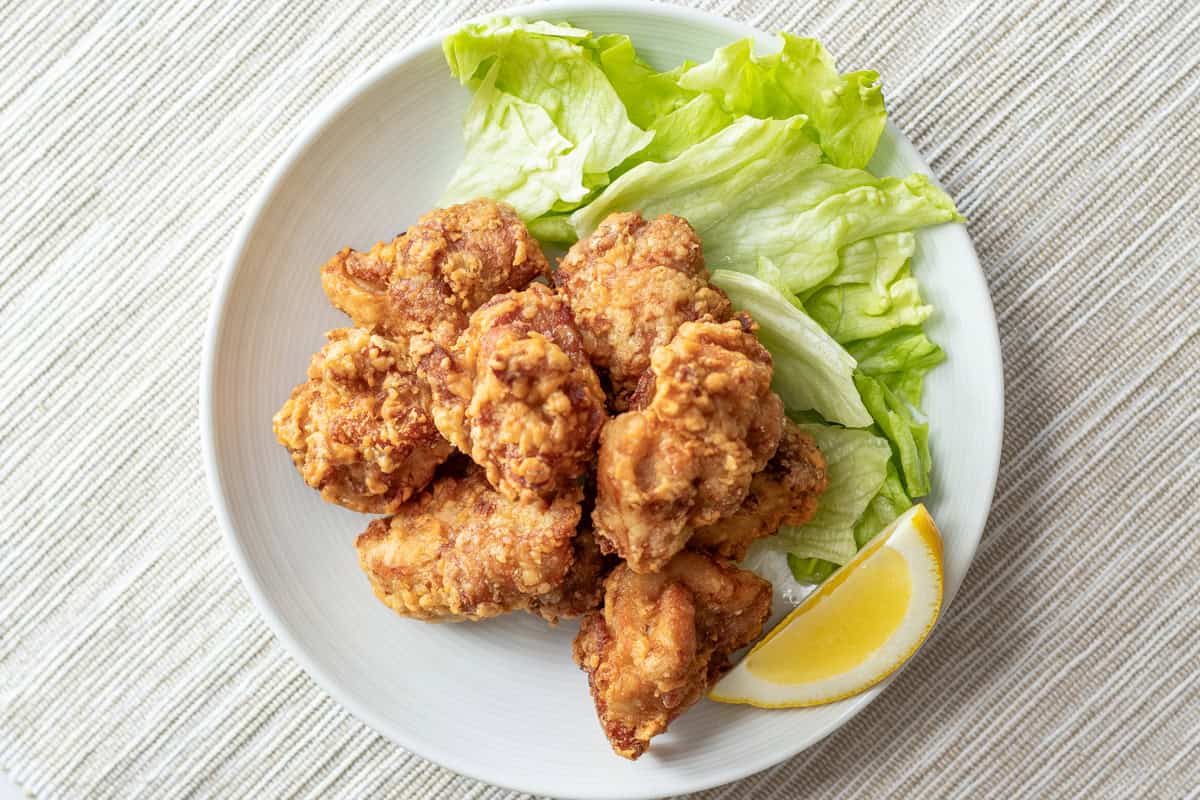
Chicken karaage is still enjoyable even after some time, but it is definitely best when freshly fried. Try to eat it while it's still warm for the best flavor.
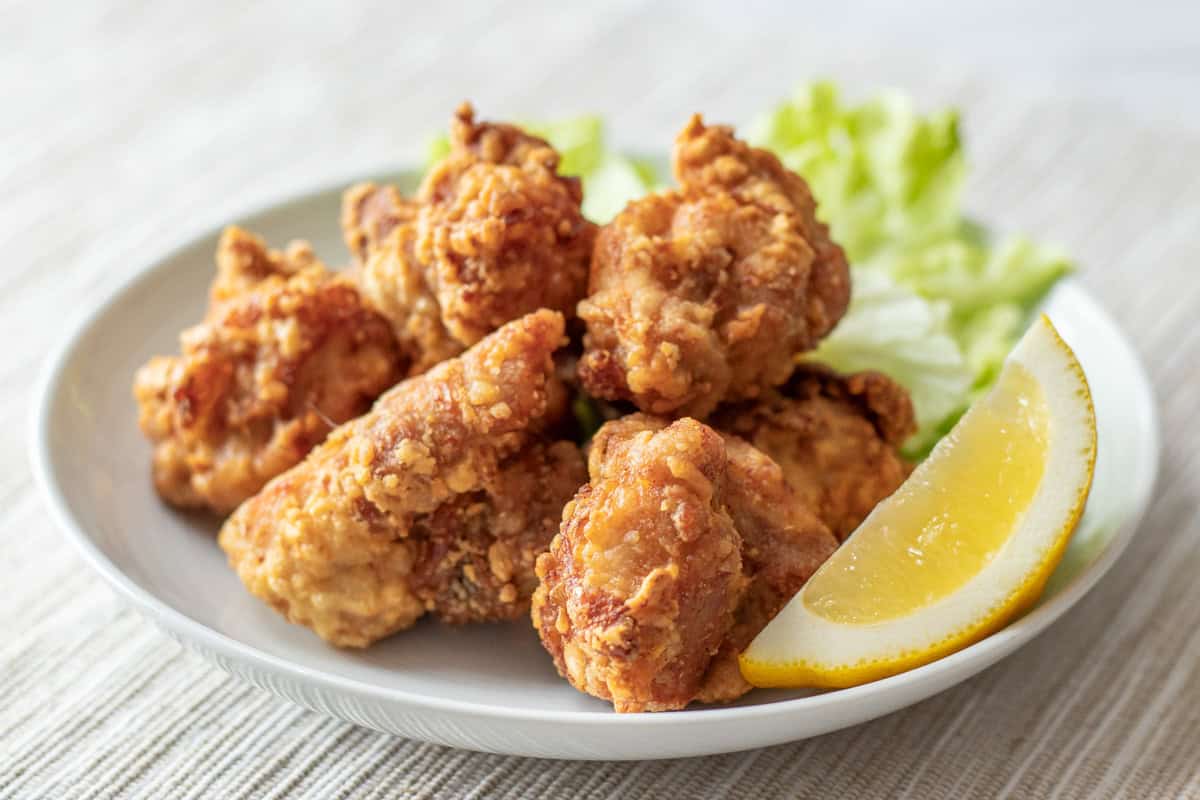
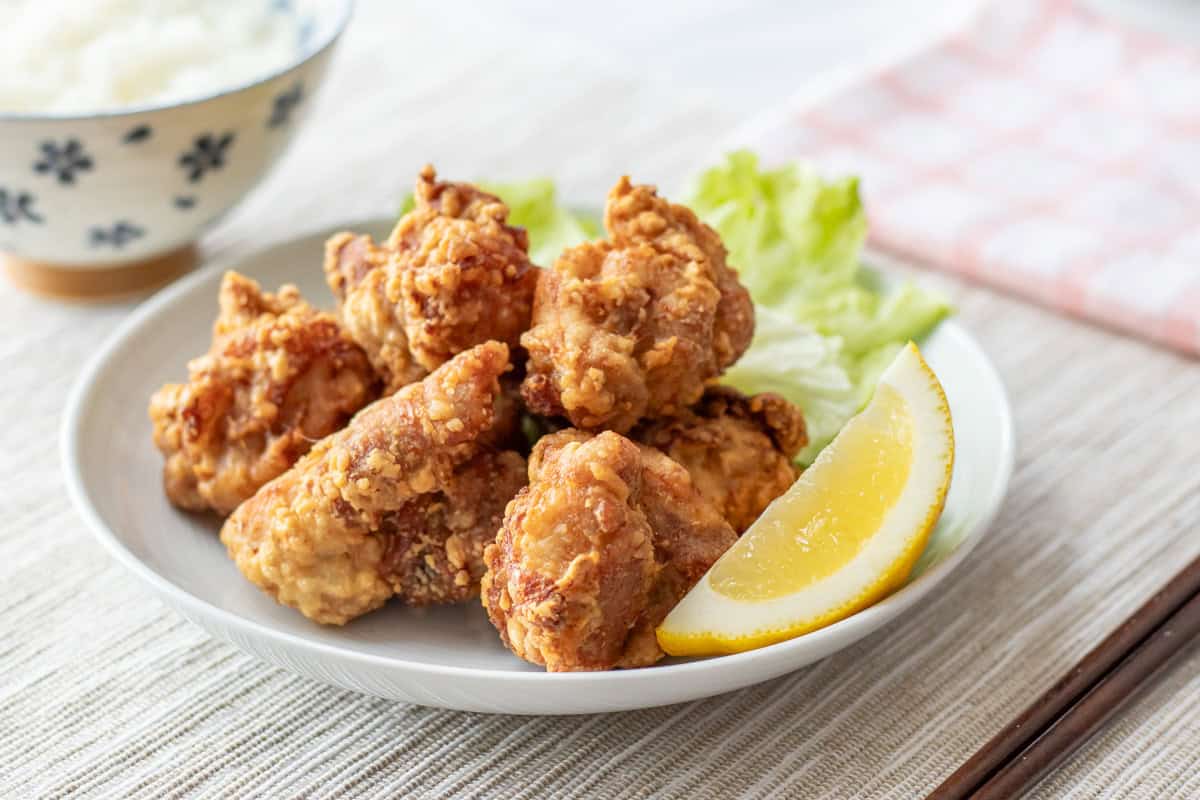
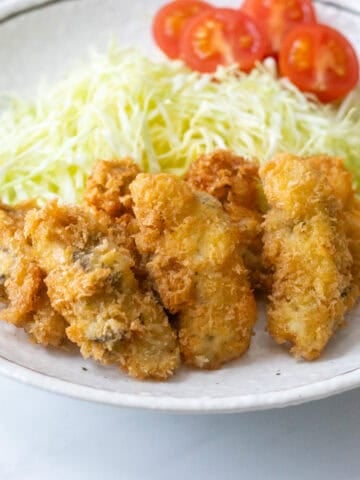
While it is delicious on its own, it is also common to squeeze a wedge of lemon over it for a refreshing twist. Feel free to add some if you like. For a more colorful presentation, you can also serve it with garnishes such as lettuce, parsley, cucumber, or tomatoes.
📋Step-by-step recipe
Ingredients
- 1 lb boneless, skin-on chicken thighs
- about 1.4 inches (3.5 cm) of neutral oil in a pot (for deep-frying)
For marinating:
- ½ tsp salt
- 1 tsp sugar
- 1 Tbsp sake
- 1 tsp grated garlic
- 2 tsp grated ginger
- 1 Tbsp soy sauce
For the coating:
- 2 Tbsp all-purpose flour (plain flour)
- 4 Tbsp potato starch or cornstarch or Japanese rice flour (komeko)
Garnishes (optional):
- lemon wedges
- fresh vegetables
Instructions
🕒 Total: 55 mins
Step 1
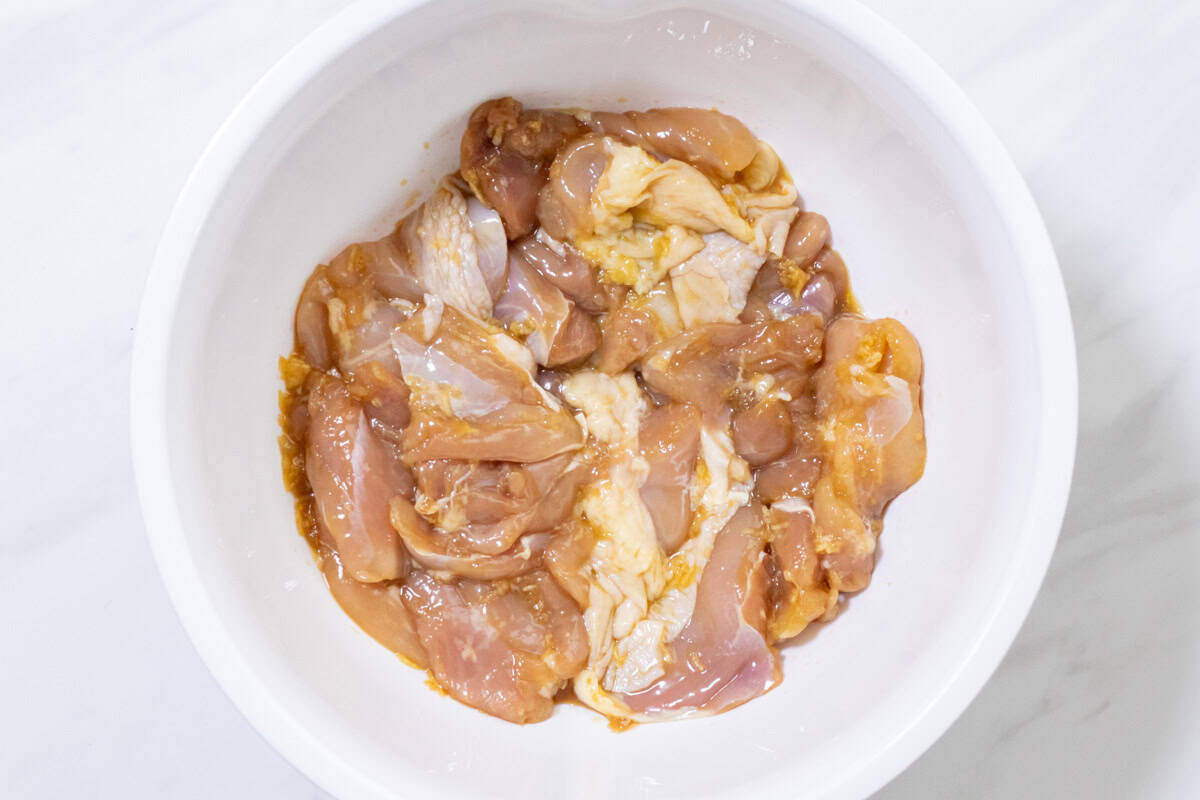
Remove any blood spots, yellow fat, cartilage, or tough tendons from the chicken thighs. Then, cut the meat into bite-sized pieces, about 1-1.5 oz (30-40 g) each, and transfer them to a bowl.

Step 2
In the bowl with the chicken, first add salt and sugar, and gently rub them in. Then, add sake, grated garlic, grated ginger, and soy sauce, and mix everything together again. Let it sit at room temperature for 20-30 minutes to allow the flavors to meld.
If you let it rest for more than 30 minutes, keep it in the refrigerator. In that case, take it out and let it return to room temperature before frying.
Step 3
In a separate bowl, combine flour and potato starch (or cornstarch or Japanese rice flour) and mix well. Add the seasoned chicken to this bowl and coat it evenly with the flour mixture. Let it sit for about 5-10 minutes to allow the coating to adhere properly to the chicken.

Step 4
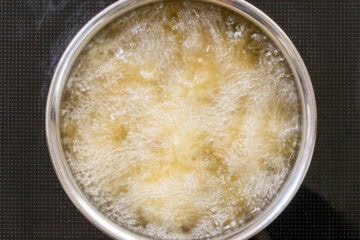
Heat oil in a pot to 320℉ (160℃). Once the oil is hot, carefully add the chicken pieces one at a time. Deep-fry them for 3 minutes.
Be careful not to add too many pieces at once, as this can cause the oil temperature to drop significantly. The chicken should occupy no more than about two-thirds of the oil’s surface area.
If you don’t have a cooking thermometer, you can check the oil temperature by dropping a small amount of the flour mixture into the oil.
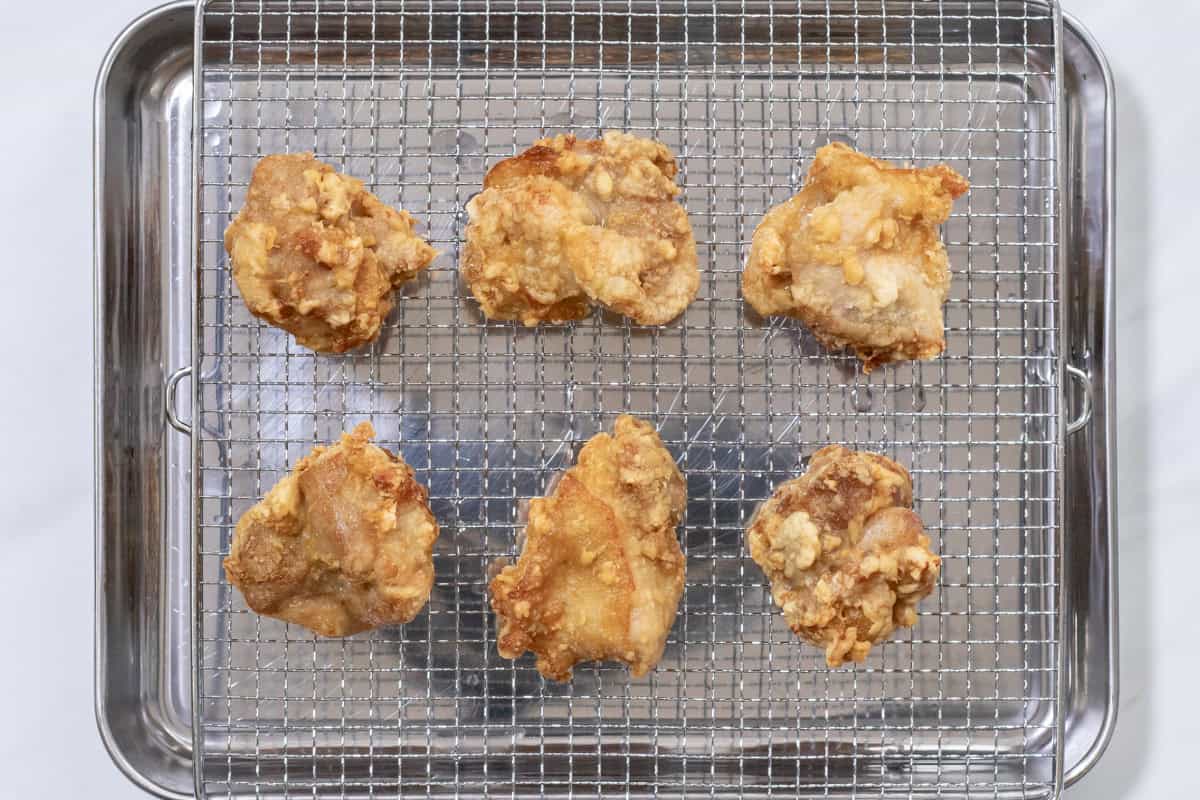
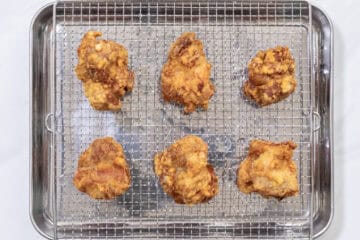
Step 5
Remove the chicken pieces from the oil and let them rest on a wire rack for at least 3 minutes. If there are any fried bits left in the oil, skim them out with a mesh skimmer or strainer. Repeat steps 4 and 5 until all the pieces are fried.
Step 6
Increase the heat and raise the oil temperature to 360℉ (180℃). Then, carefully add the chicken pieces back into the oil one at a time and fry them for about 1 minute until golden brown. As before, avoid adding too many pieces at once.
The 1-minute frying time is just a guideline. If the pieces are smaller, they will cook faster, and if they are larger, it will take longer. Once the chicken turns golden brown or starts floating to the surface of the oil, that’s a sign it’s done. Be careful not to overcook it—frying for too long will make the chicken dry and tough instead of juicy.

Step 7
Remove the chicken pieces from the oil and let them drain on a wire rack. If there are any fried bits left in the oil, skim them out with a mesh skimmer or strainer, then repeat steps 6 and 7 until all the pieces are double-fried.
Step 8
Serve the karaage on a plate. Feel free to garnish it with a lemon wedges and fresh vegetables of your choice.
To store
You can store it in the refrigerator for up to 3 days.
How to dispose of used cooking oil
After enjoying chicken karaage, it is essential to properly dispose of the oil used for deep-frying. Pouring large amounts of oil directly down the drain can clog pipes.
In Japan, the most commonly recommended method is to use an oil-solidifying powder. This powder solidifies the oil, making it easy to dispose of.
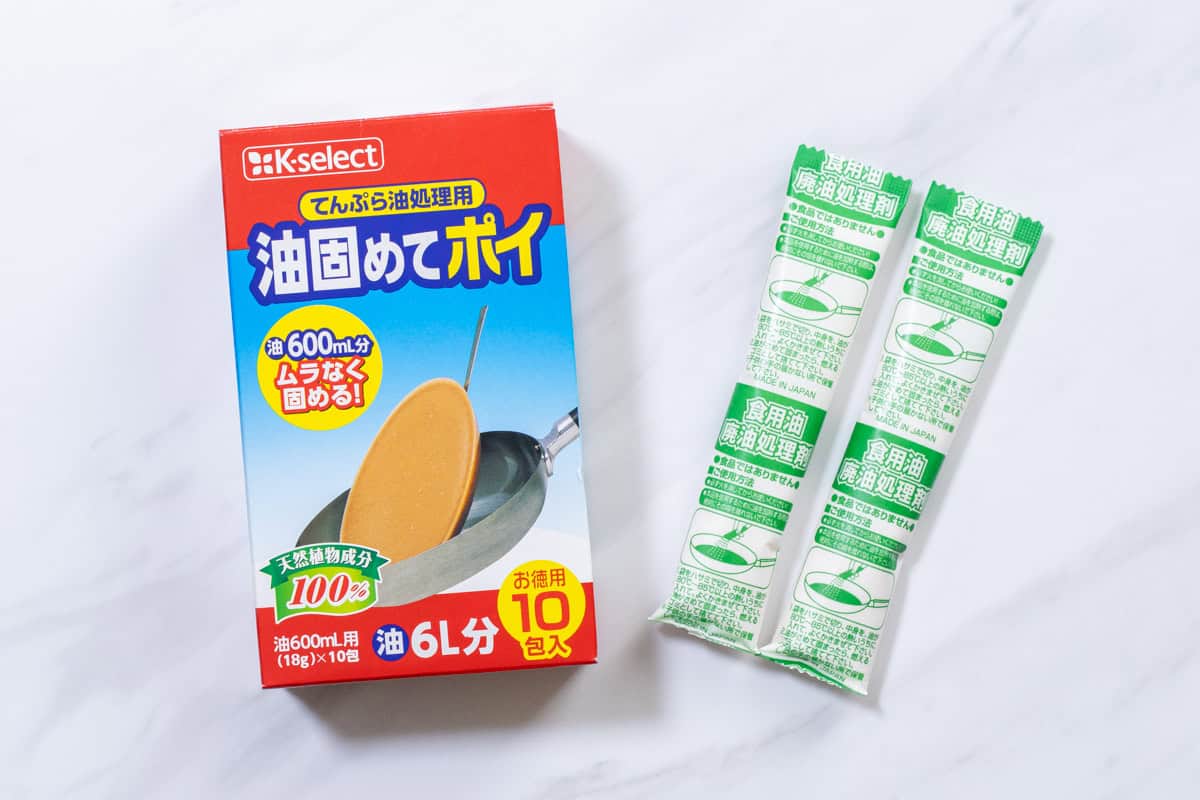
If this is not available locally, you can also use materials like newspaper to absorb the oil or pour it into an empty container after it has completely cooled.
When disposing of used oil, be sure to follow your local waste disposal regulations.
If you try this recipe, I’d love to hear what you think. Please consider leaving a review and star rating in the comments below. If you enjoyed it, I’d really appreciate it if you shared it with your friends.
More chicken recipes you'll love
Recipe card
Authentic Chicken Karaage (Japanese Fried Chicken)
Ingredients
- 1 lb boneless, skin-on chicken thighs
- about 1.4 inches (3.5 cm) of neutral oil in a pot (for deep-frying)
For marinating:
- ½ tsp salt
- 1 tsp sugar
- 1 Tbsp sake
- 1 tsp grated garlic
- 2 tsp grated ginger
- 1 Tbsp soy sauce
For the coating:
- 2 Tbsp all-purpose flour (plain flour)
- 4 Tbsp potato starch or cornstarch or Japanese rice flour (komeko)
Garnishes (optional):
- lemon wedges
- fresh vegetables
Instructions
- Remove any blood spots, yellow fat, cartilage, or tough tendons from the chicken thighs. Then, cut the meat into bite-sized pieces, about 1-1.5 oz (30-40 g) each, and transfer them to a bowl.

- In the bowl with the chicken, first add salt and sugar, and gently rub them in. Then, add sake, grated garlic, grated ginger, and soy sauce, and mix everything together again. Let it sit at room temperature for 20-30 minutes to allow the flavors to meld.If you let it rest for more than 30 minutes, keep it in the refrigerator. In that case, take it out and let it return to room temperature before frying.
- In a separate bowl, combine flour and potato starch (or cornstarch or Japanese rice flour) and mix well. Add the seasoned chicken to this bowl and coat it evenly with the flour mixture. Let it sit for about 5-10 minutes to allow the coating to adhere properly to the chicken.
- Heat oil in a pot to 320℉ (160℃). Once the oil is hot, carefully add the chicken pieces one at a time. Deep-fry them for 3 minutes.Be careful not to add too many pieces at once, as this can cause the oil temperature to drop significantly. The chicken should occupy no more than about two-thirds of the oil’s surface area.If you don’t have a cooking thermometer, you can check the oil temperature by dropping a small amount of the flour mixture into the oil.
- Remove the chicken pieces from the oil and let them rest on a wire rack for at least 3 minutes. If there are any fried bits left in the oil, skim them out with a mesh skimmer or strainer. Repeat steps 4 and 5 until all the pieces are fried.
- Increase the heat and raise the oil temperature to 360℉ (180℃). Then, carefully add the chicken pieces back into the oil one at a time and fry them for about 1 minute until golden brown. As before, avoid adding too many pieces at once.The 1-minute frying time is just a guideline. If the pieces are smaller, they will cook faster, and if they are larger, it will take longer. Once the chicken turns golden brown or starts floating to the surface of the oil, that’s a sign it’s done. Be careful not to overcook it—frying for too long will make the chicken dry and tough instead of juicy.
- Remove the chicken pieces from the oil and let them drain on a wire rack. If there are any fried bits left in the oil, skim them out with a mesh skimmer or strainer, then repeat steps 6 and 7 until all the pieces are double-fried.
- Serve the karaage on a plate. Feel free to garnish it with a lemon wedges and fresh vegetables of your choice.


Notes
- You can store it in the refrigerator for up to 3 days.
- The Nutrition Facts label assumes that the amount of oil absorbed by the chicken is approximately 8% of its weight. Garnishes are not included in the calculation.

Leave a Rating and a Comment