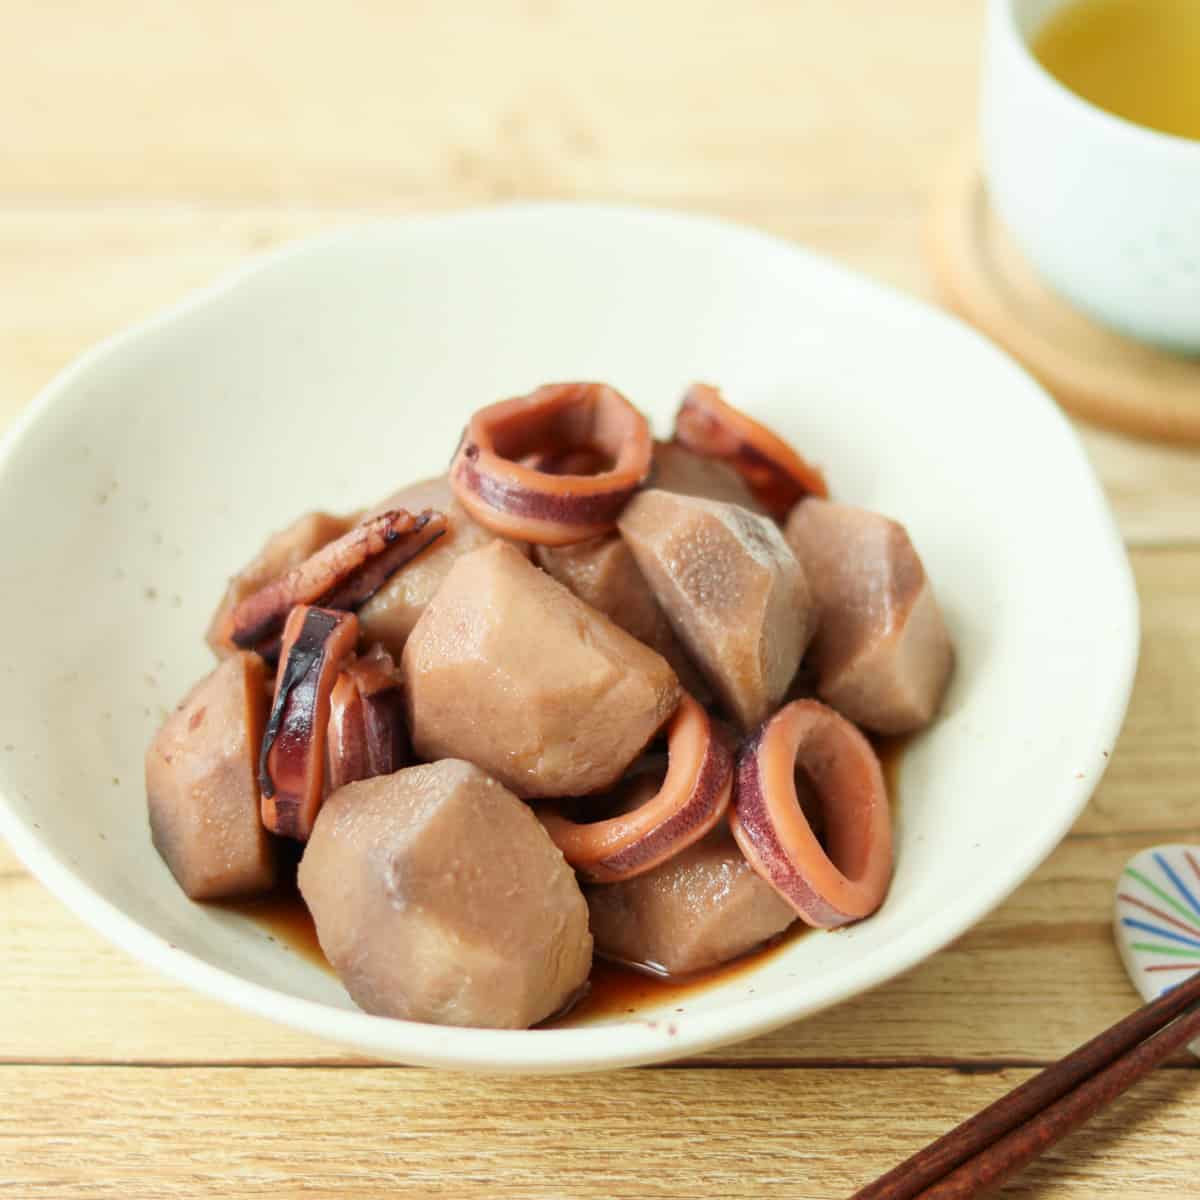
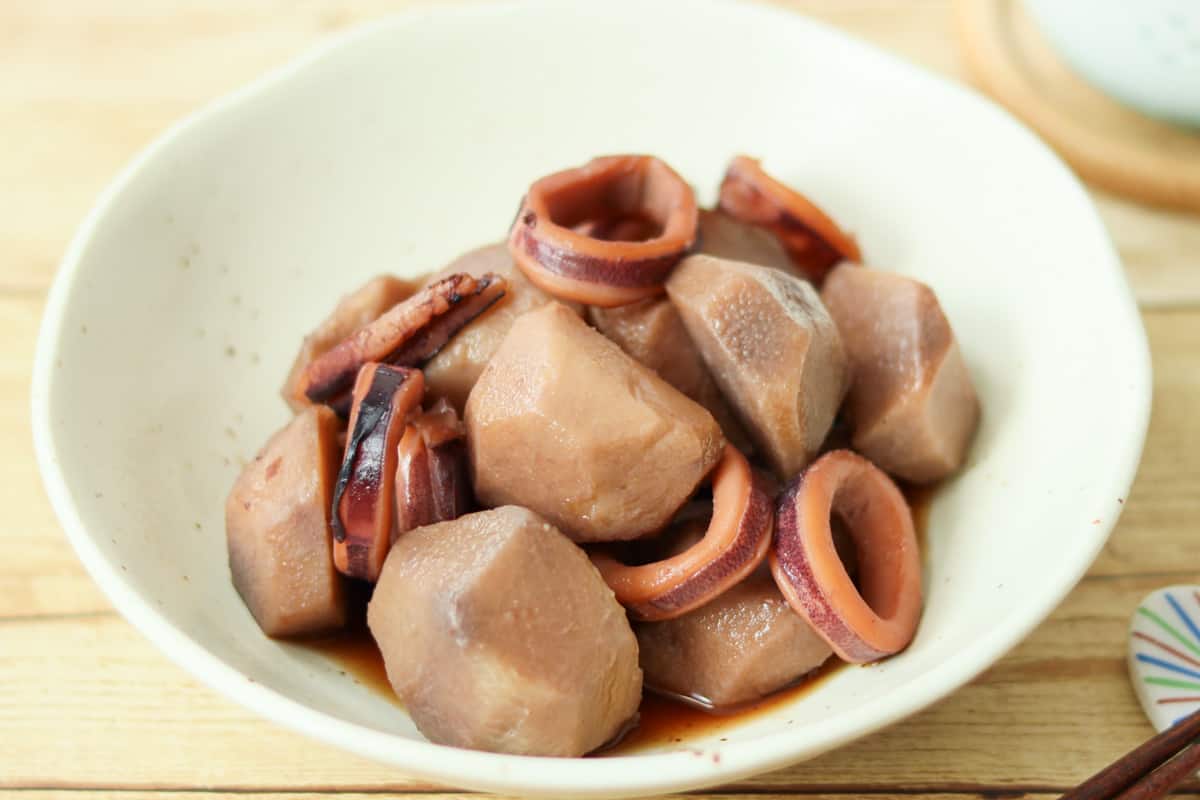
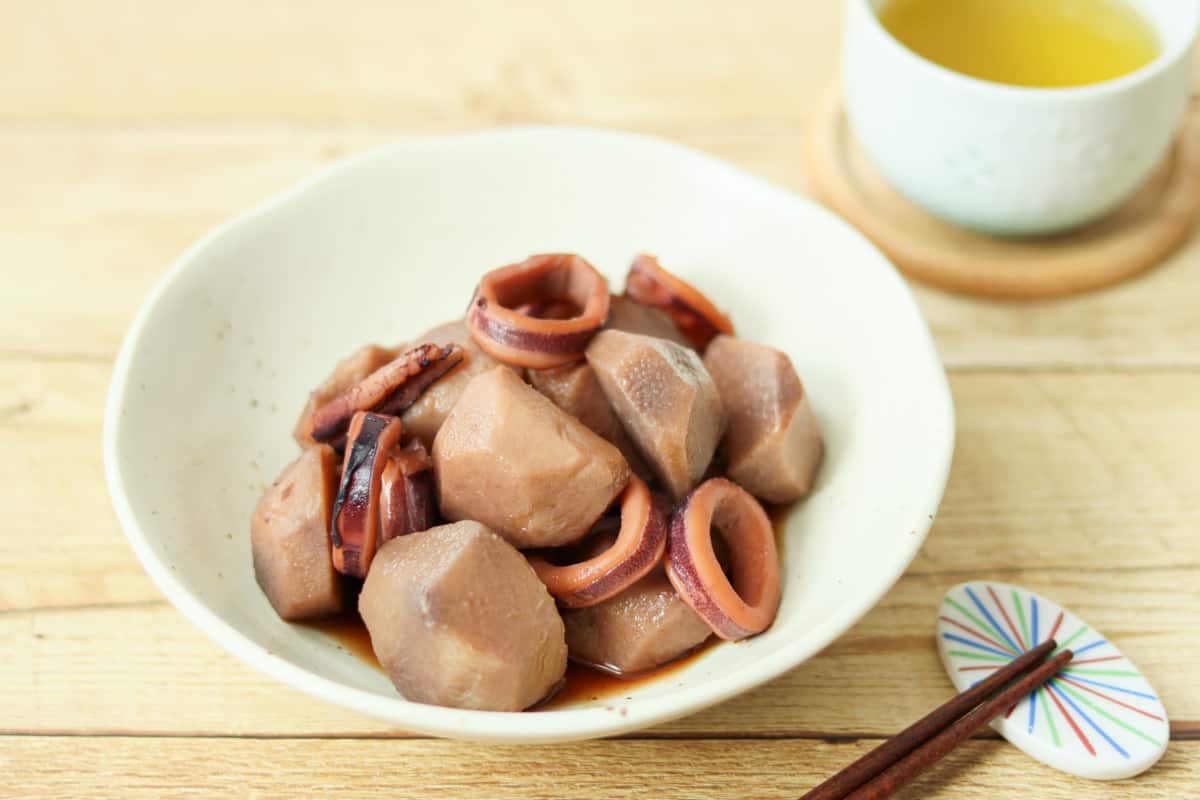
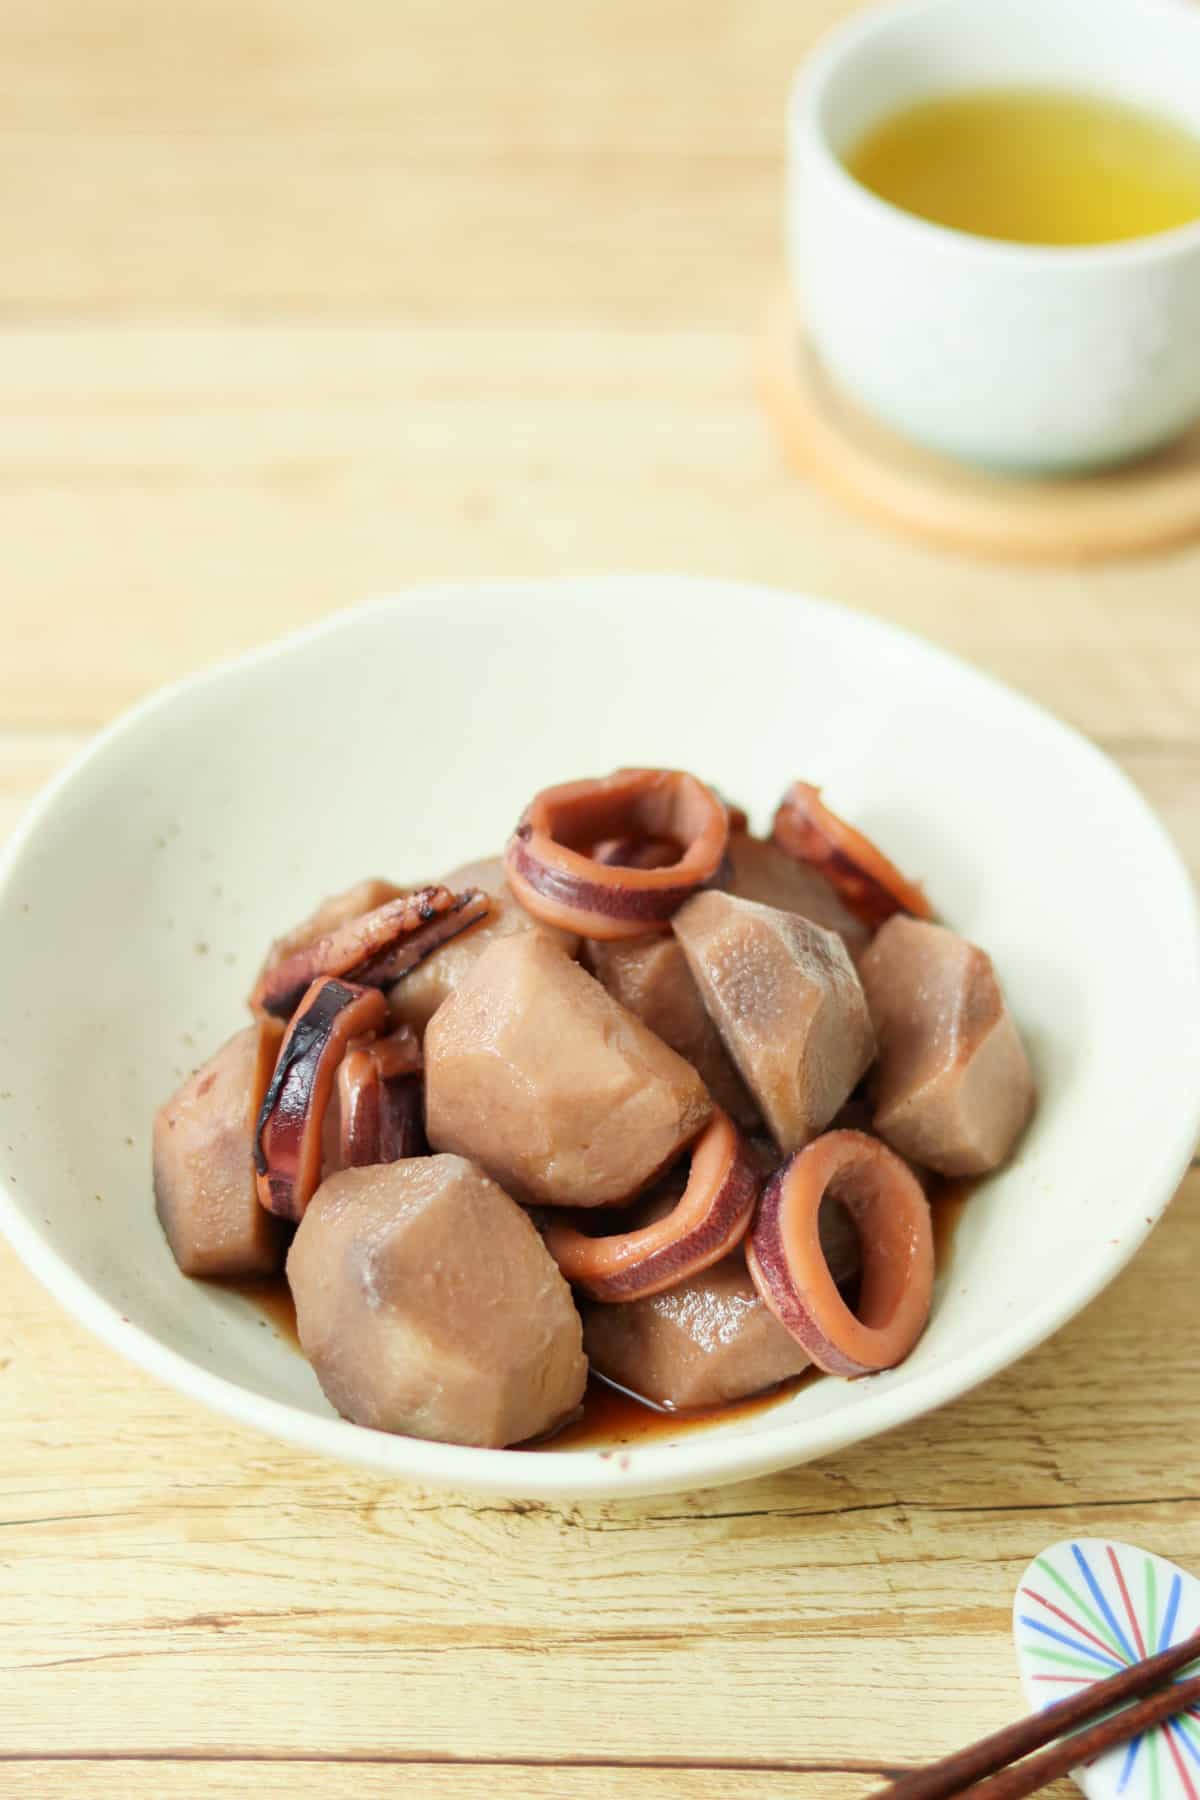
Why not try a classic Japanese comfort food? Simmered Taro and Squid is a traditional home-style dish in which the creamy texture of taro pairs nicely with the tenderness of squid. The sweet and savory simmering sauce, infused with squid flavor, offers a unique and delightful taste.
Jump to:
What is Simmered Taro and Squid?
Simmered Taro and Squid is a traditional Japanese dish made by simmering taro and squid in a sweet and savory sauce. In Japan, it is especially popular during the fall and winter months, when taro is in season. Originally a specialty of Toyama Prefecture—where both squid and taro are abundant—it has since become a staple simmered dish enjoyed across the country for its comforting balance of flavors.
What makes this dish so appealing is the harmony between its ingredients. The tender, slightly sticky taro pairs perfectly with the chewy, flavorful squid, while the sauce, infused with the squid’s natural umami, ties everything together into a comforting dish.
It is often enjoyed as a home-cooked meal, but you can also find it on the menu at izakayas and traditional Japanese restaurants. The dish truly reflects the Japanese culinary tradition of bringing out the natural flavors of the ingredients.
How to reduce taro’s sliminess
To bring out the best flavor in this dish, it is essential to prepare the ingredients properly. In particular, taro has a unique sliminess that requires a little extra care before cooking.
Taro’s creamy texture comes from its fine starch granules, but once peeled, it can become slimy. This sliminess is caused by water-soluble fiber. Excessive sliminess can affect the texture of the dish, so it is important to take steps to reduce it during preparation.
Here are two popular methods for reducing the sliminess of taro:
- Salt-rubbing method: Peel the taro, rub it with salt, and then rinse it with water.
- Boiling method: Boil the taro for about 5 minutes, then rinse it with water (it doesn’t matter whether you peel it before or after boiling).
In this recipe, I use the salt-rubbing method, but the boiling method works just as well. Feel free to use whichever method you prefer.
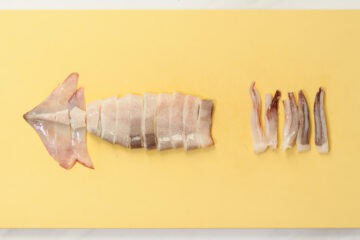
How to clean squid
To make this dish, you will need cleaned squid. Can you find it in your area? Even if you can't, cleaning squid is surprisingly easy, so I encourage you to give it a try.
Here is how to do it:
- There is a part just above the eyes where the mantle and tentacles of the squid connect; gently separate them with your fingers.
- Hold the mantle and tentacles in your hands, and carefully pull them apart.
- Remove the cartilage from inside the mantle and rinse out the cavity.
- Cut off the portion just below the squid's eyes.
- With your fingers, remove the beak located at the base of the tentacles, along with the tough parts of the suckers.
- Slit open the tube-like part at the base of the tentacles.
- Line up the tentacles and trim the tips so that they are all the same length as the shortest one.
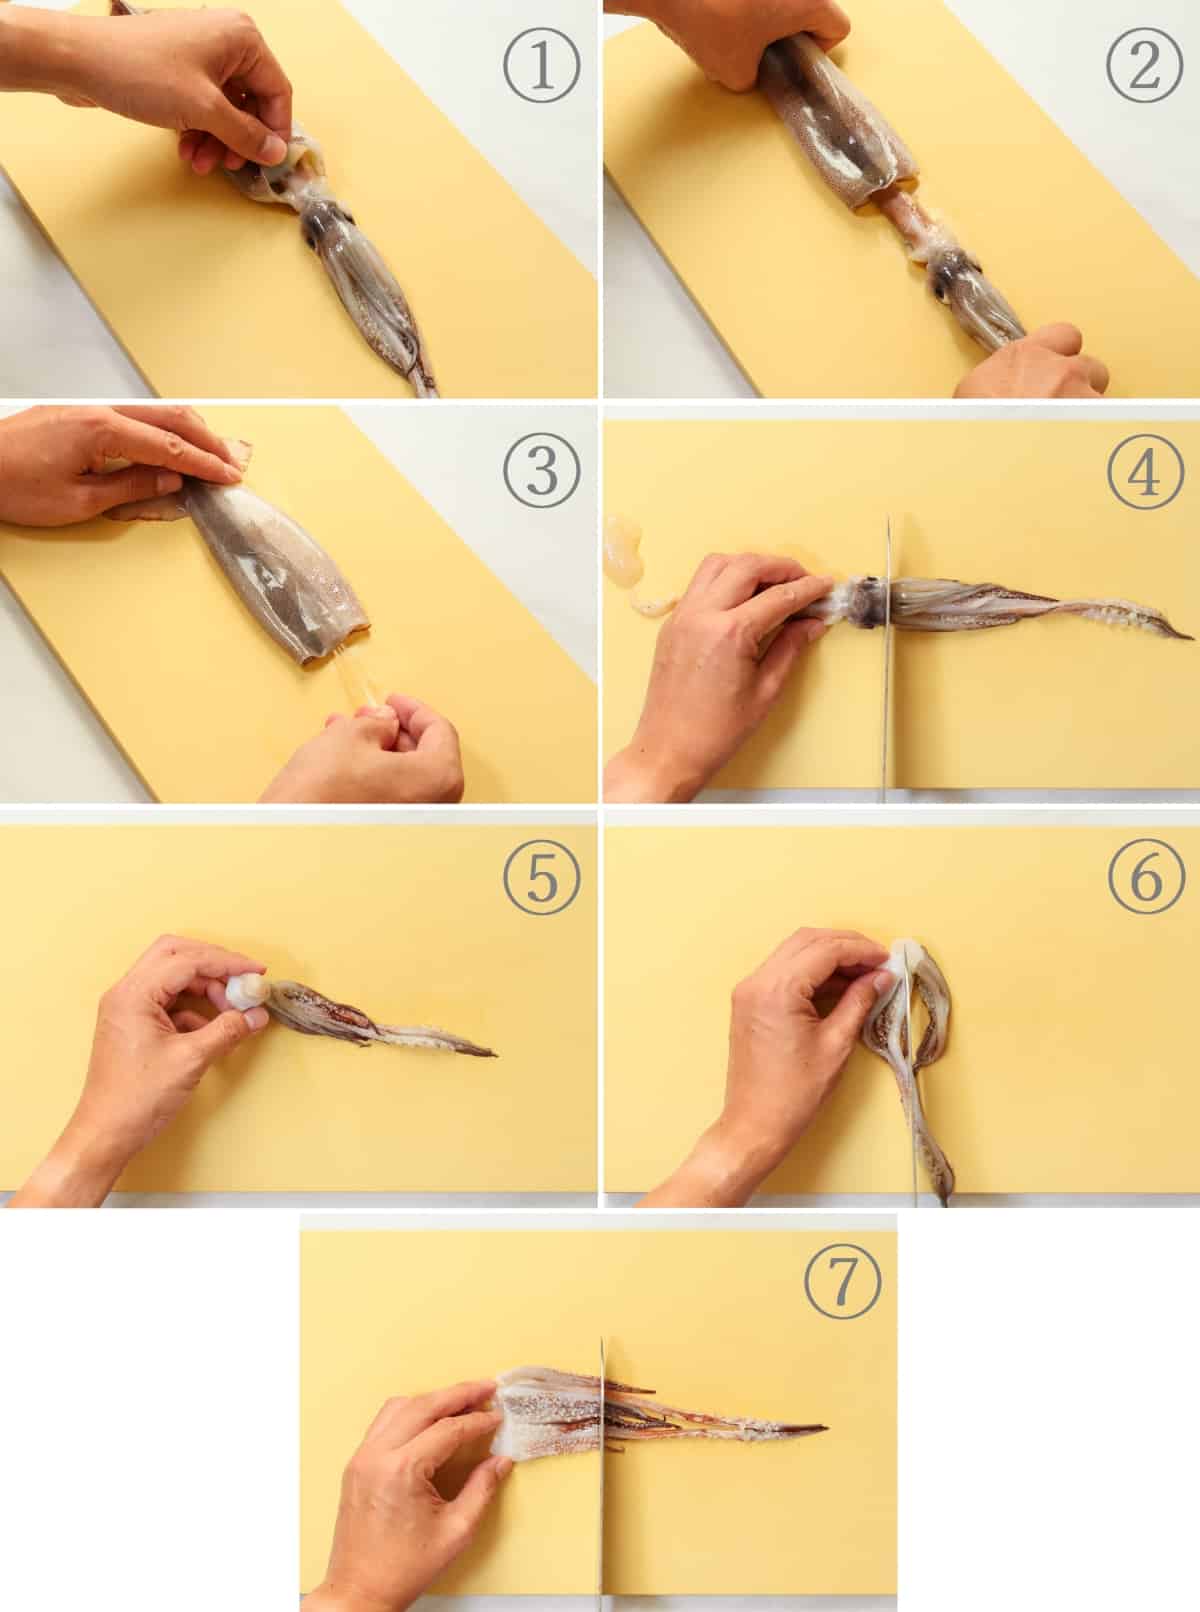
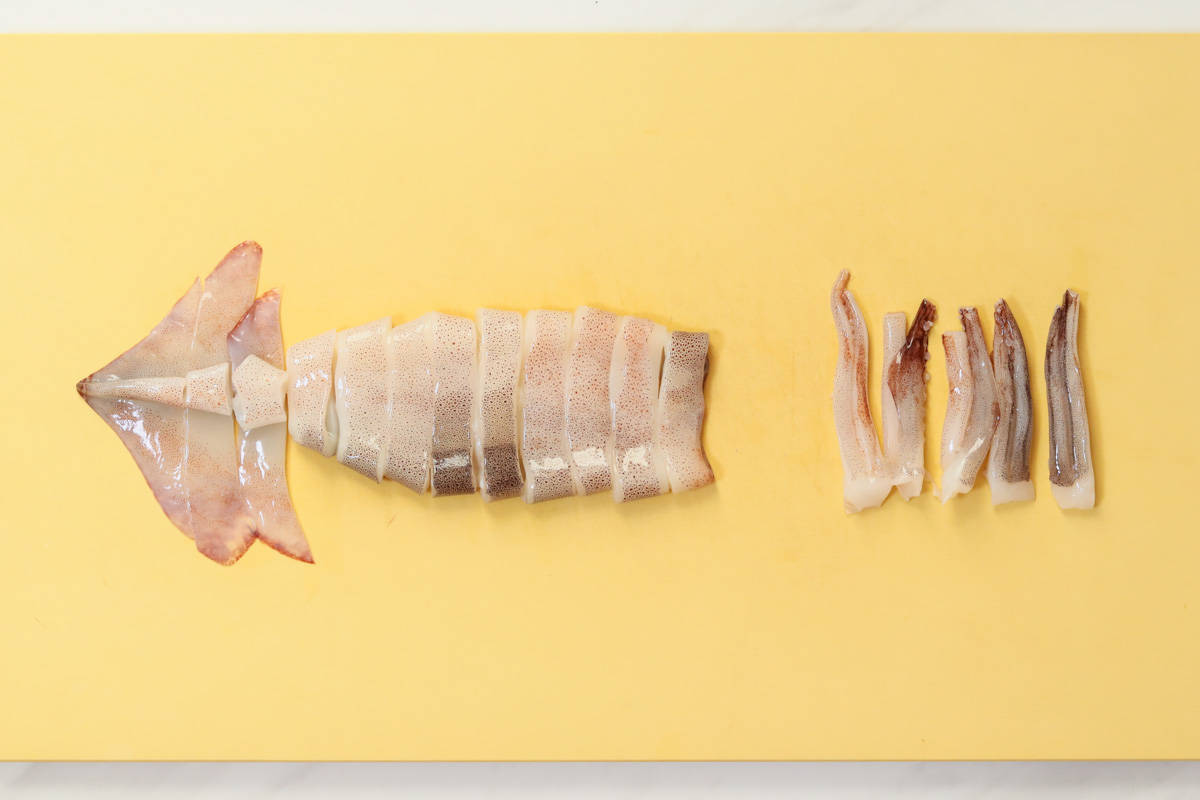
That's it for preparing the squid. For cooking, you will use the mantle and tentacles. It is not necessary to remove the skin for this dish.
If cleaning squid feels like too much of a hassle, you can also use pre-cut or frozen squid from the grocery store, although it may be slightly less flavorful.
Simple guide to otoshi-buta (drop lid)
Another point to keep in mind when making this traditional dish—or really, simmered dishes in Japan in general—is the use of an otoshi-buta (drop lid).
An otoshi-buta is a lid that sits directly on top of the ingredients in a pot or pan. Placing the lid directly on the ingredients allows the cooking liquid underneath to circulate more evenly, resulting in more efficient simmering with less liquid.
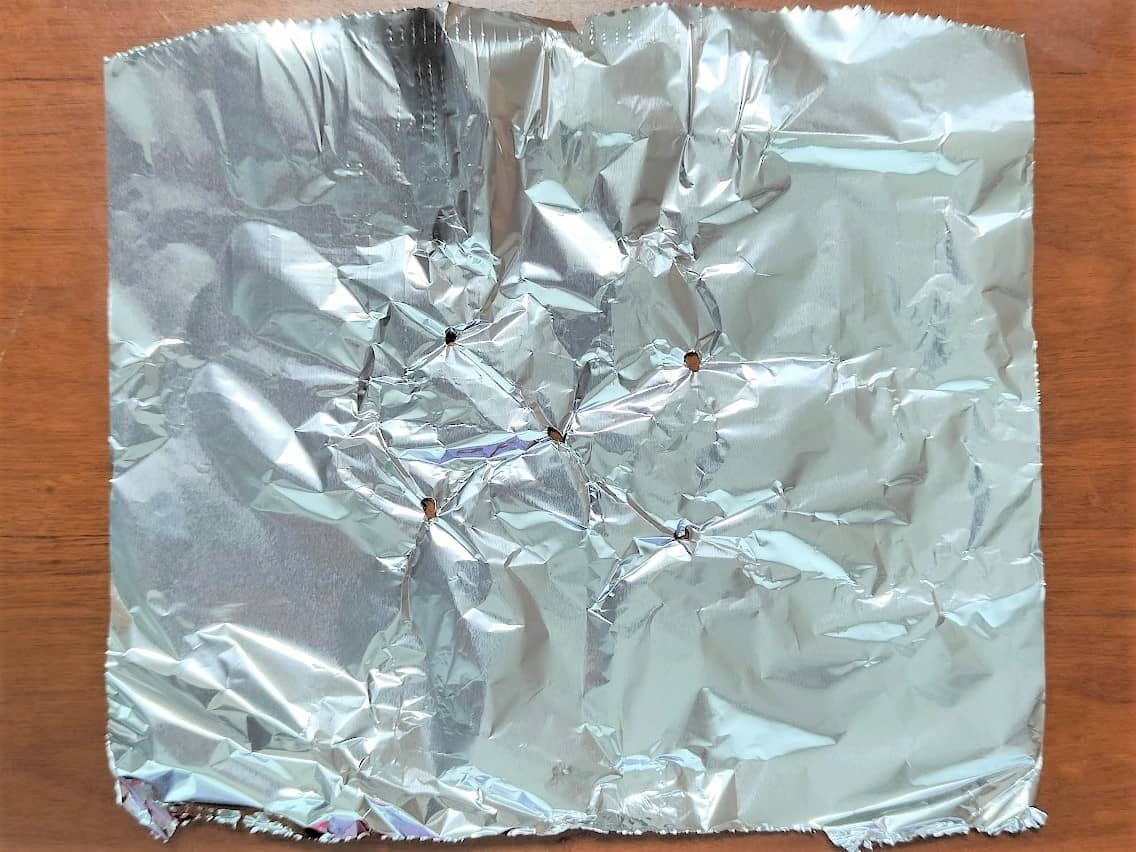
Commercial versions are available, but you can easily make one yourself by simply poking a large hole or several small ones in a sheet of aluminum foil—as shown in the photo above. The holes help prevent the otoshi-buta from floating up due to steam pressure.
You can use a regular lid instead, but since it is so easy to make, I recommend giving it a try.
📋Step-by-step recipe
Equipment
- otoshi-buta (drop-lid) (You can easily make one by following the instructions above. If that seems like too much trouble, you can simply use a regular lid instead.)
Ingredients
- 6 taro (eddoes) (about 1.6 oz/45 g each)
- ½ tsp salt (for the taro)
- 1 squid (cleaned, with skin and fins left intact; about ½ lb/230 g. For instructions on how to prepare squid, please refer to the section above titled "How to Clean Squid.")
- 1 cup water
- 1 Tbsp mirin
- 2 tsp sugar
- 1 Tbsp sake
- 2 Tbsp soy sauce
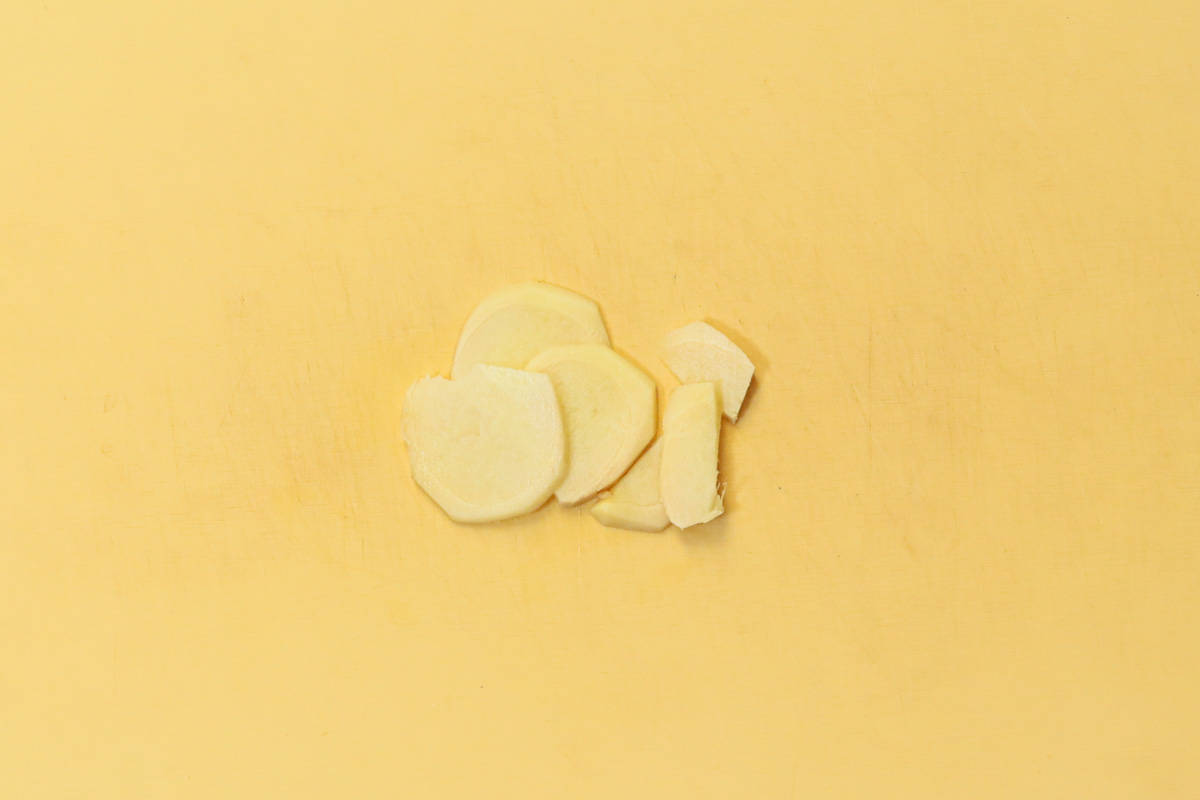
- 0.35 oz ginger (thinly sliced)
Instructions
🕒 Total: 40 mins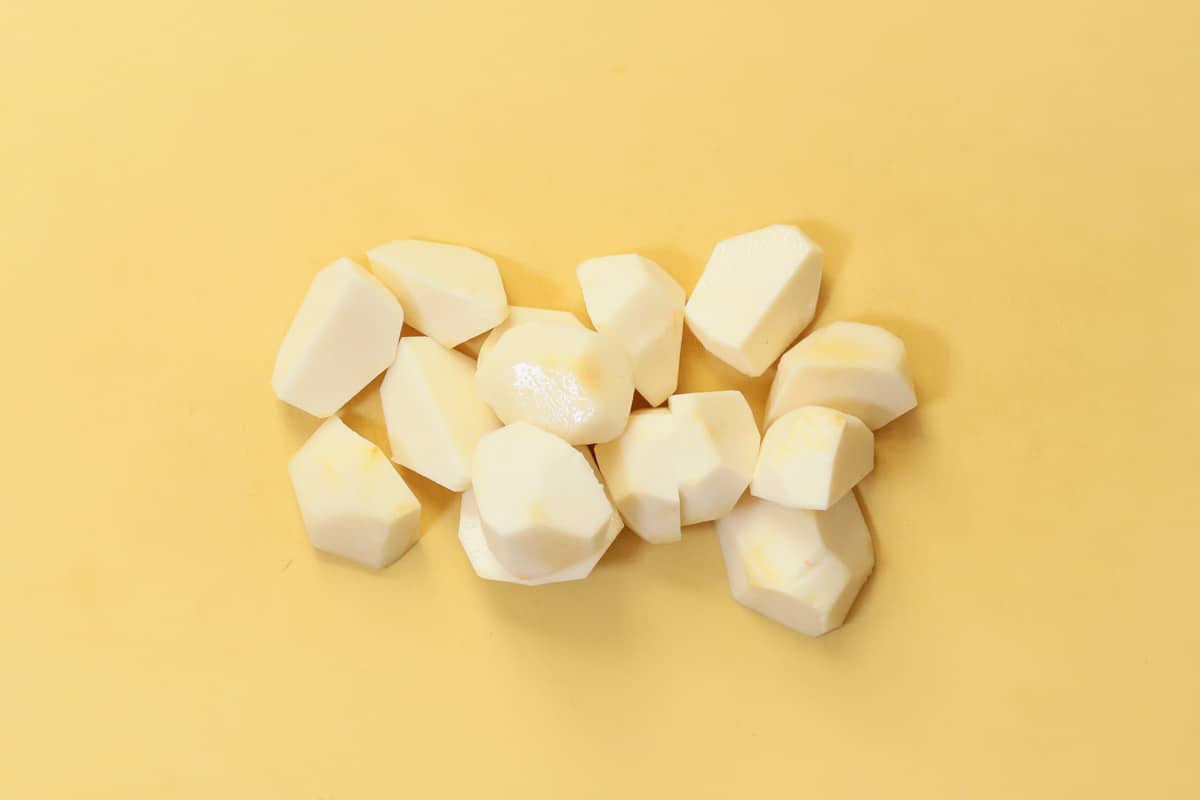
Step 1
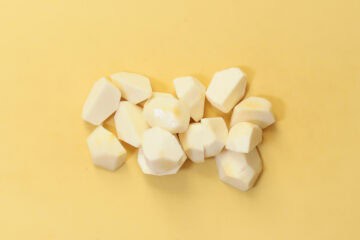
Wash and peel the taro. Sprinkle salt over it, rub it with your hands to reduce the sliminess, then rinse under running water. Cut the taro into 2 to 4 bite-sized pieces.
Step 2
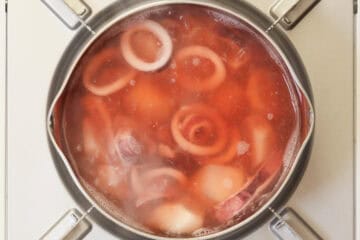
Slice the squid into rings about ⅖ inch (1 cm) wide, including the fins. Separate the tentacles into pairs.
Step 3
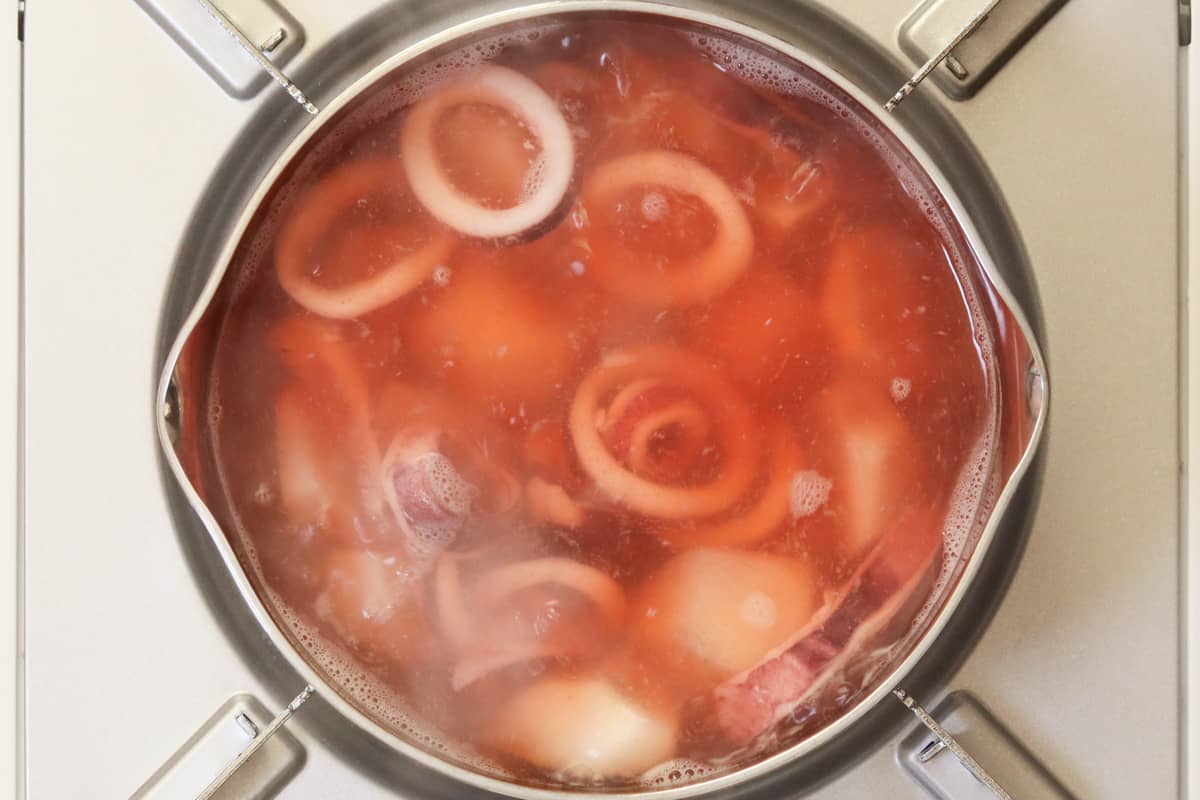
Combine water, mirin, and sugar in a pot. Add the taro and bring to a boil. Once boiling, add the squid and sake, and skim off any scum. Cover with an otoshi-buta and let it simmer over low heat for 15 minutes.
Step 4
Remove the otoshi-buta, then add soy sauce and ginger. Continue simmering, uncovered, for 10 minutes over medium-low heat.
To store
You can store it in the refrigerator for up to 3 days.
Cooking tips
- If you find it difficult to peel taro, wipe off any excess moisture first. This will help prevent the knife from slipping.
- Before heating the water, place the taro in a pot and bring it to a boil. This allows the taro to heat up gradually, which brings out its natural sweetness more effectively.
- Simmer the squid for at least 20 minutes in total. Cooking it longer will make it more tender.
If you try this recipe, I’d love to hear what you think. Please consider leaving a review and star rating in the comments below. If you enjoyed it, I’d really appreciate it if you shared it with your friends.
Another taro recipe you'll love
Recipe card
Simmered Taro and Squid
Equipment
- otoshi-buta (drop-lid) (You can easily make one by following the instructions above. If that seems like too much trouble, you can simply use a regular lid instead.)
Ingredients
- 6 taro (eddoes) (about 1.6 oz/45 g each)
- ½ tsp salt (for the taro)
- 1 squid (cleaned, with skin and fins left intact; about ½ lb/230 g. For instructions on how to prepare squid, please refer to the section above titled "How to Clean Squid.")
- 1 cup water
- 1 Tbsp mirin
- 2 tsp sugar
- 1 Tbsp sake
- 2 Tbsp soy sauce
- 0.35 oz ginger (thinly sliced)
Instructions
- Wash and peel the taro. Sprinkle salt over it, rub it with your hands to reduce the sliminess, then rinse under running water. Cut the taro into 2 to 4 bite-sized pieces.

- Slice the squid into rings about ⅖ inch (1 cm) wide, including the fins. Separate the tentacles into pairs.
- Combine water, mirin, and sugar in a pot. Add the taro and bring to a boil. Once boiling, add the squid and sake, and skim off any scum. Cover with an otoshi-buta and let it simmer over low heat for 15 minutes.
- Remove the otoshi-buta, then add soy sauce and ginger. Continue simmering, uncovered, for 10 minutes over medium-low heat.

Notes
- You can store it in the refrigerator for up to 3 days.

Leave a Rating and a Comment