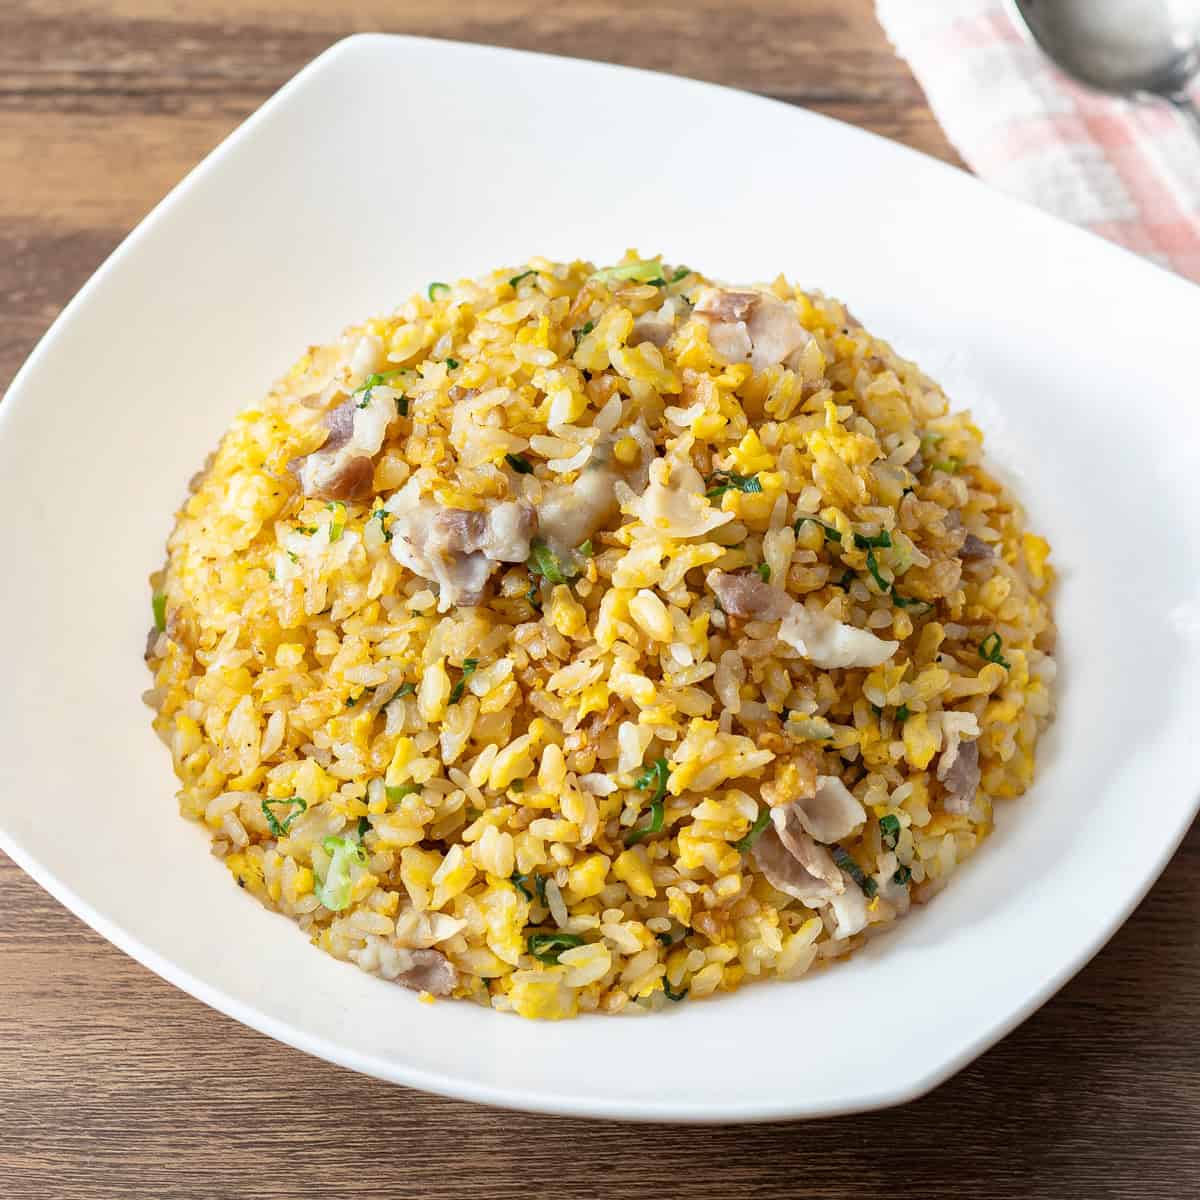
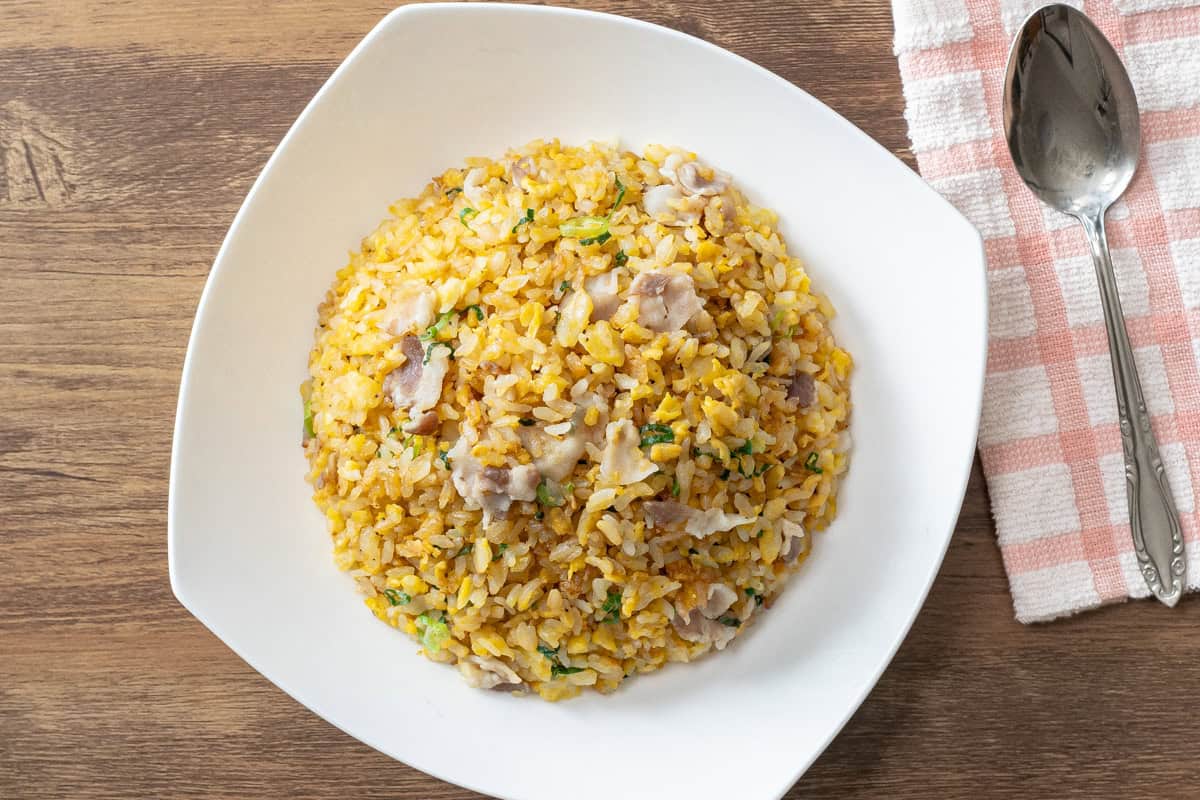
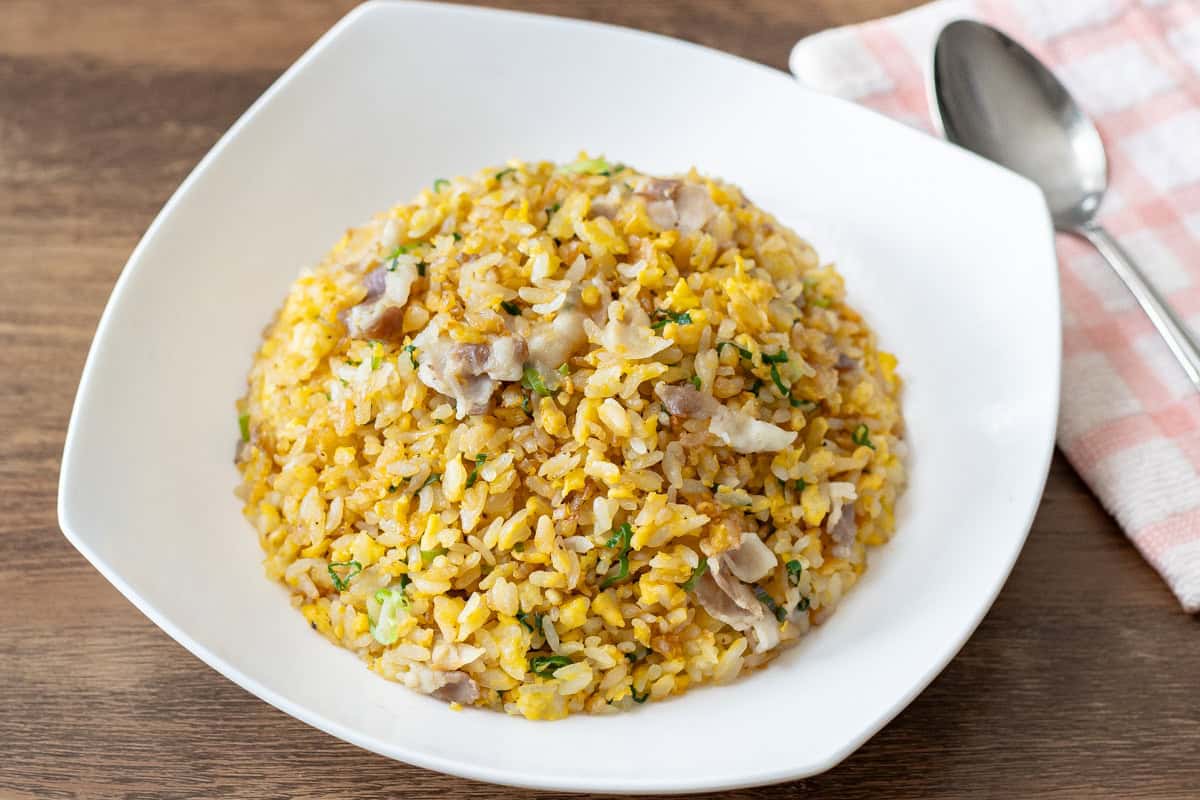
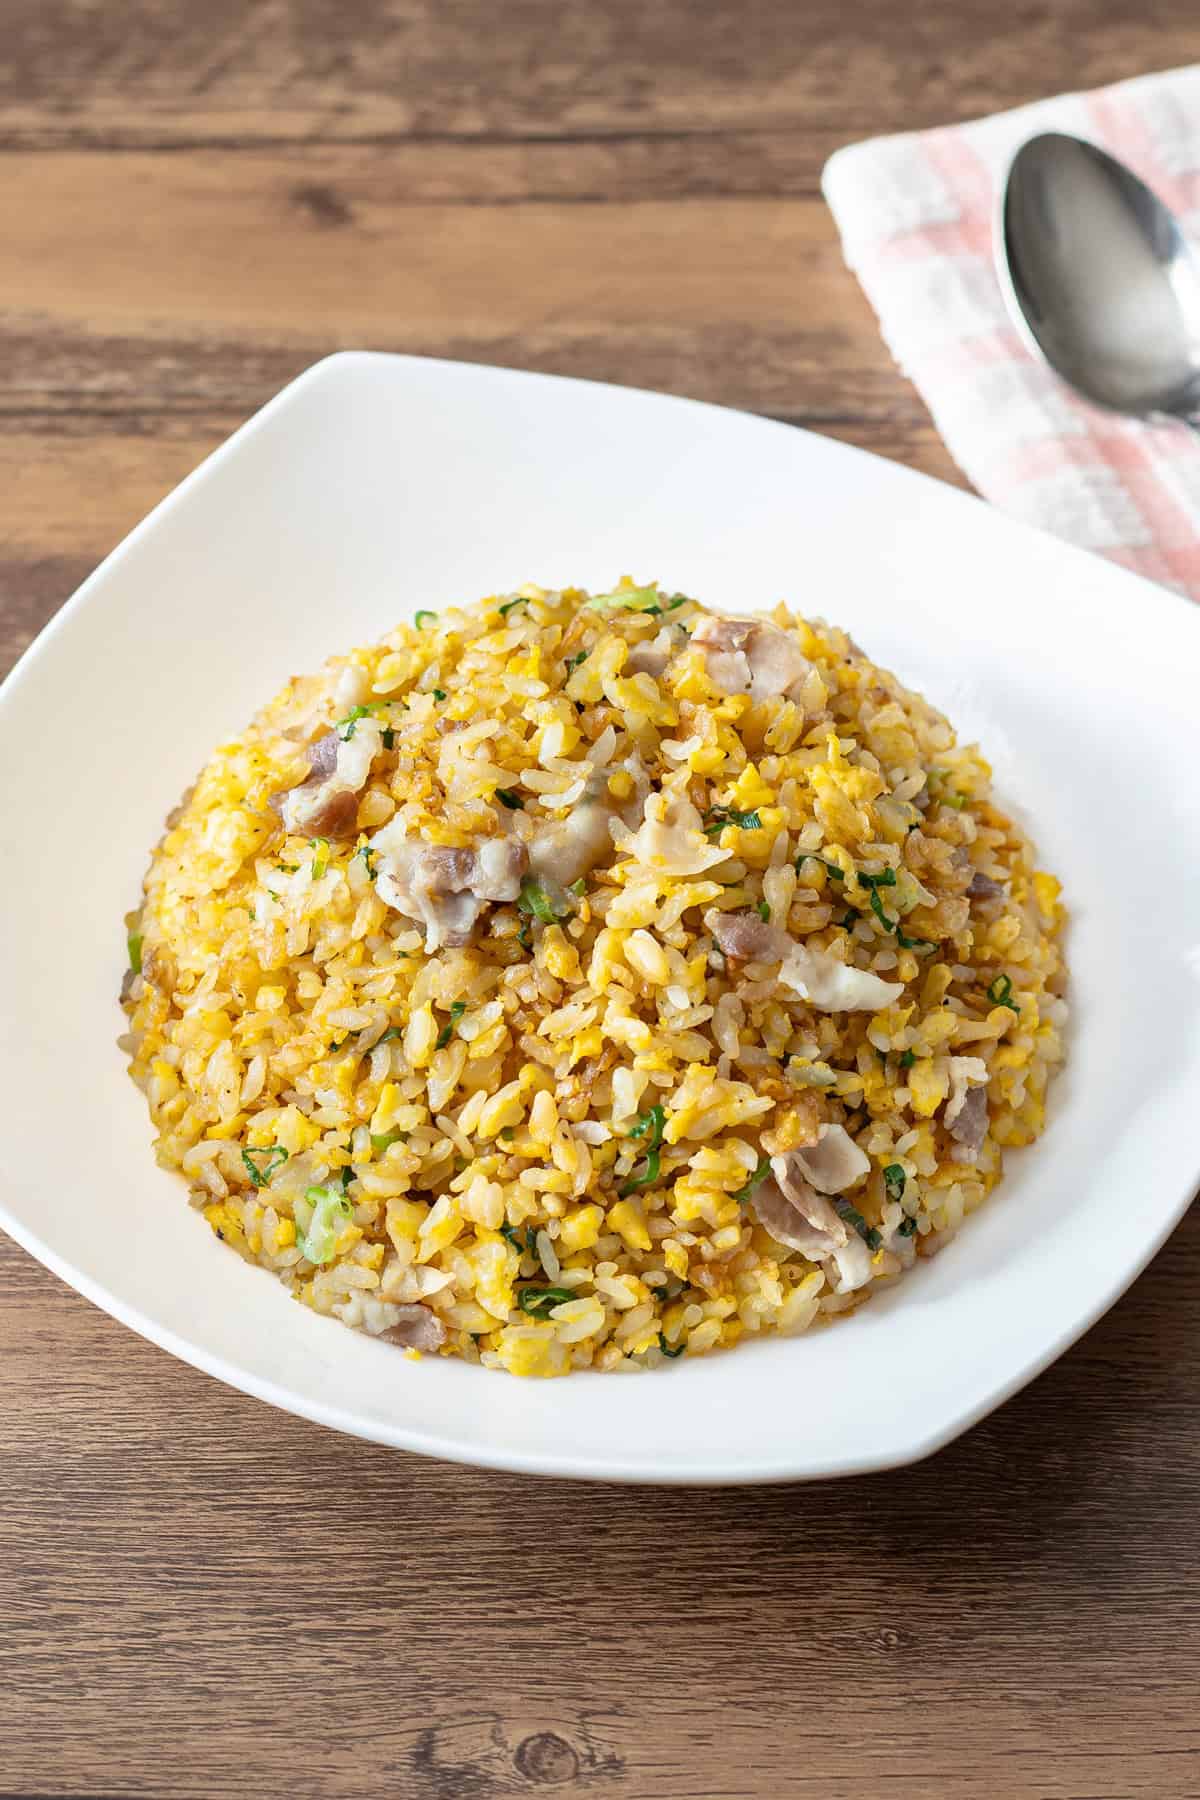
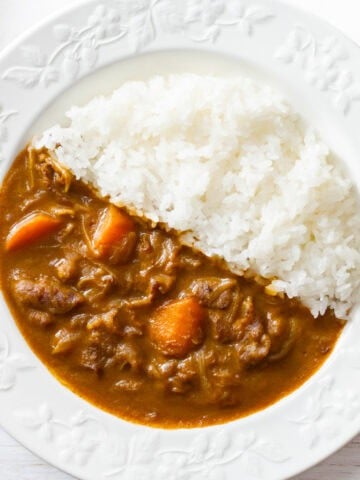
Yakimeshi is a popular Japanese dish that lets you enjoy rice stir-fried with a variety of ingredients, creating a comforting, savory flavor. Each grain of rice is separate yet slightly moist, and its appealing balance of flavors and textures has made it a favorite throughout Japan.
Jump to:
What is Yakimeshi?
Yakimeshi is a Japanese-style fried rice made by stir-frying cooked rice with ingredients such as eggs, meat, seafood, and vegetables in a pan or wok. “Yaki” means fried, and “meshi” refers to cooked rice. It originated in the mid-19th century when Chinese immigrants introduced chaofan (Chinese fried rice) to Japan, which is why it is also called "chāhan," the Japanese pronunciation of the Chinese dish's name.
The main difference between Japanese yakimeshi and Chinese chaofan lies in the type of rice used. Yakimeshi uses short-grain rice, which has a higher moisture content and a fluffy, slightly sticky texture with a subtle sweetness. As a result, even after stir-frying, the rice grains retain some moisture inside, and the dish has a slightly sweet finish.
If you make this dish without considering the rice’s characteristics, the grains tend to clump together rather than separating, resulting in a soggy texture. This is also a common mistake in Japanese home cooking. To avoid this, the recipe includes several tips to ensure that anyone can make yakimeshi with perfectly separated grains and a moist texture. It is surprisingly easy to make while still being authentic, so be sure to give it a try!
Common ingredients and seasonings
Yakimeshi is a simple dish. It is commonly made by stir-frying rice with ingredients and seasonings such as:
- Eggs
- Pork (such as pork belly, ground pork, ham, or chashu) or seafood (such as shrimp, squid, or other shellfish)
- Green onions or naganegi (Japanese leeks)
- Imitation crab
- Lettuce
- Cooking oil (lard, vegetable oil, sesame oil, etc.)
- Chicken bouillon powder
- Sake
- Salt
- Black pepper
- Soy sauce
No matter which ingredients you use, it is best to chop them into small pieces. This helps highlight the texture of each grain of rice. While adding a variety of ingredients brings richer flavor and color to the dish, you can also make it with just eggs. One of the appealing aspects of the dish is that you can easily prepare it with whatever ingredients you have on hand.
If you are aiming for restaurant-quality flavor, use lard as the cooking oil. It adds depth and richness, giving the dish a more authentic taste. It is also recommended to let the soy sauce briefly caramelize on the pan's surface before mixing it into the rice, as this imparts a savory aroma.
The choice of ingredients and the amount of seasoning vary from person to person, but there are not many specific techniques to focus on in that regard. Rather, the key to making delicious yakimeshi lies in the cooking process itself.
Tips for making perfect yakimeshi at home
The ideal yakimeshi features perfectly separated grains while retaining the natural moisture of short-grain rice. Achieving this at home requires a few tricks. Since short-grain rice is naturally sticky and the grains tend to clump together, simply stir-frying it won’t give you that perfectly separated finish.
To achieve the perfect texture, incorporate these tips into your cooking process:
- Mix the rice and eggs together before stir-frying.
- Avoid shaking the pan.
- Use chopsticks to loosen the rice.
By following just these three tips, anyone can easily achieve moist, perfectly separated grains. Let’s break down each point in detail.
Mix the rice and eggs together before stir-frying
The first tip is to mix the eggs with the rice in a bowl before cooking, rather than adding them directly to the pan. This coats each grain of rice with a thin layer of egg, making it less likely for the grains to stick together. As a result, it becomes easier to achieve separate grains.
Avoid shaking the pan
In restaurants, yakimeshi is typically made by shaking the wok or pan, but at home, the opposite approach works better. The reason is the difference in heat levels. Commercial stoves are much more powerful, so shaking the wok helps cook the rice and other ingredients evenly without burning them. Home stoves, on the other hand, are not as strong, so it is better to keep the pan still and avoid lowering the temperature.
When the pan temperature drops, excess moisture in the rice doesn’t evaporate properly, causing the rice to clump together. To prevent this, cook over high heat and keep the pan as hot as possible by minimizing unnecessary movement.
Use chopsticks to loosen the rice
Using chopsticks to break up the rice while stir-frying is also important. If you try to loosen the rice with a spatula—as you might with other stir-fries—you risk crushing the grains. When rice grains are crushed, the starch inside is released, which makes them more likely to clump together. Using chopsticks helps avoid this problem.
The method is simple: just move the chopsticks quickly side to side and back and forth, keeping them spread apart, as if cutting the connections between the grains. Since you are using them solely to separate the rice—not to pick anything up—even people unfamiliar with chopsticks can do this easily. If you don’t have chopsticks on hand, a slim utensil or any similar narrow tool can work as a substitute.
Why you should use freshly cooked rice
Some of you may have come across yakimeshi recipes in books or online that recommend using cold rice. The reason for this is that cold rice loses some of its stickiness, making it easier to achieve separate grains.
However, I strongly advise against this approach. While it does make it easier to separate the grains, it also sacrifices the moist texture that defines short-grain rice. Since rice is the star of yakimeshi, compromising its natural qualities undermines the entire purpose of the dish. Another downside is that cold rice doesn't absorb flavors as effectively.
So, what kind of rice should you use? Freshly cooked rice is best. You can cook the rice using a standard method, but cooking it slightly firmer by using about 10% less water helps the grains separate more easily during stir-frying.
You might worry that using freshly cooked rice will cause it to clump together, but rest assured—it works perfectly. This method is also used by many professional chefs in Japan. Give it a try with the recipe and see for yourself how beautifully the rice separates.
📋Step-by-step recipe
Ingredients
- 11.3 oz freshly cooked Japanese short-grain rice (2 servings)
- 0.5 oz green onions (scallions) or Japanese leek (naganegi)
- 2.5 oz pork belly (ground pork, ham, or chashu can be substituted)
- a pinch of salt (for the pork)
- 3 large eggs (about 2.1 oz/60 g each, including shell)
- 1 tsp Chinese-style chicken bouillon powder
- ¼ tsp salt
- a pinch of ground black pepper
- 1 Tbsp lard (other cooking oils can be substituted)
- 1 Tbsp soy sauce
Instructions
🕒 Total: 12 mins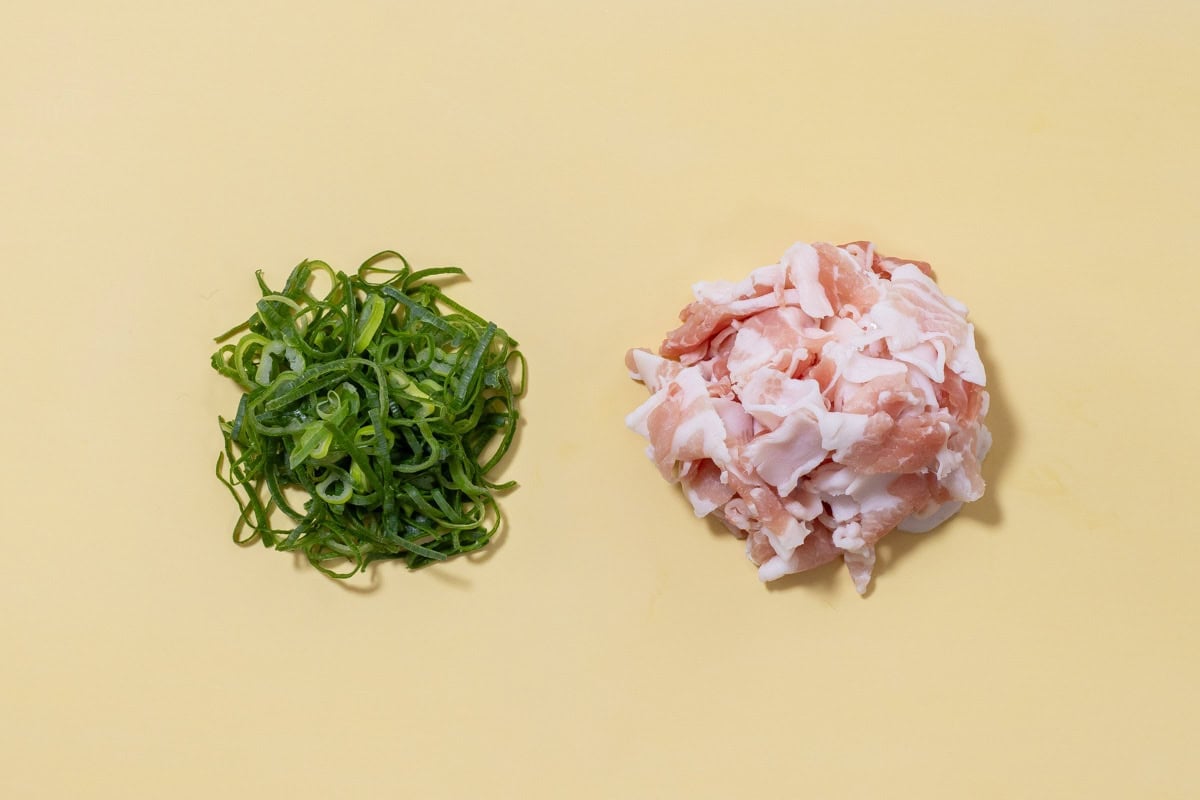
Step 1
Thinly slice the green onions. Cut the pork belly into small pieces, about ½ inch (1-1.5 cm) or smaller.

Step 2
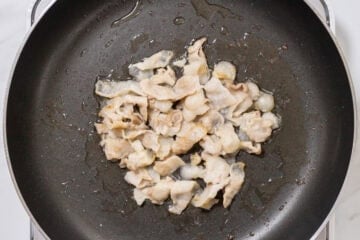
Heat a small amount of oil in a pan. Once the pan is hot, add the pork belly, season with salt, and sauté over medium heat until cooked through. Transfer the cooked pork to a separate plate and set it aside. (Keep the rendered fat in the pan to use later.)
Step 3
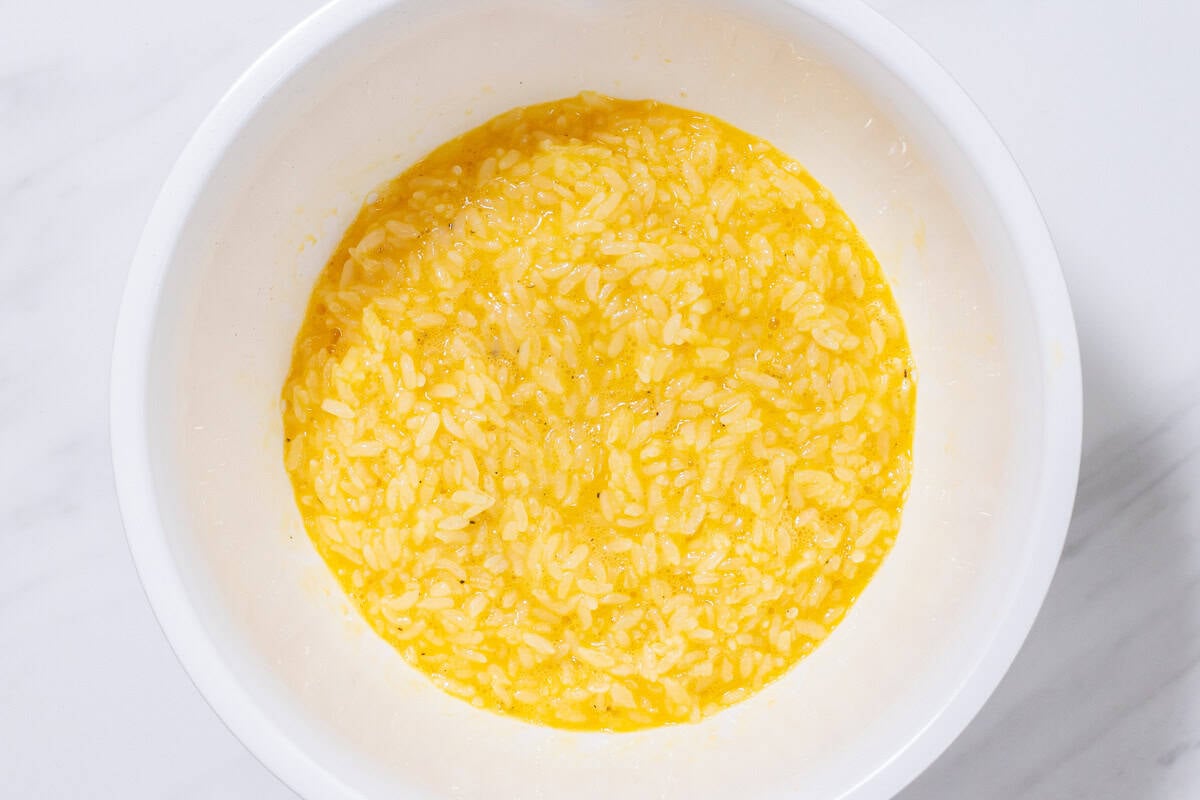
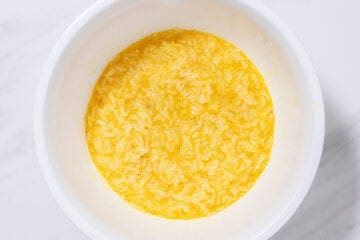
Crack the eggs into a bowl and beat them. Add the freshly cooked rice, chicken bouillon powder, salt, and black pepper, and mix well until the rice is evenly coated with the egg.
Step 4
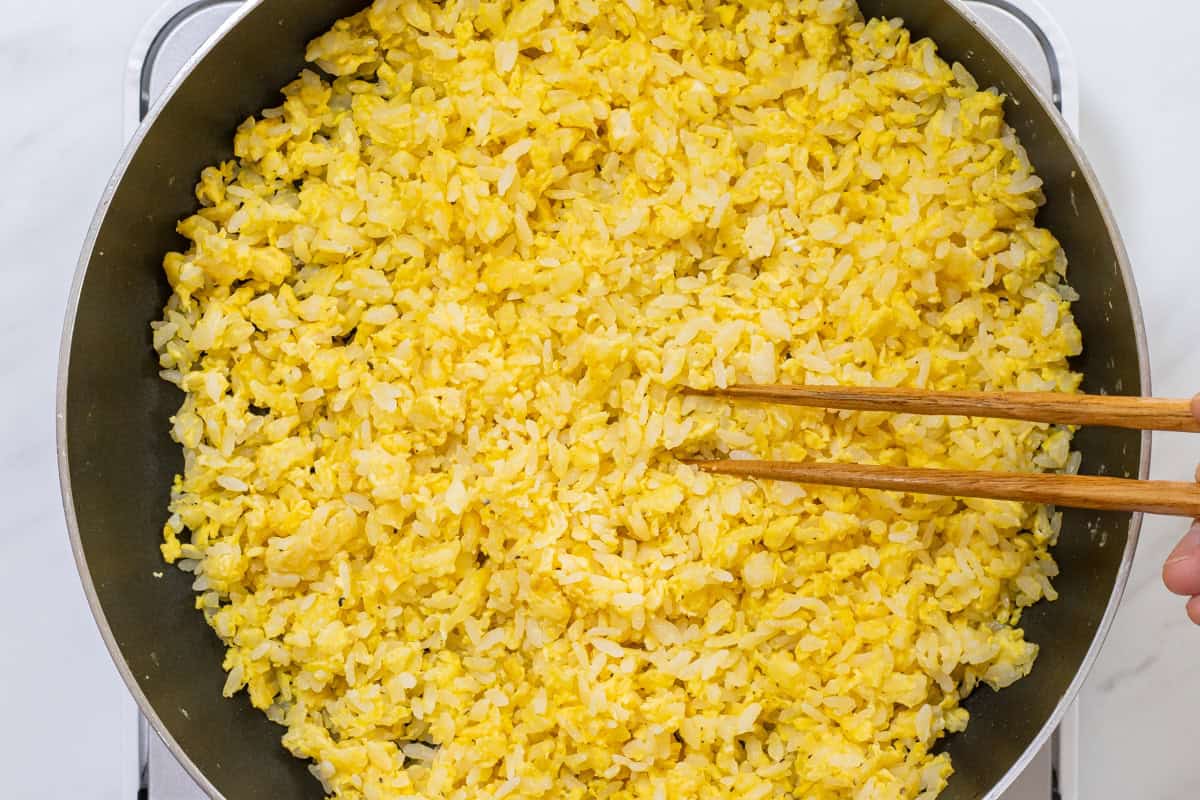
Add lard to the pan and heat it until melted. Then, add the egg-coated rice and stir-fry over high heat, using chopsticks to quickly and continuously move it side to side and back and forth, mixing it thoroughly and breaking up any clumps so the grains separate. (This will take a few minutes. Avoid moving the pan at this point, as it can cause the temperature to drop.)

Step 5
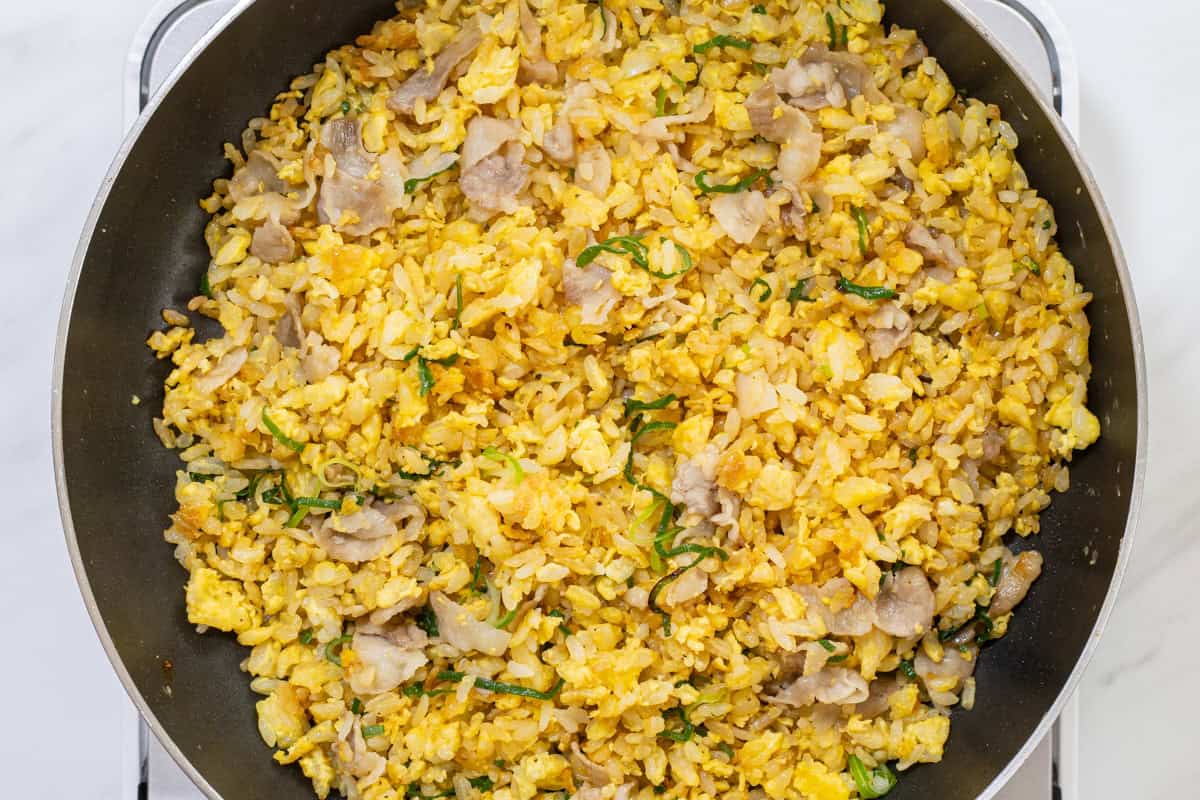
Once the rice is loosened and separated, reduce the heat to medium. Return the pork and add the green onions, then stir-fry until everything is evenly combined.
Step 6
Make a space in the center or side of the pan. Add soy sauce to that spot and let it bubble for a few seconds to caramelize slightly. Mix everything together so the soy sauce is evenly distributed.
To store
You can store it in the refrigerator for up to 2 day.
If you try this recipe, I’d love to hear what you think. Please consider leaving a review and star rating in the comments below. If you enjoyed it, I’d really appreciate it if you shared it with your friends.
More recipes you'll love
Recipe card
Yakimeshi (Japanese Fried Rice)
Ingredients
- 11.3 oz freshly cooked Japanese short-grain rice (2 servings)
- 0.5 oz green onions (scallions) or Japanese leek (naganegi)
- 2.5 oz pork belly (ground pork, ham, or chashu can be substituted)
- a pinch of salt (for the pork)
- 3 large eggs (about 2.1 oz/60 g each, including shell)
- 1 tsp Chinese-style chicken bouillon powder
- ¼ tsp salt
- a pinch of ground black pepper
- 1 Tbsp lard (other cooking oils can be substituted)
- 1 Tbsp soy sauce
Instructions
- Thinly slice the green onions. Cut the pork belly into small pieces, about ½ inch (1-1.5 cm) or smaller.

- Heat a small amount of oil in a pan. Once the pan is hot, add the pork belly, season with salt, and sauté over medium heat until cooked through. Transfer the cooked pork to a separate plate and set it aside. (Keep the rendered fat in the pan to use later.)
- Crack the eggs into a bowl and beat them. Add the freshly cooked rice, chicken bouillon powder, salt, and black pepper, and mix well until the rice is evenly coated with the egg.
- Add lard to the pan and heat it until melted. Then, add the egg-coated rice and stir-fry over high heat, using chopsticks to quickly and continuously move it side to side and back and forth, mixing it thoroughly and breaking up any clumps so the grains separate. (This will take a few minutes. Avoid moving the pan at this point, as it can cause the temperature to drop.)
- Once the rice is loosened and separated, reduce the heat to medium. Return the pork and add the green onions, then stir-fry until everything is evenly combined.
- Make a space in the center or side of the pan. Add soy sauce to that spot and let it bubble for a few seconds to caramelize slightly. Mix everything together so the soy sauce is evenly distributed.


Notes
- You can store it in the refrigerator for up to 2 day.


Leave a Rating and a Comment